• About Us
  • Disclaimers
  • Privacy Policy
  • Sitemap
Linux Tutorials for Beginners
Advertisement
  • Ubuntu
    Install and Secure phpMyAdmin on Ubuntu 22.04

    How To Install and Secure phpMyAdmin on Ubuntu 22.04

    Secure SSH with Fail2Ban

    How To Secure SSH with Fail2Ban on Ubuntu 22.04

    Install Uptime Kuma on Ubuntu 22.04

    How To Install Uptime Kuma on Ubuntu 22.04

    Install Ubuntu Server 22.04

    How To Install Ubuntu Server 22.04 LTS with Screenshots

    Set Up Firewall on Ubuntu 22.04

    How To Set Up a Firewall with UFW on Ubuntu 22.04

    Install Nginx on Ubuntu

    How To Install Nginx on Ubuntu 22.04: A Comprehensive Guide

    Install MySQL 8.0 on Ubuntu 22.04

    How To Install MySQL 8.0 on Ubuntu Server 22.04

    install-php74-ubuntu2204

    How To Install PHP 7.4 on Ubuntu 22.04

    Install Snipe-IT on Ubuntu 22.04

    How To Install Snipe-IT Asset Management on Ubuntu 22.04

  • Debian
    Secure SSH with Fail2Ban

    How To Secure SSH with Fail2Ban on Debian 11

    Install Debian 11 Server

    How To Install Debian 11 (Bullseye) Server with Pictures

    Install and Setup Node.js on Debian 11

    How To Install and Setup Node.js on Debian 11

    Install PHP 8.2 on Debian 11

    How To Install PHP 8.2 on Debian 11

    Install Nginx on Debian 11

    How To Install Nginx on Debian 11: A Comprehensive Guide

    Set Up Firewall with UFW on Debian

    How To Set Up a Firewall with UFW on Debian 11

    install php74 on debian 11

    How To Install PHP 7.4 on Debian 11

    Install MariaDB 10.9 on Debian 11

    How To Install MariaDB 10.9 on Debian 11 Server

    Initial Setup Debian Server

    Initial Setup Debian 11 Server: Secure and Efficient

  • Rocky Linux
    Install phpMyAdmin on Rocky Linux 9

    How To Install phpMyAdmin on Rocky Linux 9

    Secure SSH with Fail2Ban

    How To Secure SSH with Fail2Ban on Rocky Linux 9

    Install Rocky Linux 9.2 Server

    How To Install Rocky Linux 9.2 Server with Screenshots

    setup Firewall Using Firewalld Rocky Linux 9

    How To Set Up a Firewall Using FirewallD on Rocky Linux 9

    Install Nginx on Rocky Linux 9

    How To Install Nginx on Rocky Linux 9: A Comprehensive Guide

    Install Apache on Rocky Linux

    How To Install and Configure Apache on Rocky Linux 9

    Install MongoDB on Rocky Linux 9

    How To Install MongoDB 6.0 on Rocky Linux 9

    Install Docker on Rocky Linux

    How To Install Docker CE on Rocky Linux 9

  • CentOS
    Secure SSH with Fail2Ban

    How To Secure SSH with Fail2Ban on CentOS 7

    Install PHP8.2 on CentOS 7

    How To Install PHP 8.2 on CentOS 7 / RHEL 7

    Install Apache on CentOS 7

    How To Install Apache Web Server on CentOS 7

    Set Up FirewallD on CentOS 7

    How To Set Up a Firewall Using FirewallD on CentOS 7

    Initial Setup CentOS 7 Server

    Initial Setup CentOS 7 Server: Secure and Efficient

    Install Nginx on CentOS 7

    How To Install Nginx on CentOS 7: A Comprehensive Guide

    Build NGINX from Source on Centos 7

    How To Build NGINX from Source (Compile) on Centos7

    Install Docker Swarm on CentOS 7

    Install and Configure Docker Swarm Mode on Centos 7

    Install Docker Compose on Centos 7

    How To Install and Use Docker Compose on Centos 7

  • Linux
    Manage Groups on Linux

    A Simple Guide: How To Manage Groups on Linux

    Logrotate In Linux

    How To Manage Log Files Using Logrotate In Linux

    Check File Size in Linux

    The Easy Ways to Check File Size in Linux

    Linux server security system administrators

    Best Practices Linux Server Security for System Administrator

    Backup Files From Remote Linux VPS Using Rsync Script

    How To Backup Files From Remote Linux VPS Using Rsync Script

    SSH Key-based Authentication

    How To Configure SSH Key-based Authentication In Linux

    Linux File Permissions

    Understanding Linux File Permissions for Beginners

    Create Multiboot USB with Ventoy

    How To Create Multiboot USB with Ventoy in Linux

    Find Hard Disk Drive Information in Linux

    How To Find Hard Disk Drive Information in Linux

No Result
View All Result
Linux Tutorials for Beginners
No Result
View All Result

Home » Linux » How To Install and Use Linux Screen with Commands

How To Install and Use Linux Screen with Commands

sammbysamm
October 16, 2023
Install and Use Linux Screen

How To Install and Use Linux Screen with Commands

Share on FacebookShare on LinkedinShare on Whatsapp

Introduction

Efficiently managing multiple tasks within a Linux terminal is essential for productivity. Linux Screen, a versatile command-line utility, empowers users to create and manage multiple virtual terminal sessions within a single window. In this comprehensive guide, we’ll walk you through the step-by-step process of how to install and use Linux Screen, assists in improving your multitasking capabilities and streamlines your overall command-line experience..

Table of Contents

  • Introduction
  • Need for Terminal Multiplexing
  • Introducing Linux Screen
  • Prerequisites
  • How to Install Screen on Linux
    • Installing Screen on CentOS
    • Installing Screen on Debian or Ubuntu
    • Installing Screen on OpenSUSE
    • Screen Command Syntax
    • Starting Linux Screen
    • List all Screens
    • Detach from Linux Screen
    • Locking and Adding Passwords to Screen
    • Delete Linux Screen Session
    • Manage Linux Screen
  • Conclusion

Need for Terminal Multiplexing

As Linux users, the terminal is our primary interface to interact with the system. Often, tasks require running multiple commands or processes simultaneously. Terminal multiplexing addresses this need by allowing us to divide a single terminal window into several virtual ones, each with its own running processes.

OTHER POSTS

A Simple Guide: How To Manage Groups on Linux

How To Manage Log Files Using Logrotate In Linux

The Easy Ways to Check File Size in Linux

Introducing Linux Screen

Linux Screen, a powerful terminal multiplexer, enables users to create, manage, and switch between multiple terminal sessions with ease. Whether you’re a developer, system administrator, or enthusiast, Screen enhances your multitasking capabilities and facilitates efficient workflow management. The screen in Linux is a software package which allows you to open multiple terminal sessions inside your single SSH window. The processes that are running in the screen will continue to run even if you got disconnected from SSH.

Prerequisites

Before we dive into the how to install and use Linux Screen, there is prerequisite you need to ensure are in place. To set up these servers, follow our guides :

  • Initial Setup Debian 11 Server: Secure and Efficient
  • Initial Setup Ubuntu Server 22.04: Secure and Efficient
  • Initial Setup Rocky Linux 9 Server: Secure and Efficient
  • Initial Setup CentOS 7 Server: Secure and Efficient

How to Install Screen on Linux

The process of installing Linux Screen varies based on the distribution of Linux you’re using. If you’re utilizing a recent version of Linux, such as Ubuntu 20.04 or CentOS 8, chances are that Screen is already pre-installed.

samm@linux:~$ screen --version
Screen version 4.09.00 (GNU) 30-Jan-22

Installing Screen on CentOS

To install Screen on Red Hat / CentOS, enter the command:

$ sudo yum install screen

Installing Screen on Debian or Ubuntu

To install Screen on Debian/Ubuntu, enter the following:

$ sudo apt install screen

Installing Screen on OpenSUSE

To install Screen on OpenSUSE, enter the following:

$ sudo zypper install screen

Screen Command Syntax

The syntax of the screen command is as follows

$ screen [OPTIONS] [ CMD [ ARGS ] ]

In the above syntax, we can see that all the parameters are options and they are represented by the square brackets ([]).

Starting Linux Screen

You can easily start screen by just typing the screen command.

$ screen

This will open a new screen session.

Install and Use Linux Screen
Linux Screen

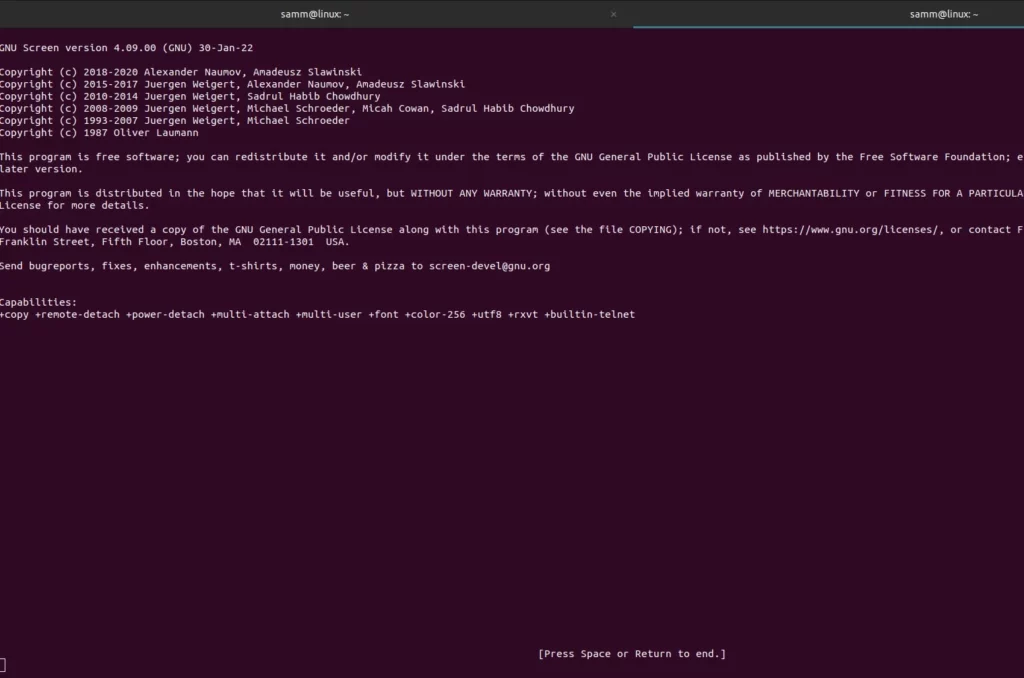
The initial launch begins with a brief licensing agreement displayed on the screen. Press Space to continue to the next page.

You can also name your screen session with the -S operator.

$ screen -S screen_name

This command will create a screen with the assigned name.

List all Screens

To list all screens you can use the ls option.

samm@linux:~$ screen -ls
There are screens on:
        63530.pts-3.linux       (08/04/2023 03:51:33 AM)        (Attached)
        62791.pts-0.linux       (08/04/2023 03:49:52 AM)        (Attached)
2 Sockets in /run/screen/S-samm.

Detach from Linux Screen

To detach from screen and leave the window running in the background, use the keystroke:

Ctrl + a and d

The command leaves the process working in Screen and exits the interface. It is the equivalent of minimizing a window in a graphical operating system.

To reattach to a running screen session, use:

$ screen -r

If you only have one Screen instance, you don’t need to enter the session ID. If you have more than one, you’ll need to specify which session ID you want to reconnect to.

Once you have the ID, add it to the screen -r command:

screen -r sessionID

For example, to restore screen 63530.pts-3.linux, run

$ screen -r 63530.pts-3.linux

Locking and Adding Passwords to Screen

To lock the screen, use the shortcut:

Ctrl + a and x

The default lock screen mechanism asks for your Linux password to unlock the screen.

Screen used by samm <samm> on linux.
Password:

Additionally, Screen allows you to protect a session with its own password. Each time you attempt to reattach to the screen, you need to provide the set password.

To create a password-protected screen, run the command:

password your_password

Replace your_passowrd with a strong password of your choice.

The next time you try to reattach to the password-protected screen, you have to provide two passwords to enter – your Linux password, followed by your Screen password.

Delete Linux Screen Session

To delete your screen session you can just type exit from your session.

If you need to delete the complete screen session you can use the following command.

$ screen -X -S screen_id quit

If you have any dead sessions you can use the below command.

screen -wipe

Manage Linux Screen

Whenever you start a new screen session, it creates a single window with a shell in it.

You can have multiple windows inside a single Screen session.

To create a new window with shell type Ctrl+a c, the first available number from the range 0…9 will be assigned to it.

Before diving into the advanced features of Linux Screen, familiarize yourself with some essential key commands, Below are some most common commands for managing Linux Screen Windows:

Ctrl+a cCreate a new window (with shell).
Ctrl+a “List all windows.
Ctrl+a 0Switch to window 0 (by number).
Ctrl+a ARename the current window.
Ctrl+a SSplit current region horizontally into two regions.
Ctrl+a |Split current region vertically into two regions.
Ctrl+a tabSwitch the input focus to the next region.
Ctrl+a Ctrl+aToggle between the current and previous windows
Ctrl+a QClose all regions but the current one.
Ctrl+a XClose the current region.
Screen commands

Conclusion

Linux Screen is a game-changer for multitasking in the terminal. With its ability to create multiple virtual terminal sessions within a single window, you can effectively manage diverse tasks and streamline your command-line interactions. By mastering the installation and usage of Linux Screen, you’re equipped to enhance your Linux productivity and efficiently navigate complex tasks with ease. Whether you’re a seasoned Linux user or a beginner, integrating Screen into your workflow is a step toward becoming a more proficient and efficient terminal user.

Also Read Our Other Guides :

  • How To Use Rsync to Sync Local and Remote Directories in Linux
  • How To Get Total Inodes and Increase Disk Inode Number in Linux
  • How To Create and Use Swap File on Linux System
  • How To Use Git Version Control on Linux: For Beginner
  • The 40 Most-Used Linux Commands You Should Know
  • 6 Methods To Search For Files By Name In Linux

Finally, now you have learned how to install and use Linux Screen with commands on Linux.

Tags: LinuxScreenUbuntu

If you got help by our tutorials, please buy me a coffee..!

Buy Me a Coffee

Thank you so much for your support!!

Previous Post

Initial Setup Rocky Linux 9 Server: Secure and Efficient

Next Post

How To Install and Configure Ansible on Rocky Linux 9

Leave a Reply Cancel reply

Your email address will not be published. Required fields are marked *

RECENT POST

Install and Secure phpMyAdmin on Ubuntu 22.04

How To Install and Secure phpMyAdmin on Ubuntu 22.04

by samm
July 22, 2024
0

Are you ready to take control of your MySQL databases on Ubuntu 22.04? In this step-by-step guide, we'll walk you...

Manage Groups on Linux

A Simple Guide: How To Manage Groups on Linux

by samm
November 12, 2023
0

Are you a Linux enthusiast looking to enhance your system administration skills? One fundamental aspect you should master is how...

Install phpMyAdmin on Rocky Linux 9

How To Install phpMyAdmin on Rocky Linux 9

by samm
November 11, 2023
0

If you're navigating the world of Rocky Linux 9 and looking to streamline your MariaDB or MySQL database management, installing...

Logrotate In Linux

How To Manage Log Files Using Logrotate In Linux

by samm
November 10, 2023
0

Log files are an essential part of any Linux system. They provide valuable insights into the system's activities, helping administrators...

Load More

RECOMMENDED.

Install Redis on Debian

How To Install Redis on Debian 11 Server

October 16, 2023
Secure SSH with Fail2Ban

How To Secure SSH with Fail2Ban on Rocky Linux 9

October 29, 2023
sammlinux sammlinux sammlinux

Related Posts

Manage Groups on Linux
Linux

A Simple Guide: How To Manage Groups on Linux

November 12, 2023
Logrotate In Linux
Linux

How To Manage Log Files Using Logrotate In Linux

November 10, 2023
Check File Size in Linux
Linux

The Easy Ways to Check File Size in Linux

November 10, 2023
Linux server security system administrators
Linux

Best Practices Linux Server Security for System Administrator

November 10, 2023
Load More
Next Post
Install Ansible on Rocky Linux

How To Install and Configure Ansible on Rocky Linux 9

  • About Us
  • Disclaimers
  • Privacy Policy
  • Sitemap

© 2023 sammlinux - Learn Today for Lead Tomorrow.

No Result
View All Result
  • Ubuntu
  • Debian
  • Rocky Linux
  • CentOS
  • Linux

© 2023 sammlinux - Learn Today for Lead Tomorrow.