


Introduction
Initial Setup Ubuntu Server 22.04 a new server is a crucial task that lays the foundation for a secure and efficient computing environment. Ubuntu Server 22.04, the latest release of this popular Linux distribution, offers a host of features to enhance performance, security, and stability.
Table of Contents
- Introduction
- Getting Started:
- Ubuntu Server 22.04 Initial Setup Walkthrough
- Step 1: Logging in as Root
- Step 2: Creating a New User
- Step 3: Granting Administrative Privileges
- Step 4: Update and Upgrade
- Step 5: Configure Timezone and NTP
- Step 6: Configure Uncomplicated Firewall (UFW) Ubuntu Server 22.04
- Step 7: Install Essential Packages
- Step 8: Secure SSH Access
- Step 9: Connecting With an SSH Key (From your Local Computer)
- Step 10: Copying the Public Key to Your Ubuntu Server 22.04
- Conclusion
Key features and characteristics of Ubuntu include:
- Free and Open Source: Ubuntu 22.04 (Jammy Jellyfish) was released on April 21, 2022 is distributed freely, and its source code is available for anyone to view, modify, and distribute under open-source licenses.
- Regular Releases: As mentioned earlier, Ubuntu follows a predictable six-month release cycle, with new versions coming out in April and October each year. These regular releases ensure users have access to the latest software and features.
- Desktop Environment: Ubuntu offers different flavors with various desktop environments, the most common being the GNOME desktop environment. Other official flavors include Kubuntu (KDE Plasma), Xubuntu (Xfce), Lubuntu (LXQt/LXDE), and more.
- Software Center: Ubuntu Software Center provides a user-friendly interface to discover, install, and manage applications. Users can access a vast repository of free and open-source software directly from the Software Center.
- Community and Support: Ubuntu has a large and active community of users and developers who contribute to the project, provide support, and share knowledge through forums, mailing lists, and other platforms.
- Cloud and Server Versions: In addition to desktop versions, Ubuntu offers specialized server and cloud editions, making it a popular choice for cloud computing and server deployments.
Getting Started:
Ubuntu Server 22.04 Initial Setup Walkthrough
Ubuntu has gained popularity for its ease of use, regular updates, and strong community support, making it a suitable choice for both beginners and experienced Linux users. When you first create a new Ubuntu server, you should perform some important configuration steps that will increase the security and usability of your server and give you a good foundation usage of your system. here you can follow how to initial setup Ubuntu Server 22.04.
Step 1: Logging in as Root
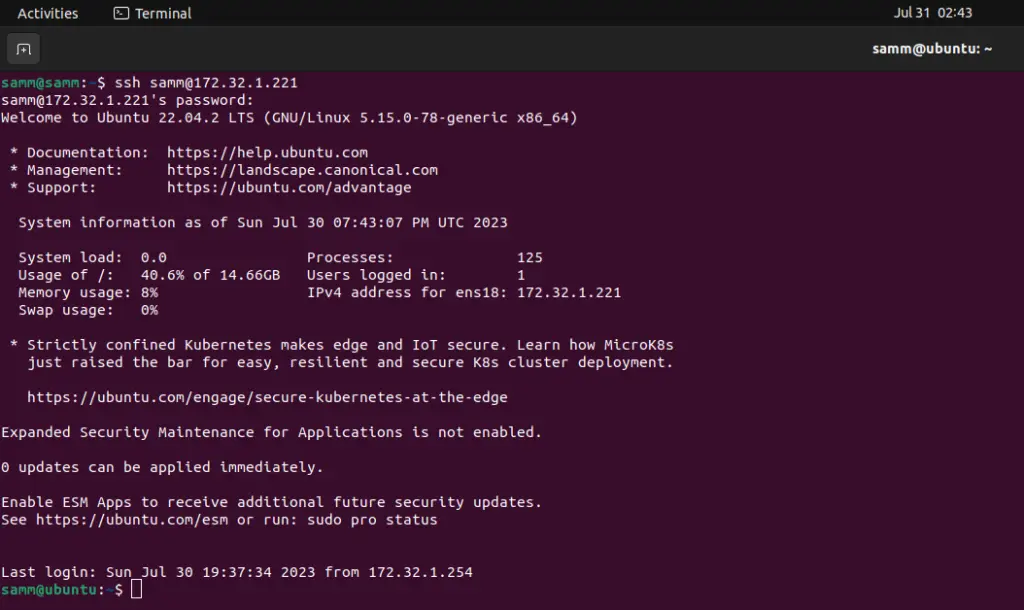
To log into your server, you will need to know your server’s public or private IP address. You will also need the password or, if you installed an SSH key for authentication, the private key for the root user’s account. log in as the root user now using the following command :
Accept the warning about host authenticity if it appears. If you are using password authentication, provide your root password to log in.
[email protected]'s password:
Welcome to Ubuntu 22.04.2 LTS (GNU/Linux 5.15.0-78-generic x86_64)

 * Documentation:  https://help.ubuntu.com
 * Management:     https://landscape.canonical.com
 * Support:        https://ubuntu.com/advantage

  System information as of Sun Jul 30 07:37:33 PM UTC 2023

  System load:  0.0                Processes:              125
  Usage of /:   40.6% of 14.66GB   Users logged in:        1
  Memory usage: 8%                 IPv4 address for ens18: 172.32.1.221
  Swap usage:   0%

 * Strictly confined Kubernetes makes edge and IoT secure. Learn how MicroK8s
   just raised the bar for easy, resilient and secure K8s cluster deployment.

   https://ubuntu.com/engage/secure-kubernetes-at-the-edge

Expanded Security Maintenance for Applications is not enabled.

0 updates can be applied immediately.

Enable ESM Apps to receive additional future security updates.
See https://ubuntu.com/esm or run: sudo pro status

Last login: Sun Jul 30 19:36:59 2023 from 172.32.1.254

root@ubuntu:~#
The root user is the administrative user in a Linux environment, and it has very broad privileges. Because of the heightened privileges of the root account, you are discouraged from using it on a regular basis. This is because part of the power inherent with the root account is the ability to make very destructive changes, even by accident.
As such, the next step is to set up an alternative user account with a reduced scope of influence for day-to-day work. This account will still be able to gain increased privileges when necessary.
Step 2: Creating a New User
For enhanced security, it’s recommended to avoid using the root account for everyday tasks. Create a new user with administrative privileges using:
root@ubuntu:~# adduser samm
Adding user `samm' ...
Adding new group `samm' (1001) ...
Adding new user `sammy' (1001) with group `samm' ...
Creating home directory `/home/samm' ...
Copying files from `/etc/skel' ...
New password:
Retype new password:
passwd: password updated successfully
Changing the user information for samm
Enter the new value, or press ENTER for the default
	Full Name []:
	Room Number []:
	Work Phone []:
	Home Phone []:
	Other []:
Is the information correct? [Y/n] Y
Step 3: Granting Administrative Privileges
Now, you have a new user account with regular account privileges. However, you may sometimes need to perform administrative tasks.
To avoid having to log out of your regular user and log back in as the root account, you can set up what is known as “superuser” or root privileges for your regular account. This will allow your regular user to run commands with administrative privileges by putting the word sudo before each command.
To add these privileges to your new user, you need to add the new user to the wheel group. By default, on Ubuntu Server 22.04, users who belong to the wheel group are allowed to use the sudo command.
As root, run this command to add your new user to the wheel group :
root@ubuntu:~# usermod -aG wheel samm
Now, when logged in as your regular user, you can type sudo before commands to perform actions with superuser privileges.
Disconnect from the server and connect again with new user:
Step 4: Update and Upgrade
The first step is to ensure your system is up to date. Open a terminal and run:
samm@ubuntu:~$ sudo apt update && apt upgrade

Hit:1 http://id.archive.ubuntu.com/ubuntu jammy InRelease
Hit:2 http://id.archive.ubuntu.com/ubuntu jammy-updates InRelease
Hit:3 http://id.archive.ubuntu.com/ubuntu jammy-backports InRelease
Hit:4 http://id.archive.ubuntu.com/ubuntu jammy-security InRelease
Reading package lists... Done
Building dependency tree... Done
Reading state information... Done
All packages are up to date.
This command fetches the latest package information and updates installed packages to their latest versions.
Step 5: Configure Timezone and NTP
Set your server’s timezone:
“sudo timedatectl set-timezone”
samm@ubuntu:~$ sudo timedatectl set-timezone Asia/Jakarta
Replace “your_time_zone” with your actual timezone.
Install and configure NTP (Network Time Protocol) to ensure accurate timekeeping:
samm@ubuntu:~$ sudo apt install ntp
Start and enable the chrony service:
samm@ubuntu:~$ sudo systemctl enable ntp
Synchronizing state of ntp.service with SysV service script with /lib/systemd/systemd-sysv-install.
Executing: /lib/systemd/systemd-sysv-install enable ntp
Step 6: Configure Uncomplicated Firewall (UFW) Ubuntu Server 22.04
Ubuntu 22.04 servers can use the UFW (uncomplicated firewall) to ensure only connections to certain services are allowed. You can set up a basic firewall using this application.
Check the status of ufw
samm@ubuntu:~$ sudo ufw status verbose
Status: inactive
Configure the firewall rules based on your specific requirements. Allow essential services such as SSH (port 22) and HTTP (port 80) using the following commands:
samm@ubuntu:~$ sudo ufw allow ssh
Rules updated
Rules updated (v6)
samm@ubuntu:~$ sudo ufw allow http
Rules updated
Rules updated (v6)
samm@ubuntu:~$ sudo ufw allow https
Rules updated
Rules updated (v6)
samm@ubuntu:~$ sudo ufw reload
Firewall reloaded
Then you can enable it:
samm@ubuntu:~$ sudo ufw enable

samm@ubuntu:~$ sudo ufw status verbose
Status: active
Logging: on (low)
Default: deny (incoming), allow (outgoing), disabled (routed)
New profiles: skip

To                         Action      From
--                         ------      ----
22/tcp                     ALLOW IN    Anywhere
80/tcp                     ALLOW IN    Anywhere
443                        ALLOW IN    Anywhere
22/tcp (v6)                ALLOW IN    Anywhere (v6)
80/tcp (v6)                ALLOW IN    Anywhere (v6)
443 (v6)                   ALLOW IN    Anywhere (v6)
Step 7: Install Essential Packages
Install necessary packages, including a text editor like Nano or Vim, and tools like wget and curl:
samm@ubuntu:~$ sudo apt install nano vim wget curl
Step 8: Secure SSH Access
SSH (Secure Shell) is a common way to access servers remotely. Secure it by editing the SSH configuration file:
Open the SSH server configuration file using a text editor:
samm@ubuntu:~$ sudo vi /etc/ssh/sshd_config
Locate the line that specifies PermitRootLogin and PasswordAuthentication and change its value to:
PermitRootLogin no
PasswordAuthentication no
Save the file and restart the SSH service:
samm@ubuntu:~$ sudo systemctl restart sshd
Step 9: Connecting With an SSH Key (From your Local Computer)
One of the most secure ways to connect to your server is to use an SSH Key. When you use an SSH Key, you can access the server without a password. In addition, you can completely turn off password access to the server by changing the password-related parameters in the sshd_config file.
When you create an SSH Key, there are two keys: Public and Private. The public key is uploaded to the server you want to connect to and the private key is stored on the computer using which you will establish the connection.
Create an SSH key with the ssh-keygen command on your computer.
If you leave it blank, you will only be able to access it with the SSH key file. However, if you set a password, you can prevent an attacker with the key file from accessing it.
As an example, you can create an SSH key in your local computer with the following command:
ssh-keygen -t rsa -b 4096 -C "samm-notebook"
You should then see the output similar to the following:
Generating public/private rsa key pair.
Enter file in which to save the key (/home/samm/.ssh/id_rsa):
Enter passphrase (empty for no passphrase):
Enter same passphrase again:
Your identification has been saved in /home/samm/.ssh/id_rsa
Your public key has been saved in /home/samm/.ssh/id_rsa.pub
The key fingerprint is:
SHA256:h0+7HmUG/uLfDdYsfgLVYTlWv5/f+tRWXOFEN1a0QuA samm-notebook
The key's randomart image is:
+---[RSA 4096]----+
|           ....BO|
|          . . +**|
|          .E .o+=|
|         o .  o.+|
|        S + +. .o|
|         + *.  o=|
|          = ..+.B|
|         . + +.*+|
|         .+.. +==|
+----[SHA256]-----+
Ensure that the ~/.ssh directory have the appropriate permissions set:
chmod -R go= ~/.ssh
The next step is to place the public key on your server so that you can use SSH-key-based authentication to log in.
Step 10: Copying the Public Key to Your Ubuntu Server 22.04
The quickest way to copy your public key to the Ubuntu Server 22.04 host is to use a utility called ssh-copy-id. Due to its simplicity, this method is highly recommended if available.
If you do not have ssh-copy-id available to you on your client machine, you may use one of the two alternate methods provided in this section (copying via password-based SSH, or manually copying the key).
Copying the Public Key Using ssh-copy-id
The ssh-copy-id tool is included by default in many operating systems, so you may have it available on your local system. For this method to work, you must already have password-based SSH access to your server.
To use the utility, you specify the remote host that you would like to connect to, and the user account that you have password-based SSH access to. This is the account to which your public SSH key will be copied.
ssh-copy-id [email protected]
You should then see the output similar to the following:
/usr/bin/ssh-copy-id: INFO: attempting to log in with the new key(s), to filter out any that are already installed
/usr/bin/ssh-copy-id: INFO: 1 key remain to be installed -- if you are prompted now it is to install the new keys

Number of key(s) added: 1

Now try logging into the machine, with:   "ssh '[email protected]'"
and check to make sure that only the key you wanted were added.
Conclusion
Congratulations! You’ve successfully completed the initial server setup for Ubuntu Server 22.04. By following these steps, you’ve laid the groundwork for a secure and optimized server environment. Remember, this is just the beginning. As you delve deeper into server administration, you’ll discover more ways to fine-tune your Ubuntu Server 22.04 to meet your specific needs.
Also Read Our Other Guides :
- Initial Setup Debian 11 Server: Secure and Efficient
- Initial Setup CentOS 7 Server: Secure and Efficient
- Initial Setup Rocky Linux 9 Server: Secure and Efficient
- How To Set Up a Firewall with UFW on Ubuntu 22.04
- How To Set Up a Firewall with UFW on Debian 11
- How To Install Ubuntu Server 22.04 LTS with Screenshots
Always keep security a top priority, stay updated with the latest patches, and explore additional configurations and optimizations to ensure your server runs smoothly and efficiently. With a solid initial setup, you’re well on your way to harnessing the power of Ubuntu Server 22.04 for your computing needs.


