• About Us
  • Disclaimers
  • Privacy Policy
  • Sitemap
Linux Tutorials for Beginners
Advertisement
  • Ubuntu
    Install and Secure phpMyAdmin on Ubuntu 22.04

    How To Install and Secure phpMyAdmin on Ubuntu 22.04

    Secure SSH with Fail2Ban

    How To Secure SSH with Fail2Ban on Ubuntu 22.04

    Install Uptime Kuma on Ubuntu 22.04

    How To Install Uptime Kuma on Ubuntu 22.04

    Install Ubuntu Server 22.04

    How To Install Ubuntu Server 22.04 LTS with Screenshots

    Set Up Firewall on Ubuntu 22.04

    How To Set Up a Firewall with UFW on Ubuntu 22.04

    Install Nginx on Ubuntu

    How To Install Nginx on Ubuntu 22.04: A Comprehensive Guide

    Install MySQL 8.0 on Ubuntu 22.04

    How To Install MySQL 8.0 on Ubuntu Server 22.04

    install-php74-ubuntu2204

    How To Install PHP 7.4 on Ubuntu 22.04

    Install Snipe-IT on Ubuntu 22.04

    How To Install Snipe-IT Asset Management on Ubuntu 22.04

  • Debian
    Secure SSH with Fail2Ban

    How To Secure SSH with Fail2Ban on Debian 11

    Install Debian 11 Server

    How To Install Debian 11 (Bullseye) Server with Pictures

    Install and Setup Node.js on Debian 11

    How To Install and Setup Node.js on Debian 11

    Install PHP 8.2 on Debian 11

    How To Install PHP 8.2 on Debian 11

    Install Nginx on Debian 11

    How To Install Nginx on Debian 11: A Comprehensive Guide

    Set Up Firewall with UFW on Debian

    How To Set Up a Firewall with UFW on Debian 11

    install php74 on debian 11

    How To Install PHP 7.4 on Debian 11

    Install MariaDB 10.9 on Debian 11

    How To Install MariaDB 10.9 on Debian 11 Server

    Initial Setup Debian Server

    Initial Setup Debian 11 Server: Secure and Efficient

  • Rocky Linux
    Install phpMyAdmin on Rocky Linux 9

    How To Install phpMyAdmin on Rocky Linux 9

    Secure SSH with Fail2Ban

    How To Secure SSH with Fail2Ban on Rocky Linux 9

    Install Rocky Linux 9.2 Server

    How To Install Rocky Linux 9.2 Server with Screenshots

    setup Firewall Using Firewalld Rocky Linux 9

    How To Set Up a Firewall Using FirewallD on Rocky Linux 9

    Install Nginx on Rocky Linux 9

    How To Install Nginx on Rocky Linux 9: A Comprehensive Guide

    Install Apache on Rocky Linux

    How To Install and Configure Apache on Rocky Linux 9

    Install MongoDB on Rocky Linux 9

    How To Install MongoDB 6.0 on Rocky Linux 9

    Install Docker on Rocky Linux

    How To Install Docker CE on Rocky Linux 9

  • CentOS
    Secure SSH with Fail2Ban

    How To Secure SSH with Fail2Ban on CentOS 7

    Install PHP8.2 on CentOS 7

    How To Install PHP 8.2 on CentOS 7 / RHEL 7

    Install Apache on CentOS 7

    How To Install Apache Web Server on CentOS 7

    Set Up FirewallD on CentOS 7

    How To Set Up a Firewall Using FirewallD on CentOS 7

    Initial Setup CentOS 7 Server

    Initial Setup CentOS 7 Server: Secure and Efficient

    Install Nginx on CentOS 7

    How To Install Nginx on CentOS 7: A Comprehensive Guide

    Build NGINX from Source on Centos 7

    How To Build NGINX from Source (Compile) on Centos7

    Install Docker Swarm on CentOS 7

    Install and Configure Docker Swarm Mode on Centos 7

    Install Docker Compose on Centos 7

    How To Install and Use Docker Compose on Centos 7

  • Linux
    Manage Groups on Linux

    A Simple Guide: How To Manage Groups on Linux

    Logrotate In Linux

    How To Manage Log Files Using Logrotate In Linux

    Check File Size in Linux

    The Easy Ways to Check File Size in Linux

    Linux server security system administrators

    Best Practices Linux Server Security for System Administrator

    Backup Files From Remote Linux VPS Using Rsync Script

    How To Backup Files From Remote Linux VPS Using Rsync Script

    SSH Key-based Authentication

    How To Configure SSH Key-based Authentication In Linux

    Linux File Permissions

    Understanding Linux File Permissions for Beginners

    Create Multiboot USB with Ventoy

    How To Create Multiboot USB with Ventoy in Linux

    Find Hard Disk Drive Information in Linux

    How To Find Hard Disk Drive Information in Linux

No Result
View All Result
Linux Tutorials for Beginners
No Result
View All Result

Home » CentOS » How To Install Apache Web Server on CentOS 7

How To Install Apache Web Server on CentOS 7

sammbysamm
October 16, 2023
Install Apache on CentOS 7

How To Install Apache Web Server on CentOS 7

Share on FacebookShare on LinkedinShare on Whatsapp

Are you want to set up a web server for your website but not sure where to begin? No worries, we’ve got your back. In this comprehensive guide, we’ll take you through the process of install the Apache Web Server on CentOS 7 to make the journey as smooth as possible.

Introduction

Generally the Apache web server, often referred to as Apache HTTP Server, is one of the most popular and reliable web servers in the world. If you’re using CentOS 7 as your server’s operating system, you’re in the right place to learn how to install Apache with ease. For that reason this article will provide you with a straightforward, step-by-step guide on how to install the Apache web server on CentOS 7, using familiar words and helpful transition phrases.

OTHER POSTS

How To Secure SSH with Fail2Ban on CentOS 7

How To Install PHP 8.2 on CentOS 7 / RHEL 7

How To Set Up a Firewall Using FirewallD on CentOS 7

Table of Contents

  • Introduction
  • Prerequisites
  • Installing Apache Web Server on CentOS 7
    • Step 1: Updating the System on CentOS 7
    • Step 2: Firewall Configuration on CentOS 7
    • Step 3: Install Apache Web Server on CentOS 7
    • Step 4: Testing Apache Web Server on CentOS 7
    • Step 5: Setting Up Virtual Hosts
    • Step 6: Viewing Your Web Page
  • Conclusion

Prerequisites

Before we dive into the installation process of Installing Apache Web Server on CentOS 7, make sure you have the following prerequisites in place:

  • A CentOS 7 system with root or sudo access, to set this up, follow our guide : Initial Setup CentOS 7 Server: Secure and Efficient, you can deploy this on a physical machine or a virtual environment like VMware or VirtualBox.
  • A stable internet connection to download packages
  • Basic familiarity with command-line operations.

Installing Apache Web Server on CentOS 7

To get Apache up and running on your CentOS 7 server and make the most of its capabilities for web hosting, simply following these steps:

Step 1: Updating the System on CentOS 7

Start by updating the package list to ensure you have the latest information about available packages using the following command:

Bash
$ sudo yum update
$ sudo yum upgrade

This ensures your system is up-to-date before installing new software.

Step 2: Firewall Configuration on CentOS 7

Before your web server can be accessed from the internet, you need to allow HTTP (80) or HTTPS (443) traffic through the firewall. Execute these commands to open the necessary port. You can use the following command:

Bash
$ sudo firewall-cmd --permanent --add-service=http
$ sudo firewall-cmd --permanent --add-service=https

After that, reload the firewall to put these new rules into effect:

Bash
$ sudo firewall-cmd --reload

This step ensures that your server is reachable via a web browser. Now that we’ve got our system prepared, let’s move on to the Apache installation.

Step 3: Install Apache Web Server on CentOS 7

Basically Apache can be found in the standard software collection that comes with CentOS. This makes it super easy to install using the yum package manager.

Afterwards, let’s move on to the next step. If you’ve set up a non-root sudo user, as mentioned in the earlier requirements, the next thing to do is to update the local Apache httpd package index to ensure it’s in sync with the latest updates from upstream using the following command:

Bash
$ sudo yum install httpd

The ‘httpd‘ package is the one CentOS uses for Apache. Shortly to the next step, you can start the Apache service and enable it to launch on boot:

Bash
$ sudo systemctl start httpd
$ sudo systemctl enable httpd

With these commands, Apache is up and running, and it will automatically start whenever your CentOS 7 system boots up.

Verify that the service is running with the following command:

Bash
$ sudo systemctl status httpd
● httpd.service - The Apache HTTP Server
     Loaded: loaded (/usr/lib/systemd/system/httpd.service; enabled; preset: disabled)
    Drop-In: /etc/systemd/system/httpd.service.d
             └─php-fpm.conf
     Active: active (running) since Wed 2023-09-23 01:10:34 WIB; 2min 15s ago
       Docs: man:httpd.service(8)
   Main PID: 285920 (httpd)
     Status: "Total requests: 0; Idle/Busy workers 100/0;Requests/sec: 0; Bytes served/sec:   0 B/sec"
      Tasks: 213 (limit: 23169)
     Memory: 41.3M
        CPU: 188ms
     CGroup: /system.slice/httpd.service
             ├─285920 /usr/sbin/httpd -DFOREGROUND
             ├─285921 /usr/sbin/httpd -DFOREGROUND
             ├─285922 /usr/sbin/httpd -DFOREGROUND
             ├─285923 /usr/sbin/httpd -DFOREGROUND
             └─285924 /usr/sbin/httpd -DFOREGROUND
 
Sept 23 01:10:34 apache systemd[1]: Starting The Apache HTTP Server...
Sept 23 01:10:34 apache systemd[1]: Started The Apache HTTP Server.
Sept 23 01:10:34 apache httpd[285920]: Server configured, listening on: port 80

As shown above from this output, it seems that the service has started without any issues. But the most reliable way to check this is by requesting a page from Apache. To verify that the software is working as it should, you can simply visit the default Apache landing page using your IP address.

Step 4: Testing Apache Web Server on CentOS 7

To make sure everything is working as expected, when open a web browser and enter your server’s IP address, you should see the Apache default welcome page, which indicates that the installation was successful.

http://your_server_ip
Install Apache Web Server on CentOS 7
Apache Default Page on CentOS 7

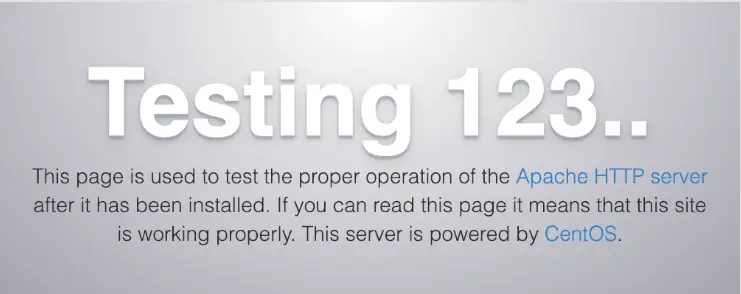
This page not only shows that Apache is doing its job correctly but also provides essential details about key Apache files and where you can find them.

Step 5: Setting Up Virtual Hosts

Basically Apache’s default setup works fine for simple situations. However, if you have special requirements, you should customize it. The main configuration file, usually called httpd.conf, is located in the /etc/httpd/conf/ folder.

You have the flexibility to set up Apache for different purposes, including virtual hosting, directory indexing, and access control. To make the required changes, open this configuration file in your favorite text editor using the following command.

Bash
sudo vi /etc/httpd/conf.d/sammlearning.conf

Paste the following lines in the file.

Apache
<VirtualHost *:80>
    ServerAdmin   [email protected]
    ServerName    test.sammlearning.com
    ServerAlias   test.sammlearning.com
    DocumentRoot  /var/www/sammlearning
    ErrorLog      /var/log/httpd/sammlearning.com-error.log
    CustomLog     /var/log/httpd/sammlearning.com-access.log combined
</VirtualHost>

Now, let’s create a folder to store all the files for the new domain ‘test.sammlearning.com‘. When you install the Apache (httpd) package, it automatically creates a default ‘DocumentRoot’ directory at ‘/var/www/’. Generally Apache uses this directory as the starting point for delivering content, which is often called the root directory.

Bash
$ sudo mkdir -p /var/www/sammlearning

Then create a sample index.html file for testing the new domain.

Bash
$ sudo vi /var/www/sammlearning/index.html

Inside the file, add your HTML content, for example paste the following lines:

HTML
<html>
<head>
<title>Welcome to sammlearning.com!</title>
</head>
<body>
<h1>Congratulation! The virtual host for <span style="color:blue; font-size: 24px;">sammlearning.net</span> is now up and running!</h1>
</body>
</html>

After making changes, save the configure of Apache and restart Apache to apply the modifications with following command:

Bash
$ sudo systemctl restart httpd

For this reason you can insert your IP Address and Domain Name in your localhost.

Bash
$ sudo vi /etc/hosts
172.32.1.223    test.sammlearning.com

Step 6: Viewing Your Web Page

Once you’ve finished setting everything up, open a web browser. Then, type in your domain name and hit ‘Enter’. Below, as can be seen a screenshot that shows an example of your newly set up virtual hosting page.

Install Apache on CentOS 7
Test Web Domain Using Apache

Conclusion

Congratulations! You’ve successfully installing the Apache Web Server on CentOS 7 and created a basic web page. At any rate this is just the beginning of your web hosting journey. As shown above this step-by-step guide you can now start building and hosting your website with ease.

When you install Apache on your CentOS 7, you unlock a wealth of potent web hosting abilities. By following this step-by-step guide, you’ll smoothly complete the installation, granting you access to improved performance, security, and scalability. As a matter of fact with Apache as your web server, you’re all set to create a robust and secure environment for hosting websites, applications, and services. So, embrace the power of Apache and take your online presence to greater heights.

To sum up, we’ve covered:

  • Updating CentOS 7
  • Configuring the firewall
  • Installing Apache Web Server
  • Testing your web server
  • Adding and viewing website content

Also Read Our Other Guides :

  • How To Install and Configure Apache on Rocky Linux 9
  • How To Install Apache 2.4 on Ubuntu 22.04
  • How To Install PHP 8.2 on CentOS 7 / RHEL 7
  • How To Install RTMP Server with Nginx on CentOS 7
  • How To Install Nginx on CentOS 7: A Comprehensive Guide
  • How To Build NGINX from Source (Compile) on Centos7
  • How To Install Varnish Cache for Nginx on Rocky Linux 9

Finally, now you have learned how to install and configure Apache on your CentOS 7. You’re now ready to explore the world of web hosting. Happy hosting!

Tags: ApacheCentOSLampWebserver

If you got help by our tutorials, please buy me a coffee..!

Buy Me a Coffee

Thank you so much for your support!!

Previous Post

How To Install Debian 11 (Bullseye) Server with Pictures

Next Post

How To Install PHP 8.2 on CentOS 7 / RHEL 7

Leave a Reply Cancel reply

Your email address will not be published. Required fields are marked *

RECENT POST

Install and Secure phpMyAdmin on Ubuntu 22.04

How To Install and Secure phpMyAdmin on Ubuntu 22.04

by samm
July 22, 2024
0

Are you ready to take control of your MySQL databases on Ubuntu 22.04? In this step-by-step guide, we'll walk you...

Manage Groups on Linux

A Simple Guide: How To Manage Groups on Linux

by samm
November 12, 2023
0

Are you a Linux enthusiast looking to enhance your system administration skills? One fundamental aspect you should master is how...

Install phpMyAdmin on Rocky Linux 9

How To Install phpMyAdmin on Rocky Linux 9

by samm
November 11, 2023
0

If you're navigating the world of Rocky Linux 9 and looking to streamline your MariaDB or MySQL database management, installing...

Logrotate In Linux

How To Manage Log Files Using Logrotate In Linux

by samm
November 10, 2023
0

Log files are an essential part of any Linux system. They provide valuable insights into the system's activities, helping administrators...

Load More

RECOMMENDED.

Install Redis on Debian

How To Install Redis on Debian 11 Server

October 16, 2023
Secure SSH with Fail2Ban

How To Secure SSH with Fail2Ban on Rocky Linux 9

October 29, 2023
sammlinux sammlinux sammlinux

Related Posts

Secure SSH with Fail2Ban
CentOS

How To Secure SSH with Fail2Ban on CentOS 7

October 29, 2023
Install PHP8.2 on CentOS 7
CentOS

How To Install PHP 8.2 on CentOS 7 / RHEL 7

October 17, 2023
Set Up FirewallD on CentOS 7
CentOS

How To Set Up a Firewall Using FirewallD on CentOS 7

October 17, 2023
Initial Setup CentOS 7 Server
CentOS

Initial Setup CentOS 7 Server: Secure and Efficient

October 17, 2023
Load More
Next Post
Install PHP8.2 on CentOS 7

How To Install PHP 8.2 on CentOS 7 / RHEL 7

  • About Us
  • Disclaimers
  • Privacy Policy
  • Sitemap

© 2023 sammlinux - Learn Today for Lead Tomorrow.

No Result
View All Result
  • Ubuntu
  • Debian
  • Rocky Linux
  • CentOS
  • Linux

© 2023 sammlinux - Learn Today for Lead Tomorrow.