


Ubuntu Server 22.04 LTS, also known as Jammy Jellyfish, is the latest long-term support (LTS) release from Canonical. If you’re new to Ubuntu Server Setup and want to install a powerful server for your projects or applications, you’re in the right place. In this step-by-step guide, we’ll walk you through the installation process of how to Install Ubuntu Server 22.04 LTS with screenshots.
Table of Contents
- A Brief Introduction to Ubuntu Server 22.04 LTS
- Prerequisites
- Downloading Ubuntu Server 22.04 LTS
- Creating a Bootable USB Drive
- Step-by-Step Guide to Installing Ubuntu 22.04 Server
- Step 1 – Boot from the Ubuntu ISO
- Step 2: Language and Keyboard Preferences
- Step 3: Select Installation Type
- Step 4: Configure Network Settings
- Step 5: Configure Proxy
- Step 6: Configure Ubuntu Archive Mirror
- Step 7: Update Installer (Optional)
- Step 8: Configure Storage Layout
- Step 9: Configure Ubuntu Hostname and Profile
- Step 10: Ubuntu Pro
- Step 11: Configure SSH
- Step 12: Select Featured Server Snaps
- Step 13: Install Ubuntu Server 22.04 Started
- Step 14: Install Ubuntu Server 22.04 Completed
- Step 15: Accessing Your Ubuntu Server 22.04
- Post-Installation Configuration
- Conclusion
A Brief Introduction to Ubuntu Server 22.04 LTS
Before diving into the installation, let’s have a quick overview of Ubuntu Server 22.04 LTS. It’s a robust, open-source operating system designed for servers and data centers. With long-term support and cutting-edge features, it’s an excellent choice for a wide range of applications.
Prerequisites
Before dive in how to install Ubuntu Server 22.04, ensure you have the following:
- A server or a computer with minimal Dual Core Processor (2 GHz), 4 GB Physical RAM, 25 GB or more Disk Space
- A bootable USB drive or installation media
- The Ubuntu Server 22.04 LTS ISO image
- Internet Connectivity (Optional)
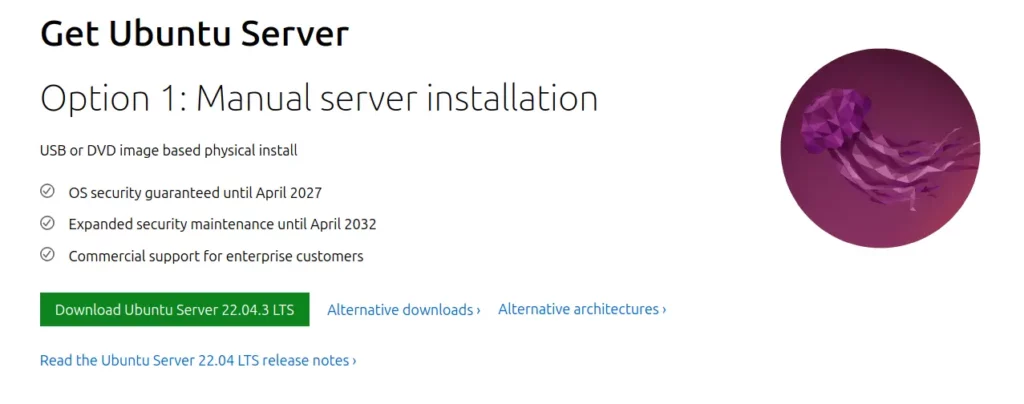
Downloading Ubuntu Server 22.04 LTS
To get started, you need to download the Ubuntu Server 22.04 LTS ISO image. Visit the official Ubuntu website and download the ISO. Make sure to choose the appropriate version based on your system architecture, whether 64-bit or 32-bit.
Creating a Bootable USB Drive
Next, you’ll require a bootable USB drive. You can easily create one using tools like Rufus (for Windows) or Ventoy or balenaEtcher (for macOS and Linux). Follow this guide to create bootable USB drive in Linux using Ventoy, insert your USB drive and follow the tool’s instructions to create the bootable drive.
If you intend to install and setup Ubuntu Server 22.04 on any hypervisor, such as Virtualbox, KVM, or VMware, you can bypass the media creation step and directly boot the ISO image.
For the purpose of this demonstration, I will install an Ubuntu virtual machine on Proxmox VE 7.4.
Step-by-Step Guide to Installing Ubuntu 22.04 Server
Installing Ubuntu server is a straightforward process, particularly for beginners. Simply follow the steps outlined below, adjust settings as needed, and you’ll be on your way.
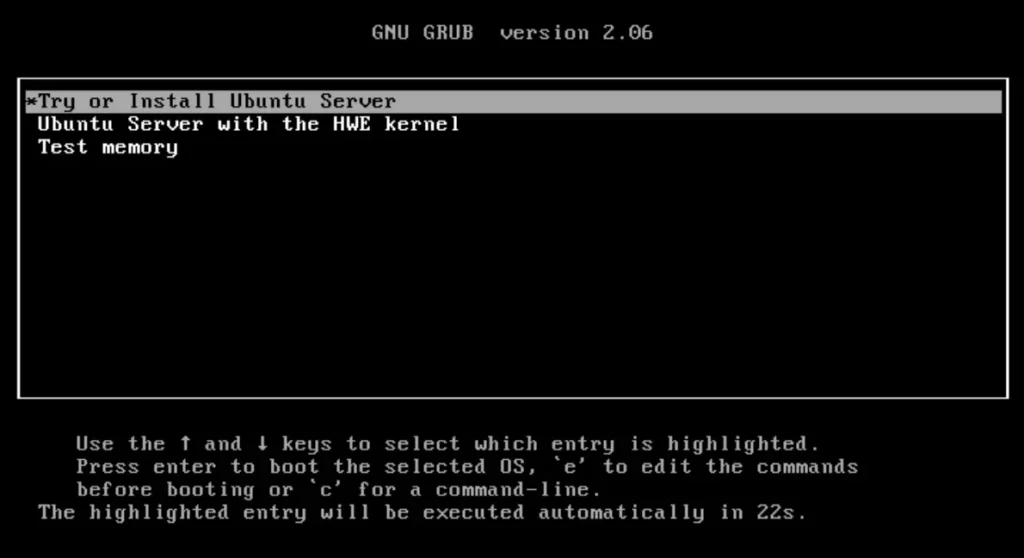
Step 1 – Boot from the Ubuntu ISO
Initiate the boot process on your system using the recently created Ubuntu 22.04 bootable USB drive. Once the installation environment loads, you’ll be welcomed by the setup Ubuntu Server 22.04 LTS startup screen. Click on “Install Ubuntu Server” to kickstart the installation process.
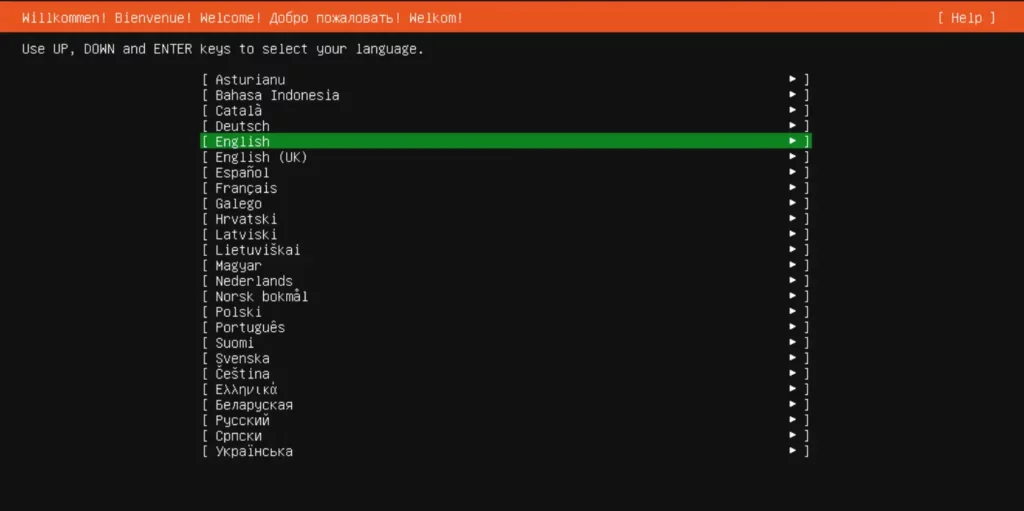
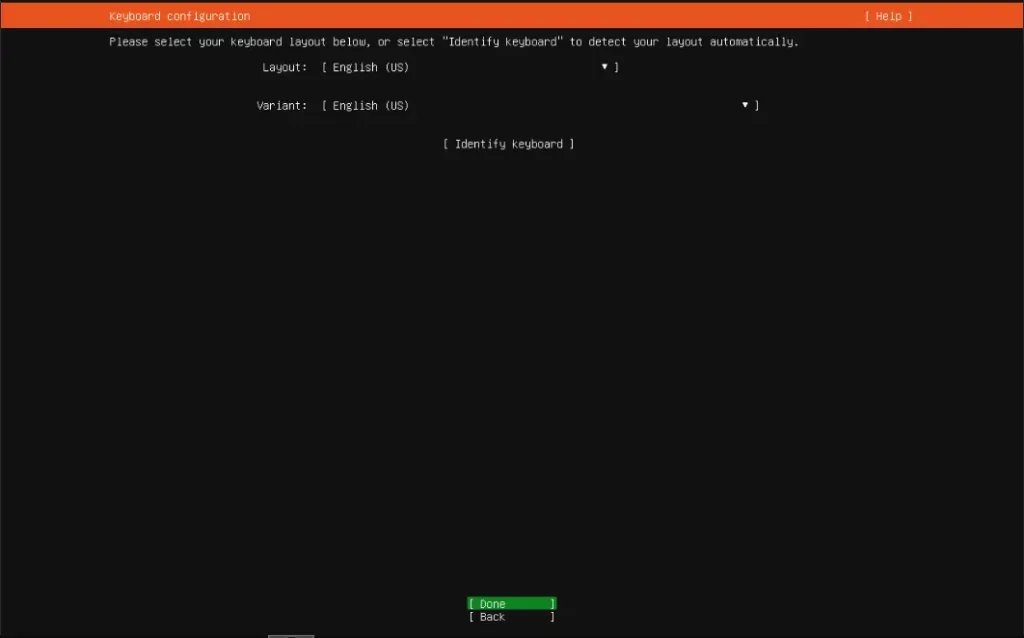
Step 2: Language and Keyboard Preferences
Select your desired language and keyboard layout. This step ensures the system is configured according to your preferences.
Select your preferred keyboard layout for Ubuntu Server installation and then enter.
Step 3: Select Installation Type
In this step, you’ll be asked to pick the installation foundation, and you have two choices:
- Ubuntu Server: This option comes fully loaded with all the software needed to efficiently operate and oversee your Ubuntu server.
- Ubuntu Server (Minimized): As the name suggests, this option offers a lightweight runtime setup ideal for scenarios where human login is not expected.
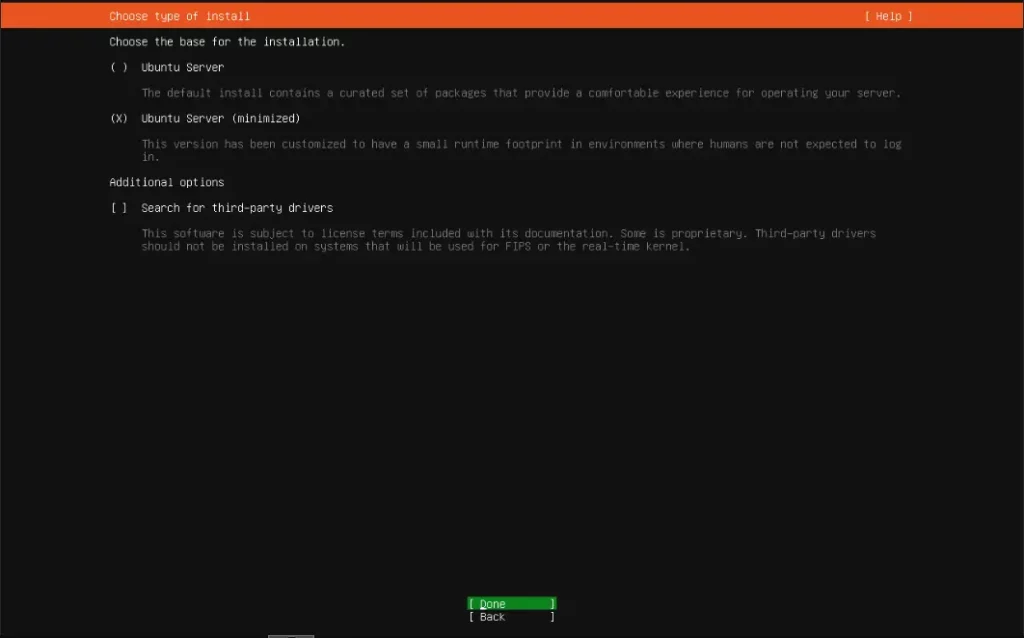
For this tutorial, I choose Ubuntu Server (Minimized).
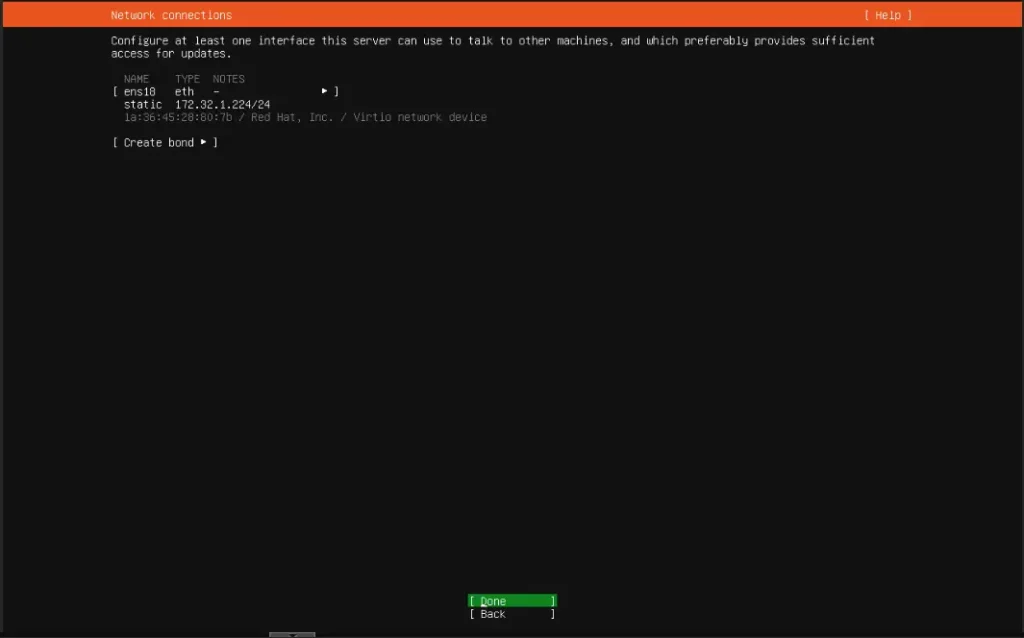
Step 4: Configure Network Settings
Connect your server to the internet by configuring the network settings. If you’re uncertain, the default “Use DHCP” option generally works well for most users.
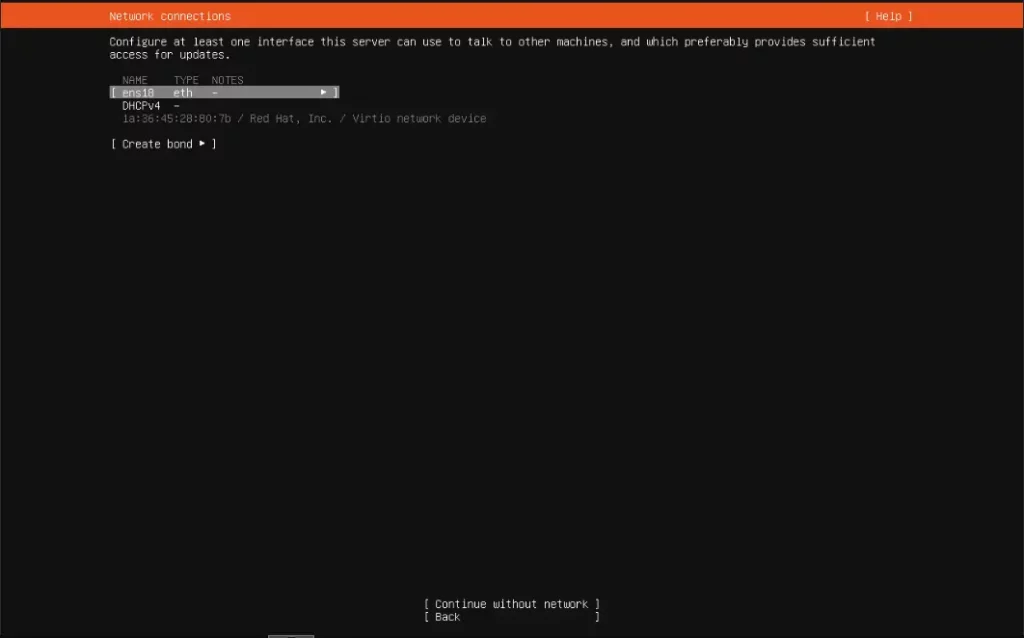
If you wish to set the IP address manually, select the desired network interface (e.g., enp6s18) by pressing the TAB key and then choose ‘Edit IPv4’ from the list by pressing ENTER.
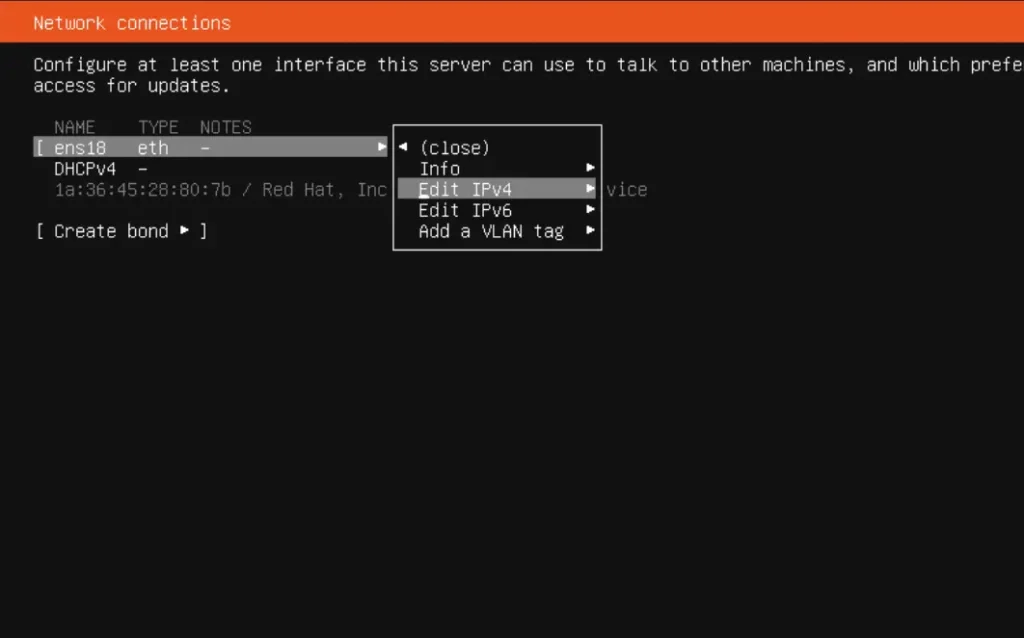
Once you’ve selected the ‘Edit IPv4’ option, press ENTER again, and then pick ‘Manual’ from the IPv4 method list.
Now, input the Subnet, IP address, Gateway, and Name servers in respective columns. After that, choose ‘Save’ and hit ENTER to save the network configuration.
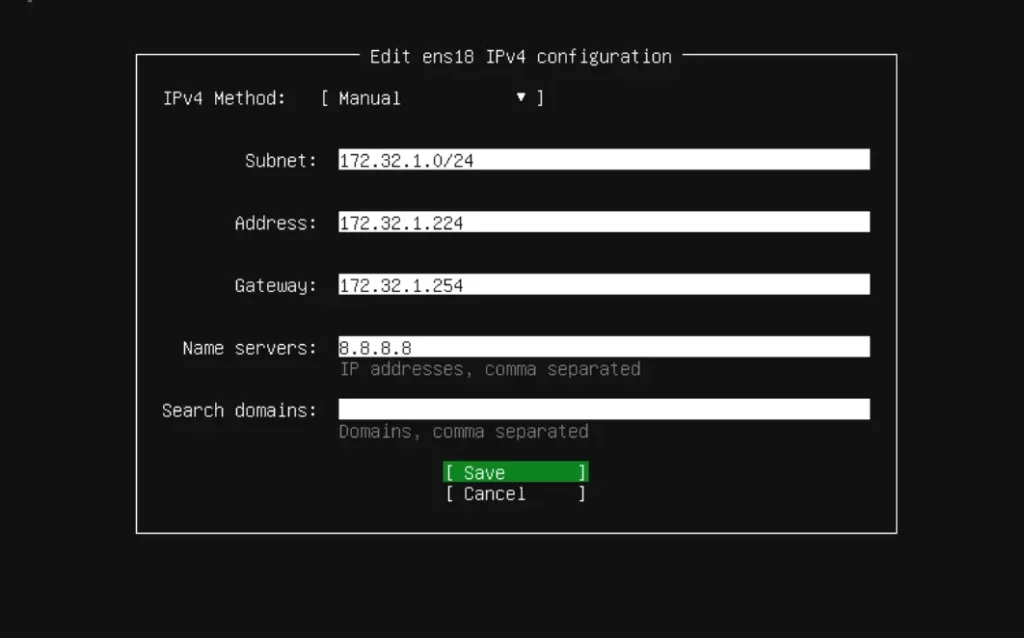
After finishing input the IP address, you will now be redirected to the main network configuration window. To proceed to the next section, press the TAB key to highlight ‘Done,’ and press ENTER once more.
Step 5: Configure Proxy
If your Ubuntu server needs a proxy server to access the internet, input the proxy server details in this window. If a proxy server isn’t needed, you can just leave it empty and press ENTER to proceed.
Step 6: Configure Ubuntu Archive Mirror
In this section, you have the option to set up an archive mirror for your Ubuntu server. By default, the installer will automatically select the most suitable, nearest archive mirror for you. If you prefer to set up a mirror manually, you can do so.

Step 7: Update Installer (Optional)
Next, you will be notified if a new Ubuntu installer is available to download and use for the rest of the installation. It is completely your choice.
If you want to try the new Ubuntu installer, choose “Update to the new installer” option and hit ENTER. The new installer will be downloaded and after that the installation will continue as usual.
If you want to stick with the current Ubuntu installer, select “Continue without updating”.
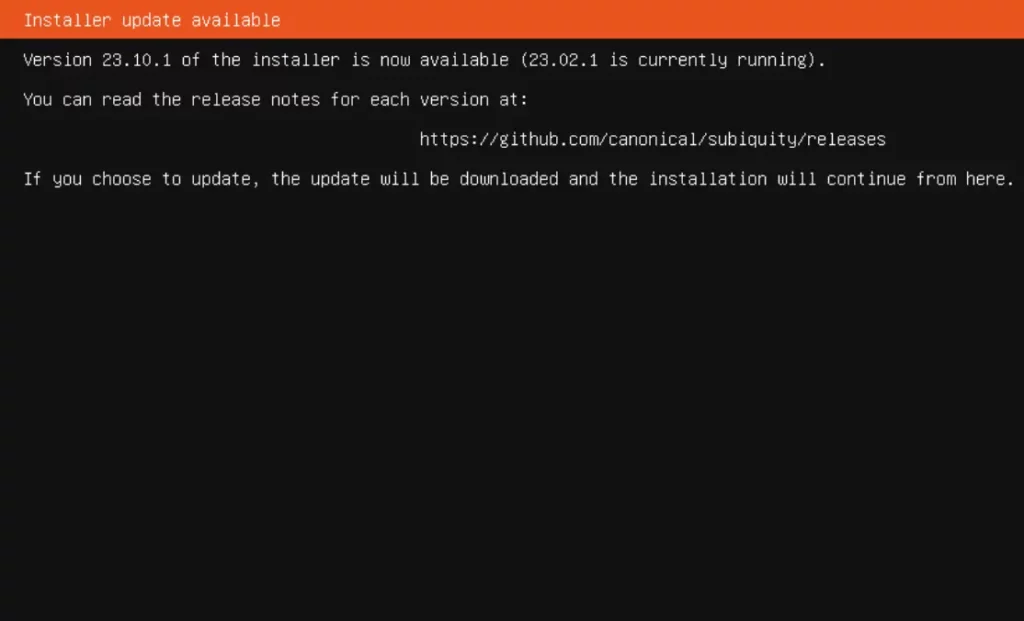
For this tutorial, I try the new Ubuntu installer, so I chose “Update to the new installer” option.
Step 8: Configure Storage Layout
In this section, we will determine the partition scheme for the Ubuntu server based on the available disk space. There are two choices available:
- Use an Entire Disk: With this option, the installer will automatically generate a partition for the entire disk.
- Custom Storage Layout: As the name implies, this option allows you to create custom partitions for the Ubuntu server.
Please note that if you are new to Ubuntu, it is advisable to select the first option, ‘Use an entire disk.’
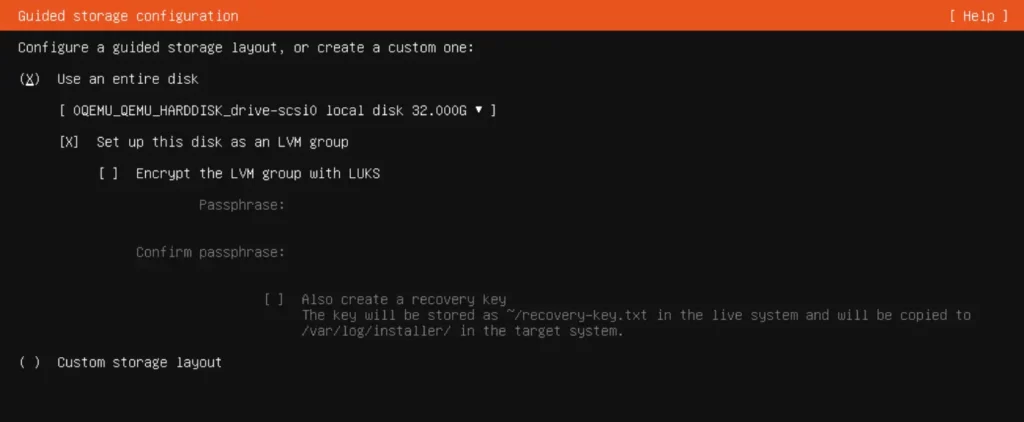
If you wish to encrypt your disk, you can select the ‘Encrypt the LVM group with LUKS’ option. If you choose this, you will be required to set a passphrase, which enhances security and prevents unauthorized access to your operating system.
The installer will automatically determine the most suitable partitioning scheme for you, so you don’t need to take any additional steps.
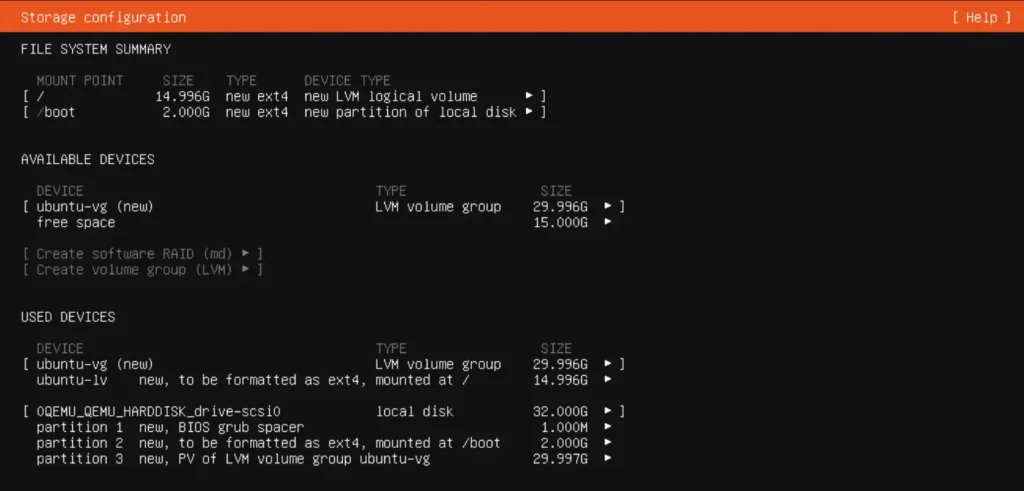
Once you’ve created all the necessary partitions, take a moment to review the disk partition layout. If you’re content with the current arrangement, select ‘Done’ and press ENTER to save the changes.
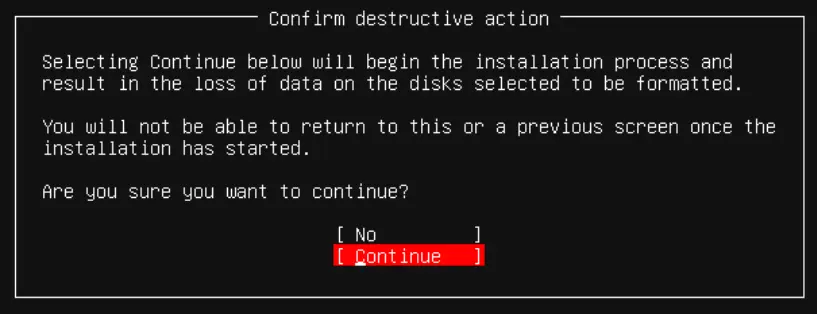
It’s important to note that all data on the disk will be permanently deleted at this stage. Therefore, make sure there is no important data on the drive, and then choose ‘Continue’ to initiate the disk partition formatting process.
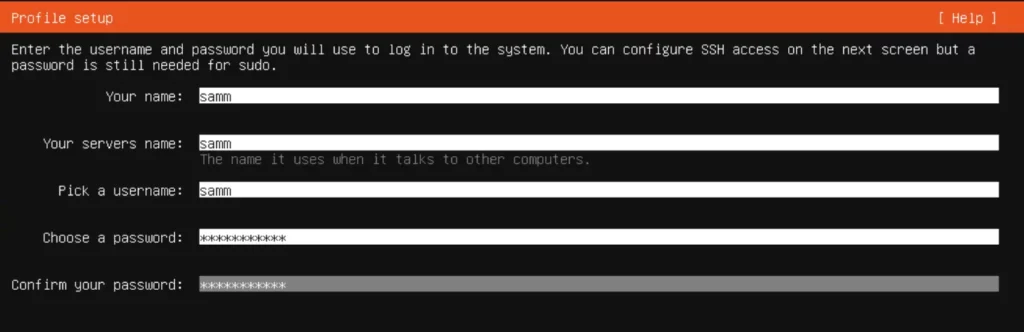
Step 9: Configure Ubuntu Hostname and Profile
In this part, provide a fitting hostname for your Ubuntu server, as well as the username and password you intend to use for logging into your Ubuntu server.
Step 10: Ubuntu Pro
If you have an Ubuntu Pro account, you have the choice to select the ‘Enable Ubuntu Pro’ option. This selection will result in an upgrade of your Ubuntu server, extending security updates all the way to 2032.
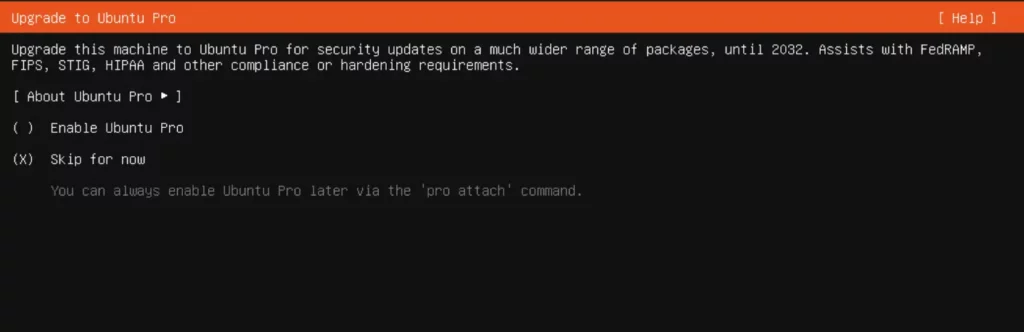
Since I don’t have an Ubuntu Pro account, I chose to skip this step. You have the flexibility to register with Ubuntu Pro at a later time by simply entering the following command:
$ sudo pro attachStep 11: Configure SSH
In this step, you can configure SSH. Mark the ‘Install OpenSSH Server’ checkbox, then select ‘Done’ and press ENTER.

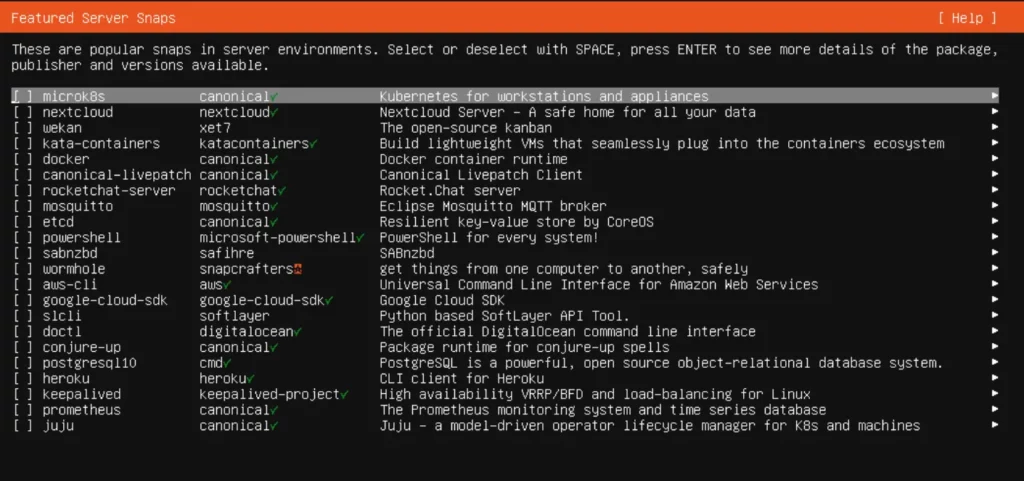
Step 12: Select Featured Server Snaps
In the following section, you’ll encounter a selection of popular snap applications that you might find useful. Make your choices among the snap applications and proceed by pressing ENTER. To select or deselect the apps, use the SPACEBAR key.
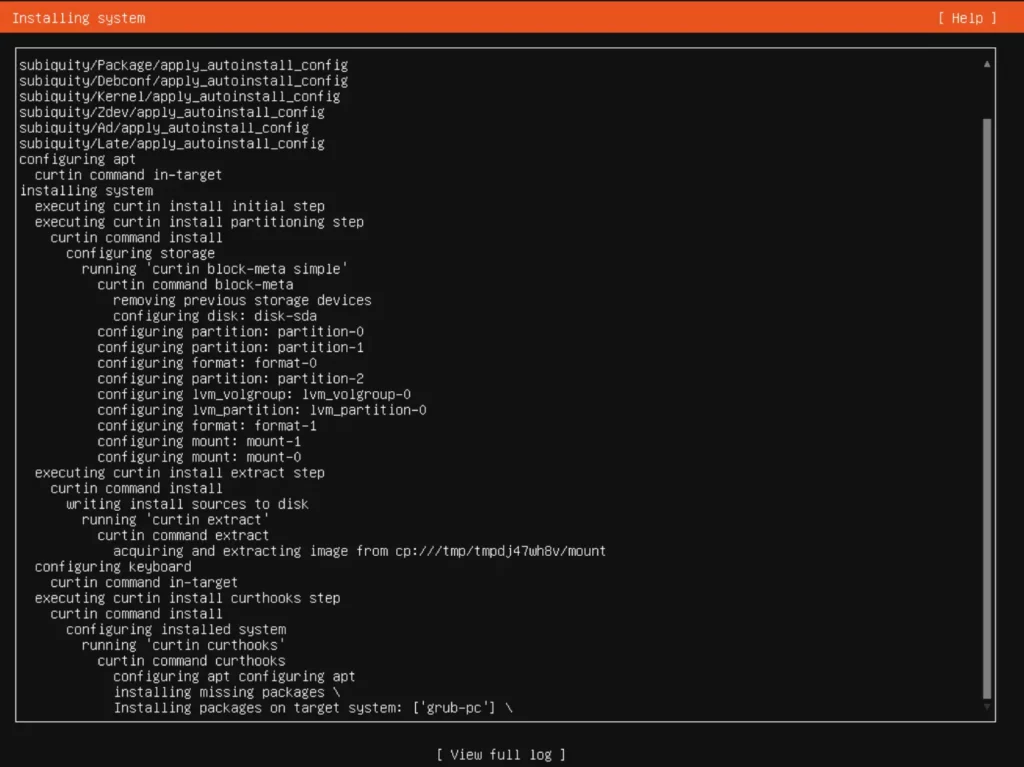
Step 13: Install Ubuntu Server 22.04 Started
The Ubuntu server installation is now commencing. It will involve the download and installation of numerous packages, so kindly exercise patience during install Ubuntu Server 22.04 process.
Step 14: Install Ubuntu Server 22.04 Completed
Once the installation wraps up, you’ll be prompted to restart your server. Click “Reboot” to complete the installation.
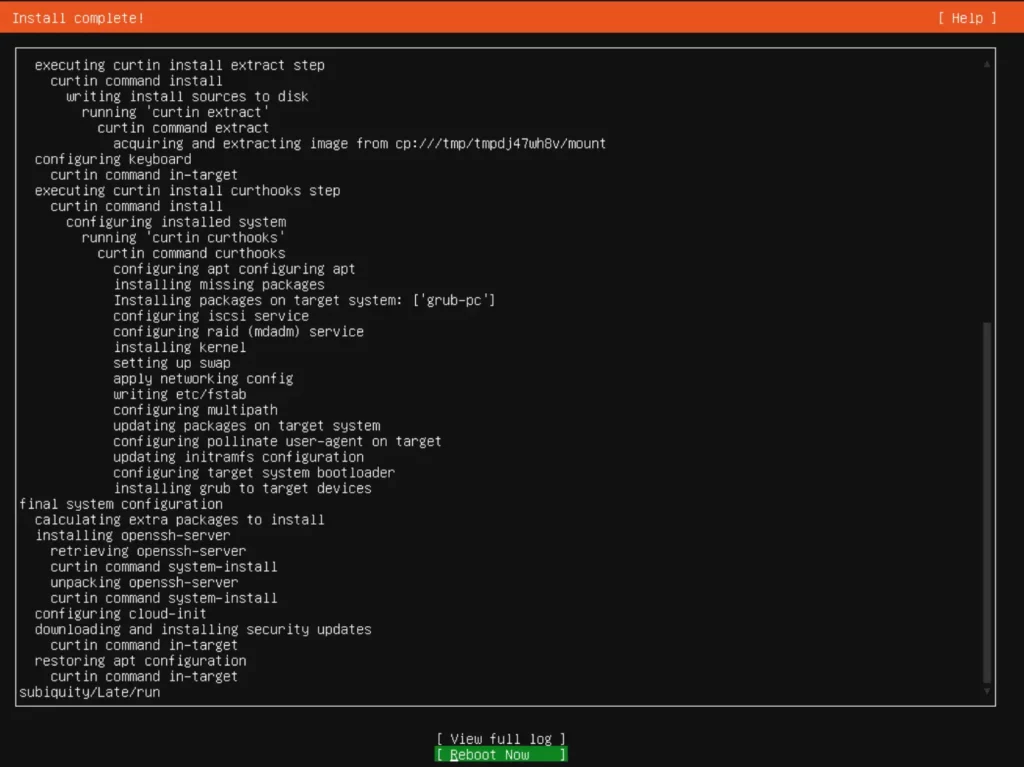
Congratulations! Ubuntu 22.04 LTS server is successfully installed!
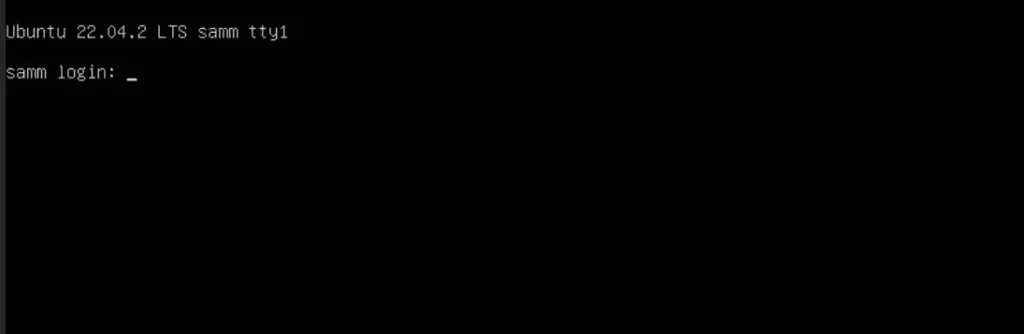
Step 15: Accessing Your Ubuntu Server 22.04
Log in to your freshly installed Ubuntu server. Input the username and the corresponding password that you established while going through the installation procedure.
Post-Installation Configuration
After the system restarts, log in with the user account you created earlier. Congratulations, Ubuntu Server 22.04 LTS is now successfully installed on your system. You can now further configure your server, install software, and start leveraging it for your specific purposes.
Updating Ubuntu
After the installation of any operating system, the initial step is to update it. Ubuntu is no different in this regard. To update your Ubuntu server, execute the following commands:
$ sudo apt update
$ sudo apt full-upgrade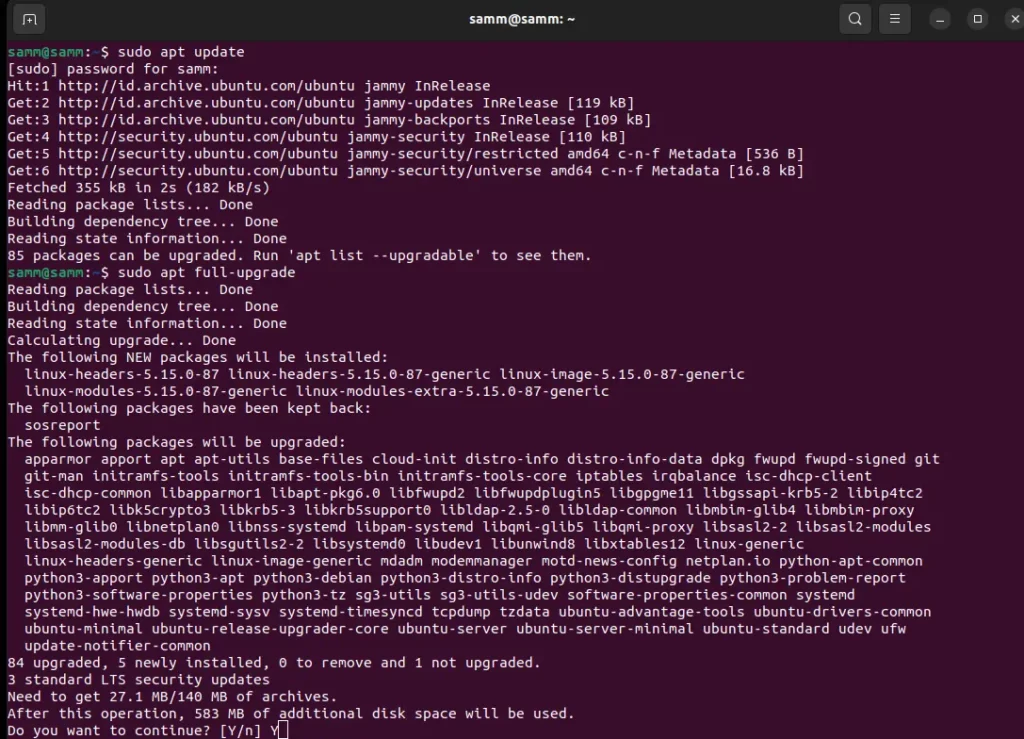
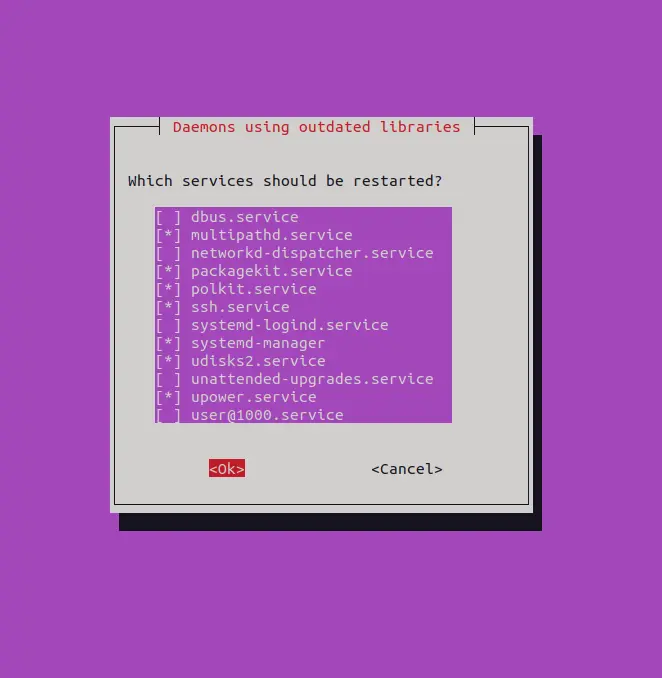
During the installing updates task, you will be prompted to restart some services. Choose OK to do so.
After all updates are applied, remove any leftover, unnecessary packages by running the following commands:
$ sudo apt autoremove
$ sudo apt autoclean
Finally, once again reboot your system.
$ sudo reboot -h nowConclusion
In this comprehensive guide, we’ve provided you with a step-by-step walkthrough of the Ubuntu Server 22.04 LTS installation/ setup process, complete with helpful screenshots to ensure clarity. By following these instructions, you can have this powerful and feature-rich operating system up and running in no time.
Ubuntu Server 22.04 LTS offers an array of capabilities, making it a top choice for a wide range of server applications. With long-term support and regular updates, you can rely on its stability and security for all your server needs.
Also Read Our Other Guides :
- How To Install Debian 11 (Bullseye) Server with Pictures
- How To Install Rocky Linux 9.2 Server with Screenshots
- How To Set Up a Firewall with UFW on Ubuntu 22.04
- Initial Setup Ubuntu Server 22.04: Secure and Efficient
- How To Install Uptime Kuma on Ubuntu 22.04
- How To Find Hard Disk Drive Information in Linux
Finally, now you have learned How To Install Ubuntu Server 22.04 LTS with Screenshots.


