Generally in the digital age, where information travels at the speed of light, ensuring the security of your server is paramount. One of the most effective ways to bolster your server’s security is by setting up a firewall. In this article, we will walk you through the process of setting up a firewall using FirewallD on CentOS 7. No need to fret if you’re not a tech expert. We’ll explain things using everyday language and guide you through each step.
Table of Contents
Understanding Firewalls
Before we dive into the setup process, let’s grasp the basics. A firewall is like a virtual fence around your server. It monitors and controls incoming and outgoing network traffic, acting as a barrier against potential threats.
FirewallD is a dynamic firewall management tool that simplifies the firewall configuration process. It’s the go-to choice for CentOS 7 users.
Getting Started
Now, let’s roll up our sleeves and get to work.
Step 1: Check FirewallD Status
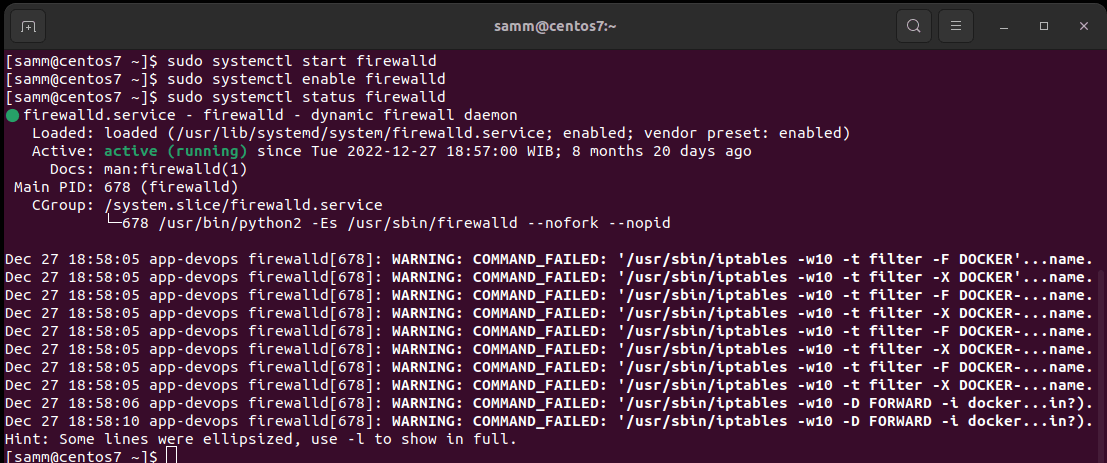
Firstly, ensure that FirewallD is installed and running on your CentOS 7 server. Open your terminal and execute the following command:
$ sudo systemctl status firewalldStep 2: Enable FirewallD on CentOS 7
If FirewallD is not active, enable it with this following command:
$ sudo systemctl start firewalldStep 3: Set FirewallD to Start at Boot
To ensure FirewallD starts automatically on your CentOS 7 upon server reboot, run this following command:
$ sudo systemctl enable firewalld
Basic Firewall Configuration
With FirewallD up and running, let’s configure some basic rules to secure your server.
Step 4: Allow SSH Access on CentOS 7
Allow SSH access to your CentOS 7 server so you can manage it remotely. Execute the following command:
$ sudo firewall-cmd --zone=public --add-service=ssh --permanentThis command permits SSH traffic and makes the rule permanent.
Step 5: Reload FirewallD on CentOS 7
To apply the changes, reload FirewallD:
$ sudo firewall-cmd --reloadAdvanced Firewall Configuration
Now, let’s explore some advanced configurations to further enhance your server’s security.
Step 6: List Available Services on CentOS 7
To see a list of available services you can allow or deny, use this following command:
$ sudo firewall-cmd --list-servicesStep 7: Allow Additional Services on CentOS 7
You can add more services to the allowed list using the following command. Then replace http with the service you want to allow, and don’t forget to reload FirewallD afterward:
$ sudo firewall-cmd --zone=public --add-service=http --permanent
$ sudo firewall-cmd --reload
Step 8: Block a Port on CentOS 7
To block a specific port, replacing PORT_NUMBER with the desired port. Use this following command:
$ sudo firewall-cmd --zone=public --remove-port=PORT_NUMBER/tcp --permanent
$ sudo firewall-cmd --reload
Monitoring Firewall Rules on CentOS 7
To check the rules you’ve set up, use this following command:
$ sudo firewall-cmd --list-allConclusion
Setting up a firewall using FirewallD on CentOS 7 is a fundamental step in securing your server. In this article, we’ve covered the essential steps in a user-friendly way. Remember, server security is an ongoing process, so keep an eye on your firewall rules and update them as needed to stay protected in the ever-evolving digital landscape.
Also Read Our Other Guides :
- How To Set Up a Firewall Using FirewallD on Rocky Linux 9
- How To Set Up a Firewall with UFW on Debian 11
- How To Set Up a Firewall with UFW on Ubuntu 22.04
- Initial Setup Debian 11 Server: Secure and Efficient
- Initial Setup Ubuntu Server 22.04: Secure and Efficient
- Initial Setup Rocky Linux 9 Server: Secure and Efficient
- How To Install RTMP Server with Nginx on CentOS 7
Finally, now you have learned how to set up a firewall using FirewallD on CentOS 7.


