


Introduction
Vagrant has revolutionized the way developers and system administrators create and manage virtualized development environments. With its easy-to-use configuration management and automation capabilities, Vagrant simplifies the process of setting up and sharing development environments. In this comprehensive guide, we’ll walk you through the step-by-step process of How To Install Vagrant on Ubuntu 22.04, enabling you to efficiently manage your development projects.
Table of Contents
Understanding Vagrant
Here’s a basic overview of how Vagrant works:
- Configuration: Vagrant uses a simple text file called a “Vagrantfile” to define the virtual machine’s settings, such as the operating system, resources (CPU, RAM), network settings, and provisioners (scripts that set up and configure the VM).
- Box: Vagrant uses “boxes” as base images to create virtual machines. A box is a pre-built and pre-configured VM template with a specific operating system and additional software installed.
- VM Management: Once the Vagrantfile is set up, developers can use Vagrant commands to create, start, stop, and destroy virtual machines based on the configuration defined in the file.
- Provisioning: Vagrant supports various provisioners like shell scripts, Ansible, Puppet, or Chef, which can be used to automatically set up and configure software and services within the VM.
- Providers: Vagrant can work with different virtualization providers like VirtualBox, VMware, Hyper-V, or cloud platforms like AWS and Azure, allowing developers to choose the most suitable platform for their projects.
By using Vagrant, developers can avoid the need to install software dependencies directly on their host machines, which can lead to a cluttered environment and potential conflicts between projects. Instead, Vagrant abstracts the development environment within a virtual machine, providing isolation and consistency.
Overall, Vagrant simplifies the process of managing development environments, making it easier for teams to collaborate and share their projects across different platforms and operating systems.
Prerequisites
- Ubuntu Server: Make sure you have a clean installation of Ubuntu Server. You can deploy this on a physical machine or a virtual environment like VMware or VirtualBox. To set this up, follow our guide Initial Setup Ubuntu Server 22.04.
- The virtual machine is required to install Vagrant, we can use any virtual machine for this purpose, such as Hyper-V, Docker, VMware, etc, but we are going to use VirtualBox in this tutorial.
Step-by-Step Install Vagrant on Ubuntu 22.04
Installing Vagrant on Ubuntu 22.04 is a straightforward process. Let’s dive into the steps:
Step 1: System Update
Before installing any new software, it’s recommended to update your package repository to ensure you’re getting the latest package information. Open a terminal and run the following commands:
sammy@vagrant:~$ sudo apt update
sammy@vagrant:~$ sudo apt upgrade
sammy@vagrant:~$ sudo apt -y install apt-transport-https ca-certificates curl software-properties-common
Step 2: Install VirtualBox
Virtual Box is a virtualization tool to create and manage multiple operating systems as virtual machines. The main reason behind installing VirtualBox is that vagrant needs virtualization support. We will install a Virtual box for the installation of Vagrant.
You will provision the machines on top of VirtualBox. So, first install the VirtualBox package. It is available in the Ubuntu’s repositories:
To install the latest VirtualBox on Ubuntu, tou can follow this guide :
Step 3: Install Repository Addition Dependencies
By default, the Vagrant is not available on Ubuntu 22.04 base repository. Now run the following command below to add the Vagrant repository and GPG keys to your Ubuntu system:
sammy@vagrant:~$ wget -O- https://apt.releases.hashicorp.com/gpg | gpg --dearmor | sudo tee /usr/share/keyrings/hashicorp-archive-keyring.gpg
Add the official Vagrant APT repository to your system:
sammy@vagrant:~$ echo "deb [signed-by=/usr/share/keyrings/hashicorp-archive-keyring.gpg] https://apt.releases.hashicorp.com $(lsb_release -cs) main" | sudo tee /etc/apt/sources.list.d/hashicorp.list
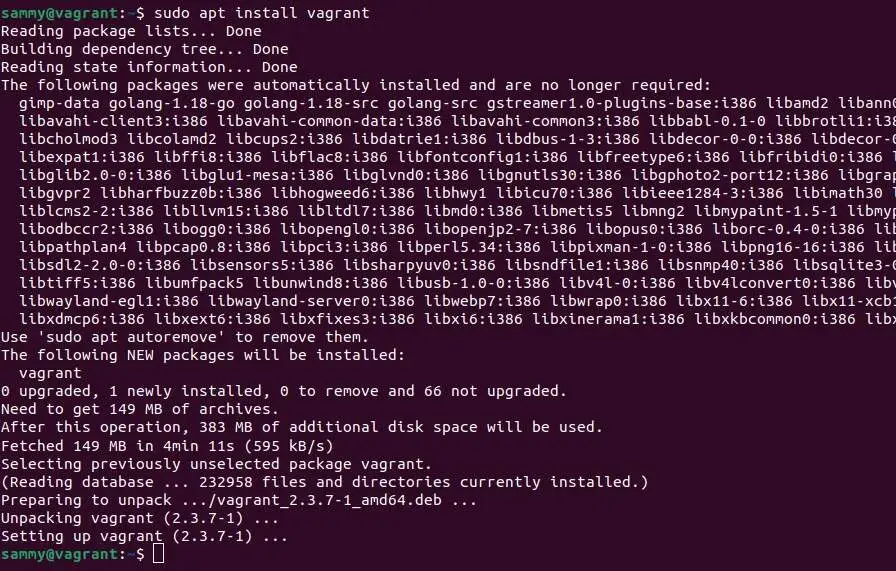
Step 4: Install Vagrant on Ubuntu 22.04.
After the repository was added, now update apt packages and install the latest version of Vagrant using the following command below:
sammy@vagrant:~$ sudo apt update
sammy@vagrant:~$ sudo apt install vagrant
Installation should take few seconds to complete:
We will run the check version command to ascertain whether or not we successfully installed Vagrant on our Ubuntu system, next verify the Vagrant installation :
sammy@vagrant:~$ vagrant --version
Vagrant 2.3.7
Step 5: Starting with the Vagrant
Once Vagrant is installed, you can use it to create and manage virtual development environments. Here is a simple example of how to create a Vagrant environment:
sammy@vagrant:~$ mkdir myvagrant_env
sammy@vagrant:~$ cd myvagrant_env/
In this example, we will use the centos/7 box. Next, initialize the Vagrant environment by running the following command:
sammy@vagrant:~/myvagrant_env$ vagrant init centos/7
The output will be similar to this:
A `Vagrantfile` has been placed in this directory. You are now
ready to `vagrant up` your first virtual environment! Please read
the comments in the Vagrantfile as well as documentation on
`vagrantup.com` for more information on using Vagrant.
Finally, start the Vagrant environment by running the following command below:
sammy@vagrant:~/myvagrant_env$ vagrant up
The output will be similar to this:
Output :

==> default: Configuring and enabling network interfaces...
    default: SSH address: 192.168.120.122:22
    default: SSH username: vagrant
    default: SSH auth method: private key
==> default: Rsyncing folder: /home/sammy/myvagrant_env/ => /vagrant
Vagrant further mounts the project directory at /vagrant in the virtual machine. It allows you to work on the project’s files on the host machine. So, to ssh into the virtual machine, run:
sammy@vagrant:~/myvagrant_env$ vagrant ssh
To stop the virtual machine, run:
sammy@vagrant:~/myvagrant_env$ vagrant halt
The above command will stop the machine if it is running. Also, will destroy all resources made during the creation of machine:
sammy@vagrant:~/myvagrant_env$ vagrant destroy
Conclusion
Vagrant brings simplicity and automation to the process of setting up and managing development environments. With its easy installation process and intuitive configuration management, developers and system administrators can quickly create isolated and reproducible environments for their projects. By following the steps outlined in this guide, you’ll have Vagrant up and running on your Ubuntu 22.04 system, ready to streamline your development workflows and enhance collaboration within your team.
For additional help or useful information, we recommend you check the official Vagrant website.
Also Read Our Other Guides :
- How To Install VirtualBox 7.0 on Ubuntu 22.04
- How To Install Java Using OpenJDK 17 on Ubuntu 22.04
- How To Install Jenkins on Ubuntu Server 22.04
- How To Install and Use TeamViewer on Ubuntu 22.04
- How To Install Python 3.11 from Source on Ubuntu 22.04
- How To Install Python 3.11 on Rocky Linux 9
Finally, now you have learned how to Install Vagrant on Ubuntu 22.04.


