• About Us
  • Disclaimers
  • Privacy Policy
  • Sitemap
Linux Tutorials for Beginners
Advertisement
  • Ubuntu
    Install and Secure phpMyAdmin on Ubuntu 22.04

    How To Install and Secure phpMyAdmin on Ubuntu 22.04

    Secure SSH with Fail2Ban

    How To Secure SSH with Fail2Ban on Ubuntu 22.04

    Install Uptime Kuma on Ubuntu 22.04

    How To Install Uptime Kuma on Ubuntu 22.04

    Install Ubuntu Server 22.04

    How To Install Ubuntu Server 22.04 LTS with Screenshots

    Set Up Firewall on Ubuntu 22.04

    How To Set Up a Firewall with UFW on Ubuntu 22.04

    Install Nginx on Ubuntu

    How To Install Nginx on Ubuntu 22.04: A Comprehensive Guide

    Install MySQL 8.0 on Ubuntu 22.04

    How To Install MySQL 8.0 on Ubuntu Server 22.04

    install-php74-ubuntu2204

    How To Install PHP 7.4 on Ubuntu 22.04

    Install Snipe-IT on Ubuntu 22.04

    How To Install Snipe-IT Asset Management on Ubuntu 22.04

  • Debian
    Secure SSH with Fail2Ban

    How To Secure SSH with Fail2Ban on Debian 11

    Install Debian 11 Server

    How To Install Debian 11 (Bullseye) Server with Pictures

    Install and Setup Node.js on Debian 11

    How To Install and Setup Node.js on Debian 11

    Install PHP 8.2 on Debian 11

    How To Install PHP 8.2 on Debian 11

    Install Nginx on Debian 11

    How To Install Nginx on Debian 11: A Comprehensive Guide

    Set Up Firewall with UFW on Debian

    How To Set Up a Firewall with UFW on Debian 11

    install php74 on debian 11

    How To Install PHP 7.4 on Debian 11

    Install MariaDB 10.9 on Debian 11

    How To Install MariaDB 10.9 on Debian 11 Server

    Initial Setup Debian Server

    Initial Setup Debian 11 Server: Secure and Efficient

  • Rocky Linux
    Install phpMyAdmin on Rocky Linux 9

    How To Install phpMyAdmin on Rocky Linux 9

    Secure SSH with Fail2Ban

    How To Secure SSH with Fail2Ban on Rocky Linux 9

    Install Rocky Linux 9.2 Server

    How To Install Rocky Linux 9.2 Server with Screenshots

    setup Firewall Using Firewalld Rocky Linux 9

    How To Set Up a Firewall Using FirewallD on Rocky Linux 9

    Install Nginx on Rocky Linux 9

    How To Install Nginx on Rocky Linux 9: A Comprehensive Guide

    Install Apache on Rocky Linux

    How To Install and Configure Apache on Rocky Linux 9

    Install MongoDB on Rocky Linux 9

    How To Install MongoDB 6.0 on Rocky Linux 9

    Install Docker on Rocky Linux

    How To Install Docker CE on Rocky Linux 9

  • CentOS
    Secure SSH with Fail2Ban

    How To Secure SSH with Fail2Ban on CentOS 7

    Install PHP8.2 on CentOS 7

    How To Install PHP 8.2 on CentOS 7 / RHEL 7

    Install Apache on CentOS 7

    How To Install Apache Web Server on CentOS 7

    Set Up FirewallD on CentOS 7

    How To Set Up a Firewall Using FirewallD on CentOS 7

    Initial Setup CentOS 7 Server

    Initial Setup CentOS 7 Server: Secure and Efficient

    Install Nginx on CentOS 7

    How To Install Nginx on CentOS 7: A Comprehensive Guide

    Build NGINX from Source on Centos 7

    How To Build NGINX from Source (Compile) on Centos7

    Install Docker Swarm on CentOS 7

    Install and Configure Docker Swarm Mode on Centos 7

    Install Docker Compose on Centos 7

    How To Install and Use Docker Compose on Centos 7

  • Linux
    Manage Groups on Linux

    A Simple Guide: How To Manage Groups on Linux

    Logrotate In Linux

    How To Manage Log Files Using Logrotate In Linux

    Check File Size in Linux

    The Easy Ways to Check File Size in Linux

    Linux server security system administrators

    Best Practices Linux Server Security for System Administrator

    Backup Files From Remote Linux VPS Using Rsync Script

    How To Backup Files From Remote Linux VPS Using Rsync Script

    SSH Key-based Authentication

    How To Configure SSH Key-based Authentication In Linux

    Linux File Permissions

    Understanding Linux File Permissions for Beginners

    Create Multiboot USB with Ventoy

    How To Create Multiboot USB with Ventoy in Linux

    Find Hard Disk Drive Information in Linux

    How To Find Hard Disk Drive Information in Linux

No Result
View All Result
Linux Tutorials for Beginners
No Result
View All Result

Home » Ubuntu » How To Install Jenkins on Ubuntu 22.04

How To Install Jenkins on Ubuntu 22.04

sammbysamm
October 16, 2023
Install Jenkins on Ubuntu

How To Install Jenkins on Ubuntu Server 22.04

Share on FacebookShare on LinkedinShare on Whatsapp

Introduction

In the constantly changing field of software development and continuous integration and continuous delivery (CI/CD), Jenkins shines as a symbol of efficiency and automation. Jenkins is an open-source tool that can make your development process smoother by helping you build, test, and deploy your code more easily. If you’re using Ubuntu 22.04 and want to improve your development workflow, this detailed guide will guide you through each step of How To Install Jenkins on Ubuntu 22.04. It will make sure your projects operate smoothly and efficiently.

Table of Contents

  • Introduction
  • Key Features of Jenkins
  • Prerequisites
  • Install Jenkins on Ubuntu 22.04
    • Step 1: System Update
    • Step 2: Install Java
    • Step 3: Add Jenkins Repository on Ubuntu 22.04
    • Step 4: Install Jenkins on Ubuntu 22.04
    • Step 5: Configure Firewall to Allow Jenkins
    • Step 6: Setup Jenkins
  • Conclusion

Key Features of Jenkins

Some of the key features and functionalities of Jenkins include:

OTHER POSTS

How To Install and Secure phpMyAdmin on Ubuntu 22.04

How To Secure SSH with Fail2Ban on Ubuntu 22.04

How To Install Uptime Kuma on Ubuntu 22.04

  1. Continuous Integration: Jenkins allows developers to automatically build and test code changes whenever new code is committed to a version control repository. This ensures that the changes integrate smoothly with the existing codebase and helps identify and fix issues early in the development process.
  2. Continuous Delivery/Deployment: Jenkins supports continuous delivery by automating the process of packaging and deploying code changes to various environments, such as staging or production, once they pass the necessary tests.
  3. Easy Configuration: Jenkins provides a web-based user interface that allows users to configure jobs and pipelines visually without the need for writing complex scripts.
  4. Pipelines: Jenkins supports defining build and deployment pipelines as code, often written in the Groovy scripting language. These pipelines enable more complex workflows and give teams better visibility into the entire CI/CD process.

Prerequisites

Before we dive into the installation process how to Install Jenkins on Ubuntu, there is prerequisite you need to ensure are in place:

  • Ubuntu Server: Make sure you have a clean installation of Ubuntu Server. You can deploy this on a physical machine or a virtual environment like VMware or VirtualBox.  To set this up, follow our guide :
    • Initial Setup Ubuntu Server 22.04: Secure and Efficient
  • install Java 8 or 11 on Ubuntu.
  • A stable internet connection.

Install Jenkins on Ubuntu 22.04

To Install Jenkins on Ubuntu 22.04, just follow these simple steps.

Step 1: System Update

Begin by updating the package list and upgrading current packages.

samm@jenkins:~$ sudo apt update
samm@jenkins:~$ sudo apt upgrade

Step 2: Install Java

Jenkins requires the Java Runtime Environment (JRE). This guide uses OpenJDK for the Java environment. OpenJDK is a Development Kit, and includes the Java Runtime Environment.

Currently, as of writing this article, Jenkins exclusively supports Java 8 and Java 11 on Ubuntu. It’s important to note that you have the ability to install multiple versions of Java on your Ubuntu system. If you have multiple versions installed, make sure to designate Java 8 or Java 11 as the default version.

Follow the steps below to install Java on Ubuntu:

  • How To Install Java Using OpenJDK 17 on Ubuntu 22.04

Being a Java application, Jenkins requires Java 8 and later versions to run without any issues. Run the command to check if Java is installed on your system.

samm@jenkins:~$  java --version
openjdk 17.0.8 2023-07-18
OpenJDK Runtime Environment (build 17.0.8+7-Ubuntu-122.04)
OpenJDK 64-Bit Server VM (build 17.0.8+7-Ubuntu-122.04, mixed mode, sharing)

Step 3: Add Jenkins Repository on Ubuntu 22.04

You have the option to download the Jenkins package through the official Jenkins link by utilizing the curl command. Subsequently, executing the following command will transfer the package data to your local repository.

[Important Notice] 
Beginning with LTS 2.387.2 and weekly 2.397, releases will be signed with a new GPG key. Administrators must install the new key on their servers before attempting to update Jenkins.
Read more about the key rotation on the blog.

This repository for Jenkins is intended for automated installation and upgrades on Debian systems. To make use of this repository, start by adding the key to your system.

samm@jenkins:~$ curl -fsSL https://pkg.jenkins.io/debian-stable/jenkins.io-2023.key | sudo tee \
   /usr/share/keyrings/jenkins-keyring.asc > /dev/null

Then add a Jenkins apt repository entry:

samm@jenkins:~$ echo deb [signed-by=/usr/share/keyrings/jenkins-keyring.asc] \
    https://pkg.jenkins.io/debian-stable binary/ | sudo tee \
    /etc/apt/sources.list.d/jenkins.list > /dev/null

After activating Jenkins repository, run the following command to update apt packages list and let the system know that you have recently added a new repository.

samm@jenkins:~$ sudo apt update

Step 4: Install Jenkins on Ubuntu 22.04

With everything configured, proceed to install Jenkins and all its dependencies using the apt package manager.

samm@jenkins:~$ sudo apt install jenkins

Wait for the download and installation to complete.

Reading package lists... Done
Building dependency tree... Done
Reading state information... Done
The following NEW packages will be installed:
  jenkins
0 upgraded, 1 newly installed, 0 to remove and 0 not upgraded.
Need to get 95.7 MB of archives.
After this operation, 98.5 MB of additional disk space will be used.
Get:1 https://pkg.jenkins.io/debian-stable binary/ jenkins 2.401.3 [95.7 MB]
Fetched 95.7 MB in 19s (5,092 kB/s)                                                                                                        
Selecting previously unselected package jenkins.
(Reading database ... 104219 files and directories currently installed.)
Preparing to unpack .../jenkins_2.401.3_all.deb ...
Unpacking jenkins (2.401.3) ...
Setting up jenkins (2.401.3) ...
Created symlink /etc/systemd/system/multi-user.target.wants/jenkins.service → /lib/systemd/system/jenkins.service.
Scanning processes...                                                                                                                       
Scanning candidates...                                                                                                                      
Scanning linux images... 

Once the installation is complete, Jenkins should start automatically. To confirm this, run the command:

samm@jenkins:~$ sudo systemctl status jenkins

Output:

● jenkins.service - Jenkins Continuous Integration Server
     Loaded: loaded (/lib/systemd/system/jenkins.service; enabled; vendor preset: enabled)
     Active: active (running) since Tue 2023-08-08 05:37:52 WIB; 3min 25s ago
   Main PID: 100493 (java)
      Tasks: 47 (limit: 4556)
     Memory: 1.1G
        CPU: 55.008s
     CGroup: /system.slice/jenkins.service
             └─100493 /usr/bin/java -Djava.awt.headless=true -jar /usr/share/java/jenkins.war --webroot=/var/cache/jenkins/war --httpPort=8>

Aug 08 05:37:30 jenkins jenkins[100493]: ee7033f181ac4e40b76f46489da91f9e
Aug 08 05:37:30 jenkins jenkins[100493]: This may also be found at: /var/lib/jenkins/secrets/initialAdminPassword
Aug 08 05:37:30 jenkins jenkins[100493]: *************************************************************
Aug 08 05:37:52 jenkins jenkins[100493]: 2023-08-07 22:37:52.755+0000 [id=34]        INFO        jenkins.InitReactorRunner$1#onAttained: Co>
Aug 08 05:37:52 jenkins jenkins[100493]: 2023-08-07 22:37:52.797+0000 [id=25]        INFO        hudson.lifecycle.Lifecycle#onReady: Jenkin>
Aug 08 05:37:52 jenkins systemd[1]: Started Jenkins Continuous Integration Server.
Aug 08 05:37:53 jenkins jenkins[100493]: 2023-08-07 22:37:53.868+0000 [id=53]        INFO        h.m.DownloadService$Downloadable#load: Obt>
Aug 08 05:37:53 jenkins jenkins[100493]: 2023-08-07 22:37:53.869+0000 [id=53]        INFO        hudson.util.Retrier#start: Performed the a>
lines 1-20/20 (END)

Exit the status screen by pressing Ctrl+Z.

Step 5: Configure Firewall to Allow Jenkins

As we’ve discussed, Jenkins default listens on port 8080. Therefore, if you’ve installed Jenkins on a server with UFW enabled, it’s essential to open this port to allow traffic.

To enable firewall on Ubuntu 22.04 run,

samm@jenkins:~$ sudo ufw enable
Command may disrupt existing ssh connections. Proceed with operation (y|n)? y
Firewall is active and enabled on system startup

To open port 8080 on ufw firewall, run the command:

samm@jenkins:~$ sudo ufw allow 8080/tcp
Rule added
Rule added (v6)

Then reload the firewall to effect the changes.

samm@jenkins:~$ sudo ufw reload
Firewall reloaded

To confirm that port 8080 is open on the firewall, execute the command:

samm@jenkins:~$ sudo ufw status
Status: active

To                         Action      From
--                         ------      ----
22/tcp                     ALLOW       Anywhere                  
80/tcp                     ALLOW       Anywhere                  
443                        ALLOW       Anywhere                       
8080/tcp                   ALLOW       Anywhere 

You have now configured the firewall, and you can proceed to set up Jenkins.

Step 6: Setup Jenkins

To set up Jenkins, go to your browser and open http://[your-ip-address-jenkins]:8080 where Jenkins server is running.

The Unlock Jenkins screen will appear as shown below, asking for the administrator password.

Install Jenkins on Ubuntu
Unlock Jenkins

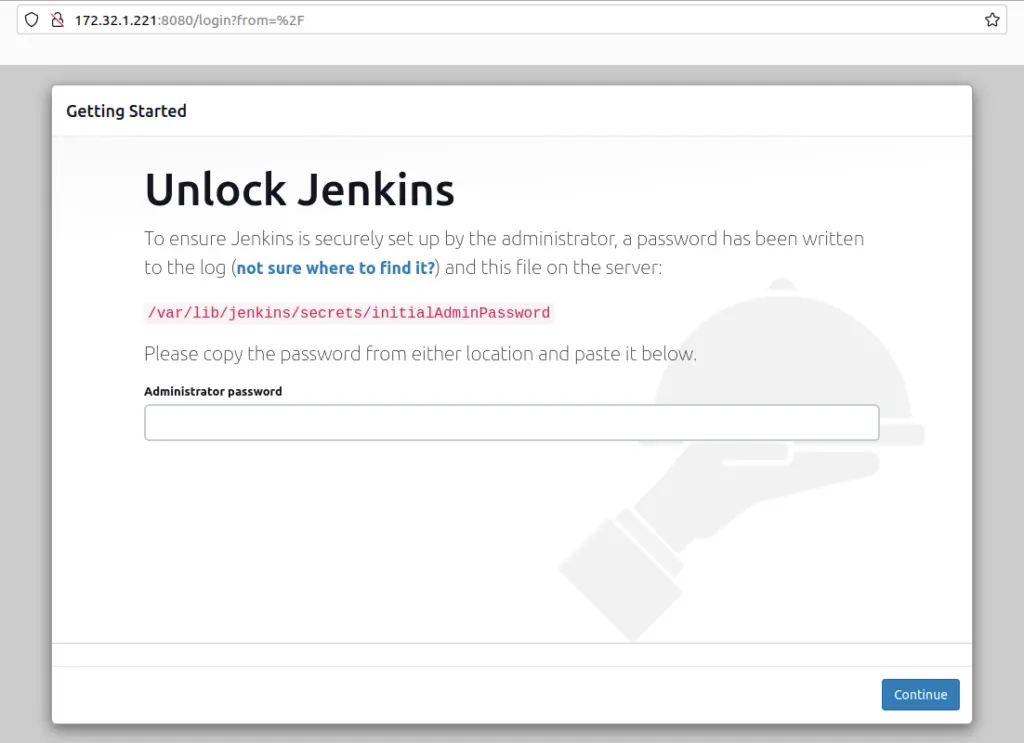
Upon default setup, you will receive a 32-character alphanumeric initial admin password, enabling you to log in to the Jenkins dashboard. Later, you can create an admin user and password.

Open the terminal and run the command below to get the initial credential to unlock Jenkins.

samm@jenkins:~$ sudo cat /var/lib/jenkins/secrets/initialAdminPassword

ee7033f181ac4e40b76f46489da91f9e

At this point, copy and paste the provided password onto the “Unlock Jenkins” page in your browser, and then proceed by clicking on “continue.”

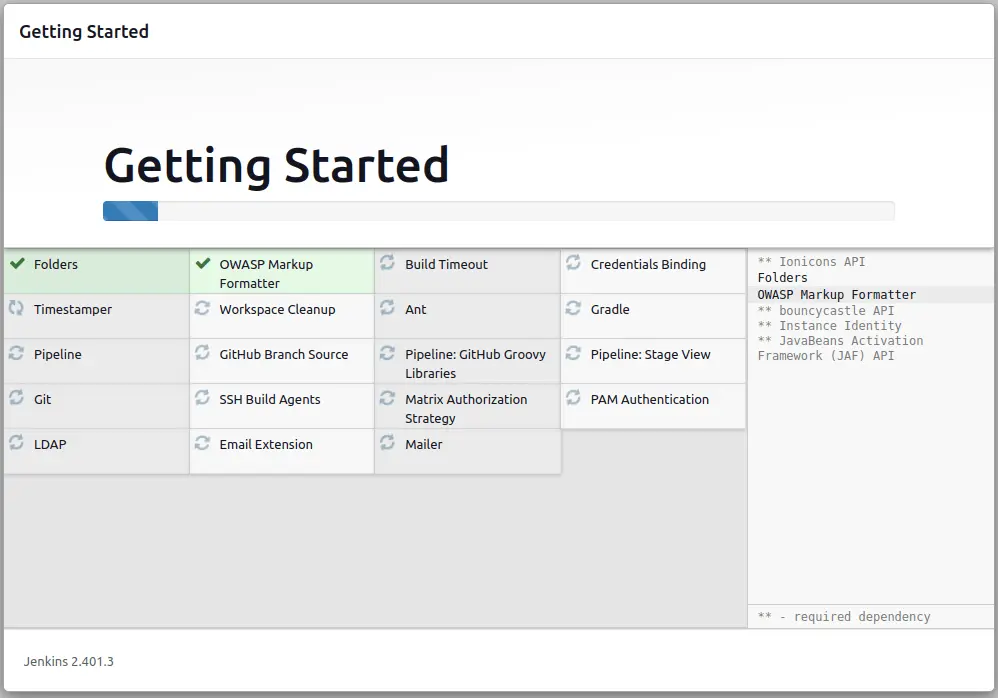
Next, you need to customize Jenkins and install plugins. You can either select plugins of your choice or install suggested plugins, which are the most widely used plugins by the community.

It may take a couple of minutes to install all suggested plugins.

Install Plugins
Install Plugins Jenkins

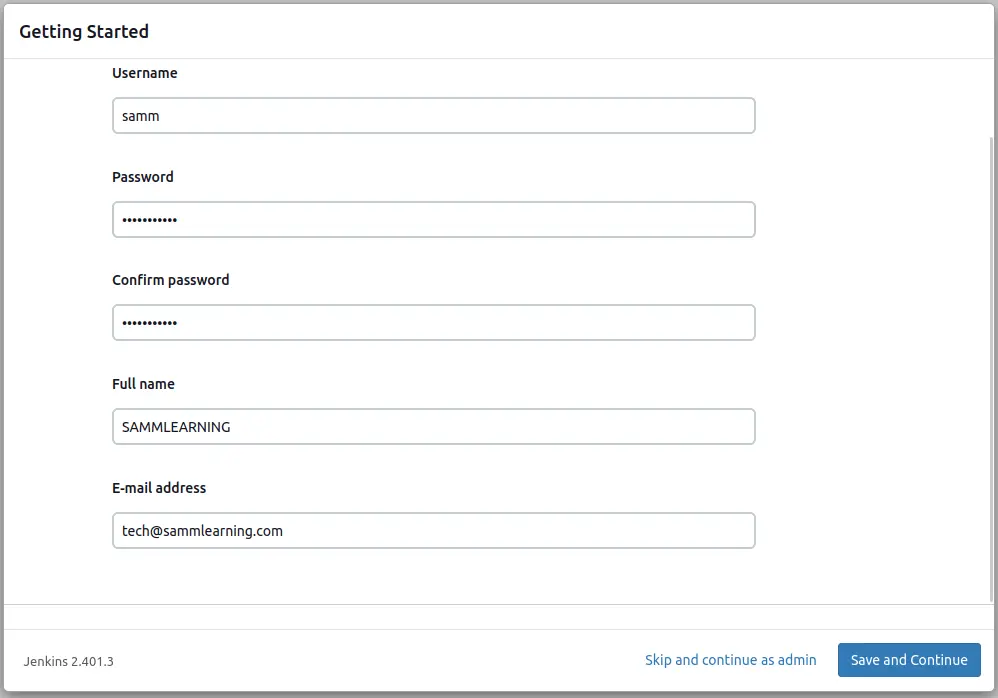
After the plugins have been installed, you’ll receive a prompt to create your initial admin user. Once you’ve filled out the necessary fields, click “Save and continue. You also have the option to skip this step and continue as Admin.

Create Admin Jenkins

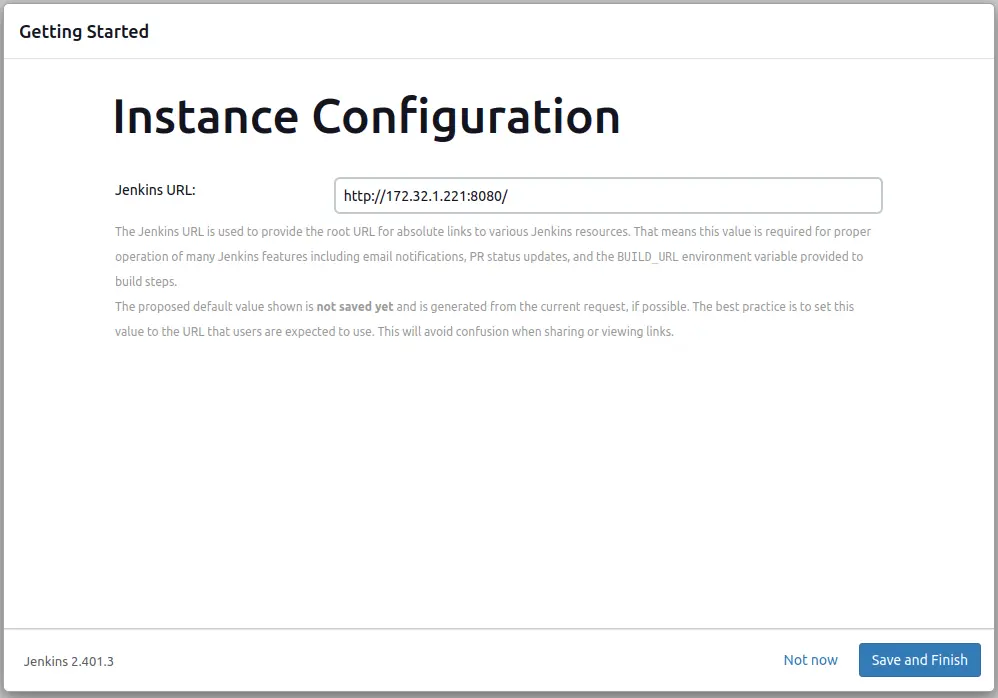
Moving forward, in the subsequent step, you need to indicate the Jenkins URL where the Jenkins instance will be set up to operate. Enter either a domain name or an IP address followed by port 8080, and then proceed by clicking “Save and Finish.”

Install Jenkins on Ubuntu
Instance Configuration Jenkins

You should now get a confirmation message “Jenkins is ready!”. Click Start using Jenkins:

Jenkins on Ubuntu
Jenkins is Ready

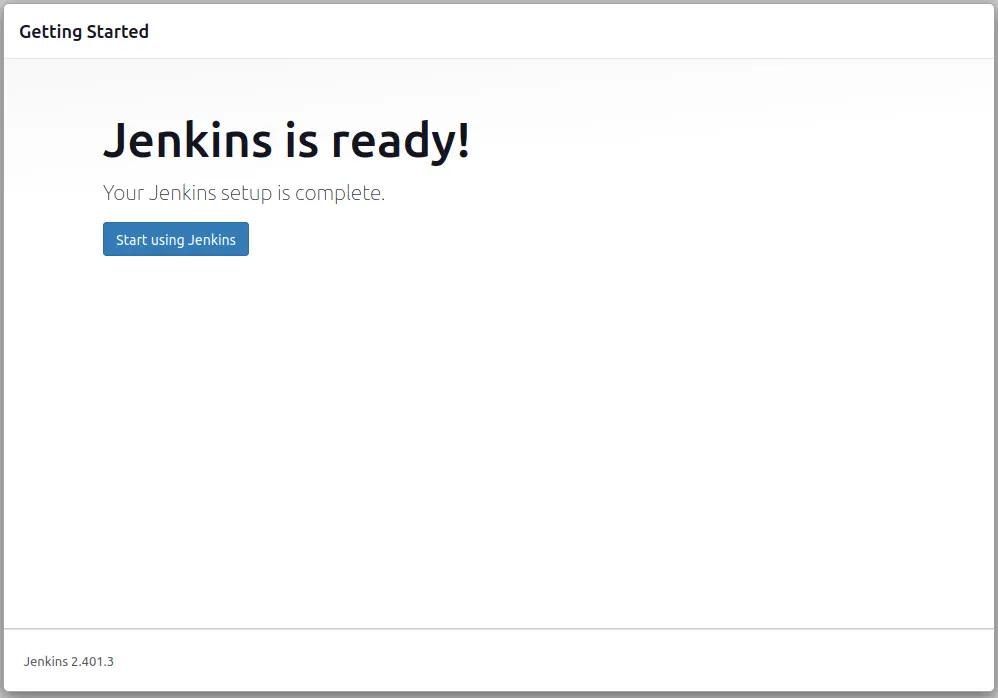
Finally, Jenkins dashboard will open where you can start creating your pipeline jobs.

Install Jenkins
Dashboard Jenkins

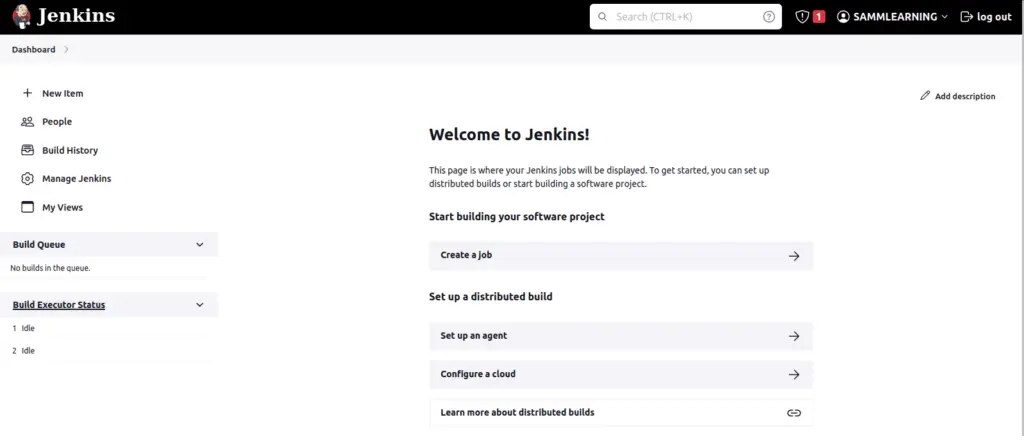
You have now successfully installed Jenkins on Ubuntu Server 22.04.

Conclusion

Congratulations! You’ve successfully Install Jenkins on Ubuntu 22.04 environment. Jenkins opens the doors to continuous integration, automated testing, and efficient software delivery. By following this comprehensive guide, you’ve gained the knowledge to create your first Jenkins job and customize Jenkins to suit your project’s needs. Embrace the power of Jenkins to enhance your development workflow and achieve higher levels of productivity and reliability.

Also Read Our Other Guides :

  • How To Install Java Using OpenJDK 17 on Ubuntu 22.04
  • How To Install and Config Git on Ubuntu 22.04
  • How To Install and Configure Ansible on Rocky Linux 9
  • How To Secure Nginx with Let’s Encrypt on Rocky Linux 9
  • How To Install and Use TeamViewer on Ubuntu 22.04

Finally, now you have learned how to Install Jenkins on Ubuntu 22.04.

Tags: AutomationCI/CDDevOpsJenkinsUbuntu

If you got help by our tutorials, please buy me a coffee..!

Buy Me a Coffee

Thank you so much for your support!!

Previous Post

How To Secure Nginx with Let’s Encrypt on Rocky Linux 9

Next Post

How To Install and Use TeamViewer on Ubuntu 22.04

Leave a Reply Cancel reply

Your email address will not be published. Required fields are marked *

RECENT POST

Install and Secure phpMyAdmin on Ubuntu 22.04

How To Install and Secure phpMyAdmin on Ubuntu 22.04

by samm
July 22, 2024
0

Are you ready to take control of your MySQL databases on Ubuntu 22.04? In this step-by-step guide, we'll walk you...

Manage Groups on Linux

A Simple Guide: How To Manage Groups on Linux

by samm
November 12, 2023
0

Are you a Linux enthusiast looking to enhance your system administration skills? One fundamental aspect you should master is how...

Install phpMyAdmin on Rocky Linux 9

How To Install phpMyAdmin on Rocky Linux 9

by samm
November 11, 2023
0

If you're navigating the world of Rocky Linux 9 and looking to streamline your MariaDB or MySQL database management, installing...

Logrotate In Linux

How To Manage Log Files Using Logrotate In Linux

by samm
November 10, 2023
0

Log files are an essential part of any Linux system. They provide valuable insights into the system's activities, helping administrators...

Load More

RECOMMENDED.

Install Redis on Debian

How To Install Redis on Debian 11 Server

October 16, 2023
Secure SSH with Fail2Ban

How To Secure SSH with Fail2Ban on Rocky Linux 9

October 29, 2023
sammlinux sammlinux sammlinux

Related Posts

Install and Secure phpMyAdmin on Ubuntu 22.04
Ubuntu

How To Install and Secure phpMyAdmin on Ubuntu 22.04

July 22, 2024
Secure SSH with Fail2Ban
Ubuntu

How To Secure SSH with Fail2Ban on Ubuntu 22.04

October 29, 2023
Install Uptime Kuma on Ubuntu 22.04
Ubuntu

How To Install Uptime Kuma on Ubuntu 22.04

November 12, 2023
Install Ubuntu Server 22.04
Ubuntu

How To Install Ubuntu Server 22.04 LTS with Screenshots

October 21, 2023
Load More
Next Post
Install TeamViewer on Ubuntu

How To Install and Use TeamViewer on Ubuntu 22.04

  • About Us
  • Disclaimers
  • Privacy Policy
  • Sitemap

© 2023 sammlinux - Learn Today for Lead Tomorrow.

No Result
View All Result
  • Ubuntu
  • Debian
  • Rocky Linux
  • CentOS
  • Linux

© 2023 sammlinux - Learn Today for Lead Tomorrow.