


Rocky Linux, a promising successor to CentOS, has garnered attention for its stability and reliability. As you embark on your journey with Rocky Linux 9, ensuring a secure and efficient initial setup lays the groundwork for a smooth experience. In this comprehensive guide, we will walk you through the step-by-step process of configurations Rocky Linux 9, emphasizing security and efficiency at every step.
Table of Contents
- Why Initial Setup Matters
- Key Features of Rocky Linux
- Step 1: Installation and Basic Configuration
- Step 2: Logging in as Root
- Step 3: Creating a New User
- Step 4: Secure SSH Access
- Step 5: Update and Upgrade
- Step 6: Implement a Firewall
- Step 7: Install and Configure Fail2Ban
- Step 8: Optimize Resource Usage
- Step 9: Install a Web Server (Optional)
- Step 9: Regular Backups
- Conclusion
Why Initial Setup Matters
Before delving into the technical details, let’s understand why a solid initial setup is crucial. A well-configured server not only enhances security but also paves the way for optimal performance. In the age of data breaches and cyber threats, safeguarding your server from the get-go is non-negotiable. Additionally, an efficiently configured server ensures that your resources are utilized effectively, resulting in better overall performance.
Rocky Linux is a community-driven, open-source Linux distribution designed to be a free, stable, and secure alternative to CentOS (Community Enterprise Operating System). The project was initiated by Gregory Kurtzer, the original founder of CentOS, as a response to the announcement by Red Hat that CentOS Linux 8 would be discontinued in favor of CentOS Stream, a rolling-release distribution. This decision caused concerns among users who relied on CentOS as a stable and reliable server operating system.
Rocky Linux aims to fill the void left by CentOS and provide a compatible and reliable operating system for users and organizations that prefer the traditional CentOS model of stable releases with long-term support.
Key Features of Rocky Linux
Key features and characteristics of Rocky Linux:
- Binary Compatibility: Rocky Linux is designed to be fully binary-compatible with Red Hat Enterprise Linux (RHEL). This compatibility ensures that applications built and certified for RHEL can run on Rocky Linux without any modifications.
- Community-Driven Development: Rocky Linux is developed and maintained by a community of volunteers, contributors, and organizations that are passionate about providing a robust, community-driven Linux distribution.
- Stability and Reliability: The distribution aims to offer a stable and reliable platform suitable for production servers and critical workloads.
- Transparent Development: The development process and decisions of Rocky Linux are open and transparent, encouraging community involvement and trust.
- Focus on Security: Rocky Linux prioritizes security and timely updates to keep the system protected against vulnerabilities and threats.
Rocky Linux aims to be a drop-in replacement for CentOS, allowing users to switch from CentOS to Rocky Linux with minimal effort. By providing a familiar and stable environment, Rocky Linux seeks to serve as a reliable choice for businesses, organizations, and individual users who require a free and community-supported Linux distribution with long-term support.
It’s worth noting that the development of Linux distributions is ongoing, and newer versions or updates may have been released after my knowledge cutoff date. For the latest information about Rocky Linux, including the latest releases and developments, I recommend visiting the official Rocky Linux website or community channels.
When you first create a new Rocky Linux 9 server, there are a few configuration steps that you should take early on as part of the initial setup. This will increase the security and usability of your server and will give you a solid foundation to build on.
Step 1: Installation and Basic Configuration
Begin by installing Rocky Linux 9 on your server. During the installation process, consider these fundamental steps:
- Root Password: Set a strong root password that combines upper and lowercase letters, numbers, and special characters to fortify the server’s security.
- User Accounts: Create a non-root user with sudo privileges to minimize the risks associated with using the root account.
- Firewall Configuration: Enable the firewall and restrict incoming and outgoing traffic to only essential services.
Step 2: Logging in as Root
To log into your server, you will need to know your server’s public IP address. You will also need the password or, if you installed an SSH key for authentication, the private key for the root user’s account. If you have not already logged into your server.
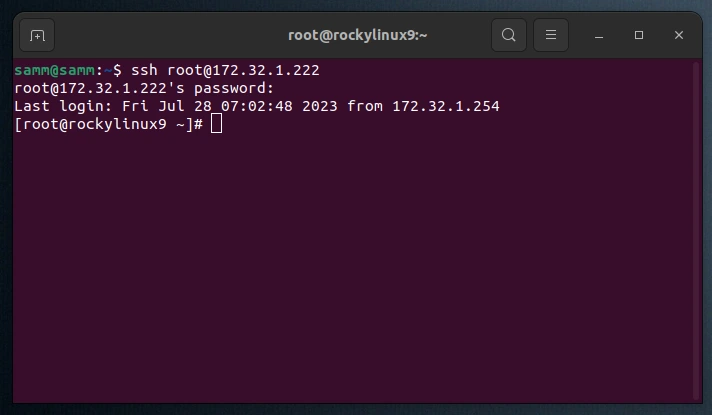
If you are not already connected to your server, log in as the root user now using the following command (substitute with your server’s public/ private IP address):
$ ssh [email protected]
Accept the warning about host authenticity if it appears. If you are using password authentication, provide your root password to log in, and If it’s an SSH key that is passphrase protected, you may be prompted to enter the passphrase the first time you use the key each session. If this is your first time logging into the server with a password, you may also be prompted to change the root password.
[email protected]'s password:
Last failed login: Fri Jul 28 07:02:41 EDT 2023 from 172.32.1.254 on ssh:notty
There was 1 failed login attempt since the last successful login.
Last login: Fri Jul 28 06:08:36 2023
[root@rockylinux9 ~]#
The root user is the administrative user in a Linux environment, and it has very broad privileges. Because of the heightened privileges of the root account, you are discouraged from using it on a regular basis. This is because part of the power inherent with the root account is the ability to make very destructive changes, even by accident.
As such, the next step is to set up an alternative user account with a reduced scope of influence for day-to-day work. This account will still be able to gain increased privileges when necessary.
Step 3: Creating a New User
Once you are logged in as root, you can create a new user account that you will use to log in from now on.
This example creates a new user called samm, but you should replace it with any username that you prefer:
[root@rockylinux9 ~]# adduser samm
Next, set a strong password for the samm user, you will be prompted to enter the password twice.
[root@rockylinux9 ~]# passwd samm
Changing password for user samm.
New password: [yourpassword]
Retype new password: [yourpassword]
passwd: all authentication tokens updated successfully.
Granting Administrative Privileges
Now, you have a new user account with regular account privileges. However, you may sometimes need to perform administrative tasks.
To avoid having to log out of your regular user and log back in as the root account, you can set up what is known as “superuser” or root privileges for your regular account. This will allow your regular user to run commands with administrative privileges by putting the word sudo before each command.
To add these privileges to your new user, you need to add the new user to the wheel group. By default, on Rocky Linux 9, users who belong to the wheel group are allowed to use the sudo command.
As root, run this command to add your new user to the wheel group :
[root@rockylinux9 ~]# usermod -aG wheel samm
Now, when logged in as your regular user, you can type sudo before commands to perform actions with superuser privileges.
Step 4: Secure SSH Access
Securing SSH access is paramount, as SSH is a common entry point for attackers. Modify the SSH configuration file to enhance security:
[root@rockylinux9 ~]# vi /etc/ssh/sshd_config
Consider implementing the following recommendations:
- Change Port: Consider changing the default SSH port to a non-standard port to evade automated attacks.
- Public Key Authentication: Use SSH key pairs for authentication instead of passwords. Disable password authentication to prevent brute-force attacks.
- PermitRootLogin: Set
PermitRootLogintonoto prevent root login via SSH.
After making changes, restart the SSH service:
[root@rockylinux9 ~]# systemctl restart sshd
Connecting With an SSH Key (From your Local Computer)
One of the most secure ways to connect to your server is to use an SSH Key. When you use an SSH Key, you can access the server without a password. In addition, you can completely turn off password access to the server by changing the password-related parameters in the sshd_config file.
When you create an SSH Key, there are two keys: Public and Private. The public key is uploaded to the server you want to connect to and the private key is stored on the computer using which you will establish the connection.
Create an SSH key with the ssh-keygen command on your computer.
If you leave it blank, you will only be able to access it with the SSH key file. However, if you set a password, you can prevent an attacker with the key file from accessing it.
As an example, you can create an SSH key in your local computer with the following command:
$ ssh-keygen -t rsa -b 4096 -C "samm-notebook"
You should then see the output similar to the following:
Generating public/private rsa key pair.
Enter file in which to save the key (/home/samm/.ssh/id_rsa):
Enter passphrase (empty for no passphrase):
Enter same passphrase again:
Your identification has been saved in /home/samm/.ssh/id_rsa
Your public key has been saved in /home/samm/.ssh/id_rsa.pub
The key fingerprint is:
SHA256:h0+7HmUG/uLfDdYsfgLVYTlWv5/f+tRWXOFEN1a0QuA samm-notebook
The key's randomart image is:
+---[RSA 4096]----+
|           ....BO|
|          . . +**|
|          .E .o+=|
|         o .  o.+|
|        S + +. .o|
|         + *.  o=|
|          = ..+.B|
|         . + +.*+|
|         .+.. +==|
+----[SHA256]-----+
Ensure that the ~/.ssh directory have the appropriate permissions set:
$ chmod -R go= ~/.ssh
You now have a public and private key in your computer/notebook that you can use to authenticate. The next step is to place the public key on your server so that you can use SSH-key-based authentication to log in.
Copying the Public Key to Your Rocky Linux Server
The quickest way to copy your public key to the Rocky Linux host is to use a utility called ssh-copy-id. Due to its simplicity, this method is highly recommended if available. If you do not have ssh-copy-id available to you on your client machine, you may use one of the two alternate methods provided in this section (copying via password-based SSH, or manually copying the key).
Copying the Public Key Using ssh-copy-id
The ssh-copy-id tool is included by default in many operating systems, so you may have it available on your local system. For this method to work, you must already have password-based SSH access to your server.
To use the utility, you specify the remote host that you would like to connect to, and the user account that you have password-based SSH access to. This is the account to which your public SSH key will be copied.
The syntax is:
$ ssh-copy-id [email protected]
You should then see the output similar to the following:
/usr/bin/ssh-copy-id: INFO: attempting to log in with the new key(s), to filter out any that are already installed
/usr/bin/ssh-copy-id: INFO: 1 key remain to be installed -- if you are prompted now it is to install the new keys

Number of key(s) added: 1

Now try logging into the machine, with:   "ssh '[email protected]'"
and check to make sure that only the key you wanted were added.
Step 5: Update and Upgrade
After installation, update the system to ensure you’re working with the latest software versions:
[samm@rockylinux9 ~]$ sudo dnf update
Upgrading the system guarantees that you have the latest security patches and bug fixes, contributing to a more secure environment.
Step 6: Implement a Firewall
Utilize the powerful firewall management tool, firewalld to control incoming and outgoing traffic:
[samm@rockylinux9 ~]$ sudo dnf install firewalld
[samm@rockylinux9 ~]$ sudo systemctl enable firewalld
[samm@rockylinux9 ~]$ sudo systemctl start firewalld
Configure the firewall to only allow necessary services and ports. For instance, if your server hosts a web application, open HTTP (80) and HTTPS (443) ports and allow essential services such as SSH (port 22) using the following commands:
[samm@rockylinux9 ~]$ sudo firewall-cmd --zone=public --add-service=ssh --permanent
[samm@rockylinux9 ~]$ sudo firewall-cmd --zone=public --add-service=http --permanent
[samm@rockylinux9 ~]$ sudo firewall-cmd --zone=public --add-service=https --permanent
[samm@rockylinux9 ~]$ sudo firewall-cmd --reload
Step 7: Install and Configure Fail2Ban
Fail2Ban is a valuable tool for preventing brute-force attacks by blocking malicious IPs. Install and configure it to monitor services like SSH:
[samm@rockylinux9 ~]$ sudo dnf install fail2ban sudo systemctl enable fail2ban
Create a custom configuration for SSH:
[samm@rockylinux9 ~]$ sudo cp /etc/fail2ban/jail.conf /etc/fail2ban/jail.local
[samm@rockylinux9 ~]$ sudo vi /etc/fail2ban/jail.local
Adjust the settings to suit your needs, and ensure that SSH jail is active:
[sshd]
enabled = true
After configuring, restart Fail2Ban:
[samm@rockylinux9 ~]$ sudo systemctl restart fail2ban
Step 8: Optimize Resource Usage
Efficiency is a key component of a well-configured server. Optimize your resources to ensure smooth performance:
- Swap Space: Set up swap space to prevent memory-related crashes. Use the
fallocatecommand to create a swap file:bashCopy code
[samm@rockylinux9 ~]$ sudo fallocate -l 1G /swapfile
[samm@rockylinux9 ~]$ sudo chmod 600 /swapfile
[samm@rockylinux9 ~]$ sudo mkswap /swapfile
[samm@rockylinux9 ~]$ sudo swapon /swapfile
- Monitoring Tools: Install monitoring tools like
htopto keep an eye on resource usage and identify potential bottlenecks.
Step 9: Install a Web Server (Optional)
If you intend to host web applications, consider installing a web server like Apache or Nginx. Configure the server to support secure connections with HTTPS through Let’s Encrypt.
Step 9: Regular Backups
No server setup is complete without a robust backup strategy. Implement regular backups to safeguard your data in case of unforeseen events.
Conclusion
An initial setup that prioritizes security and efficiency sets the tone for a successful server management experience. With Rocky Linux 9 as your foundation, following these steps will ensure that your server is secure against potential threats while delivering optimal performance.
Remember that security is an ongoing process, so keep your system updated and stay informed about the latest security practices. A well-configured server not only provides a secure environment but also empowers you to harness the full potential of your digital endeavors.
Also Read Our Other Guides :
- Initial Setup CentOS 7 Server: Secure and Efficient
- Initial Setup Ubuntu Server 22.04: Secure and Efficient
- Initial Setup Debian 11 Server: Secure and Efficient
- How To Set Up a Firewall Using FirewallD on Rocky Linux 9
- How To Install Rocky Linux 9.2 Server with Screenshots
Finally, now you have learned initial setup Rocky Linux 9 Server with secure and efficient.


