


In the digital age, speed and reliability are paramount for delivering an exceptional user experience. Amazon CloudFront, a content delivery network (CDN) offered by Amazon Web Services (AWS), empowers businesses to distribute content globally with low latency and high availability. This step-by-step guide will walk you through the process of how to create an AWS CloudFront distribution, enabling you to accelerate content delivery and enhance your website’s performance.
Table of contents
- Importance of Content Delivery
- Prerequisites for Creating AWS CloudFront
- Step-by-Step Guide to Creating AWS CloudFront
- Step 1: Sign in to AWS Console
- Step 2: Navigate to CloudFront Service
- Step 3: Create a CloudFront Distribution
- Step 4: Configure Distribution Settings
- Step 5: Configure Cache Behavior Settings
- Step 6: Configure Distribution Settings
- Step 7: Review and Create the Distribution
- Step 8: Integrate CloudFront with Your Content
- Step 9: Verifying CloudFront Setup
- Conclusion
Key features and characteristics of AWS CloudFront:
- Content Distribution: CloudFront caches copies of content at edge locations situated in various geographic regions worldwide. When a user requests the content, CloudFront serves it from the nearest edge location, reducing the round-trip time and improving the user experience.
- Low Latency: By serving content from edge locations, CloudFront reduces the time it takes to access data, resulting in lower latency and faster load times for users.
- High Data Transfer Speeds: AWS CloudFront leverages the global AWS network infrastructure, enabling it to deliver content at high data transfer speeds, regardless of the users’ geographic locations.
- Scalability: CloudFront can handle high volumes of traffic and scale automatically to meet demand, making it suitable for serving content to a vast number of users simultaneously.
- Security: CloudFront integrates with other AWS services, allowing you to enforce security measures such as AWS Web Application Firewall (WAF) to protect against common web threats and distribute content over HTTPS for secure communication.
- Origin Shield: CloudFront offers an optional feature called Origin Shield, which helps reduce the load on the origin server by caching content at a central location (the Origin Shield) before distributing it to edge locations.
- Real-time Logs and Reporting: CloudFront provides detailed logs and reporting, allowing you to monitor usage, analyze performance, and gain insights into your content delivery.
Importance of Content Delivery
In today’s fast-paced digital landscape, user expectations for quick and seamless web experiences have never been higher. Delivering content promptly and efficiently is crucial to retaining users and driving engagement. AWS CloudFront steps in as a powerful tool to ensure swift content delivery, regardless of a user’s geographic location. This translates to improved website performance, reduced bounce rates, and enhanced search engine rankings.
Prerequisites for Creating AWS CloudFront
Before we delve into the creation process, ensure you’re prepared for setting up AWS CloudFront:
To create AWS CloudFront and streamline content delivery, you’ll need:
- Amazon Web Services Account: Sign up for an AWS account if you haven’t already. This will grant you access to the AWS Management Console.
- Origin Server or S3 Bucket: CloudFront requires a source from which to deliver content. This could be an S3 bucket, an EC2 instance, or another HTTP server.
- Amazon Route 53 (Optional): For custom domain name configuration, you might want to use Amazon Route 53, AWS’s scalable domain name system (DNS) web service.
Step-by-Step Guide to Creating AWS CloudFront
Let’s dive into the process of create AWS CloudFront distribution:
- Sign In to AWS Console: Log in to your AWS Management Console using your credentials.
- Navigate to CloudFront: Locate the CloudFront service from the “Services” dropdown or by searching for it.
- Create Distribution: Click on the “Create Distribution” button to initiate the setup process.
- Choose Distribution Type: You’ll be prompted to select between a web distribution (for websites) and a RTMP distribution (for media streaming). Choose the appropriate option.
- Configure Distribution Settings: Fill in details such as the origin settings, default cache behavior, and distribution settings. These settings determine how CloudFront handles content delivery and caching.
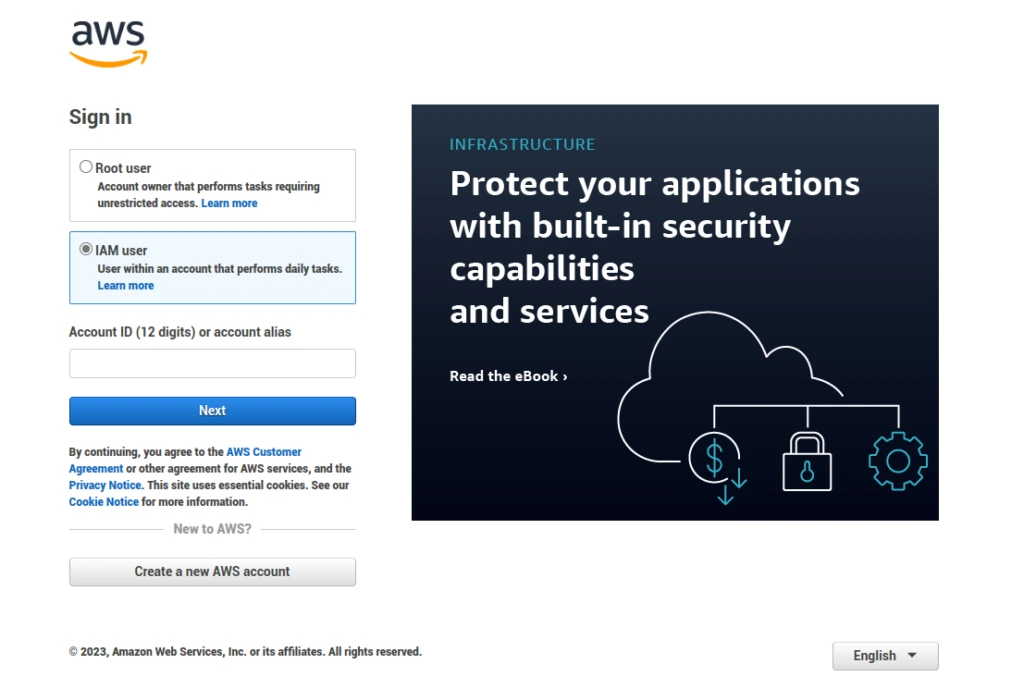
Step 1: Sign in to AWS Console
Visit the AWS Management Console at https://console.aws.amazon.com and sign in with your AWS account credentials. If you don’t have an account, you will need to create one before proceeding.
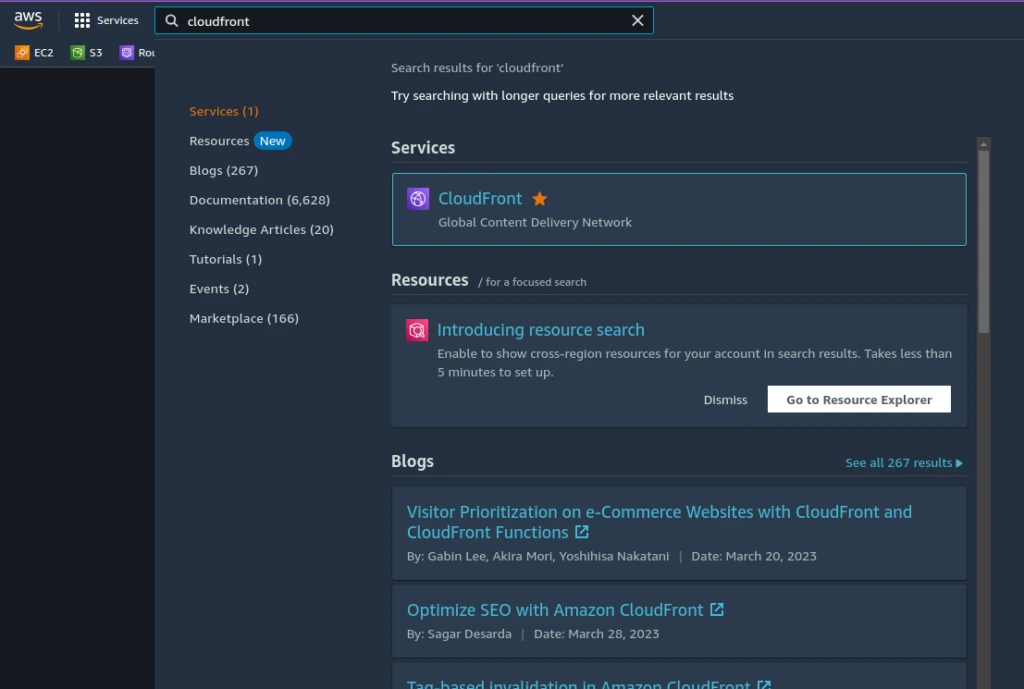
Step 2: Navigate to CloudFront Service
Once you’re logged in, navigate to the CloudFront service by selecting “CloudFront” from the list of available services. This is where you will create and manage your CloudFront distributions.

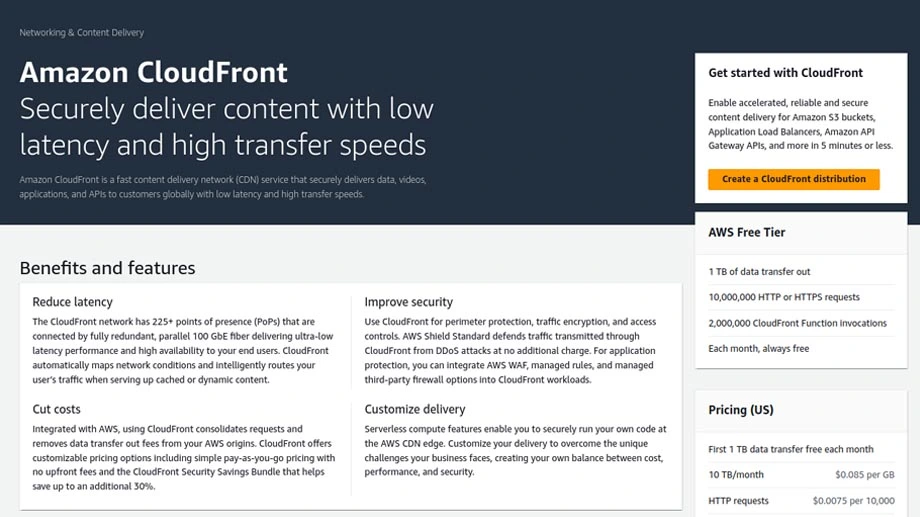
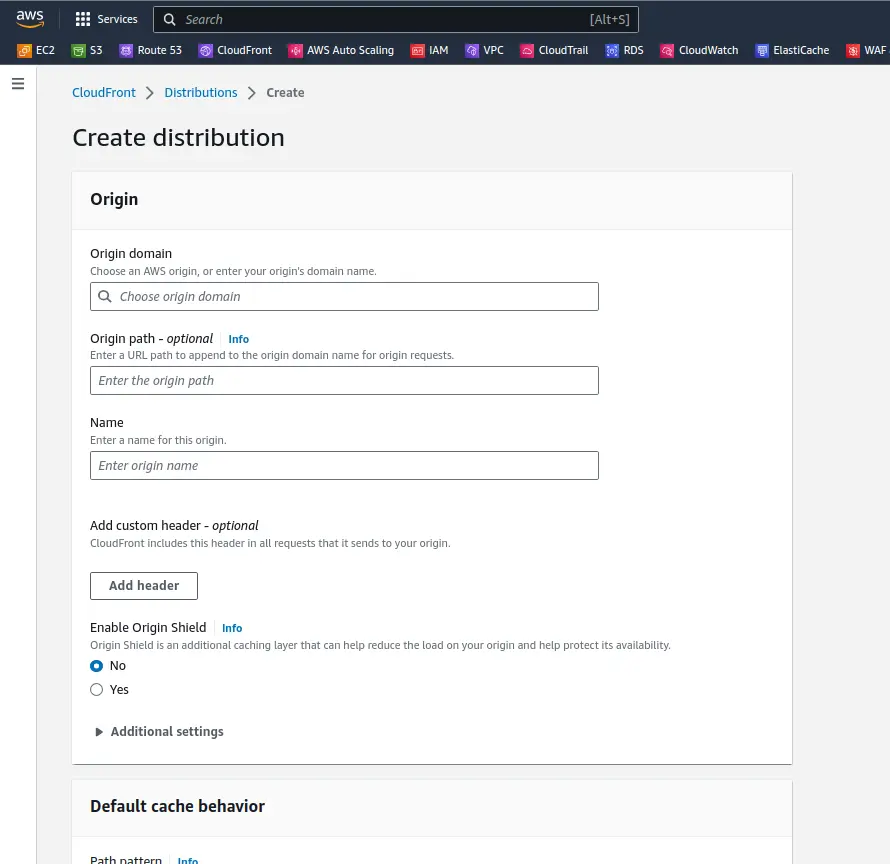
Step 3: Create a CloudFront Distribution
To create AWS CloudFront, go to CloudFront dashboard, click on the “Create Distribution” button to begin the process of creating a CloudFront distribution. You have two options: Web or RTMP. Choose the Web option if you want to deliver HTTP or HTTPS content.
Step 4: Configure Distribution Settings
In the distribution settings screen, configure the necessary settings for your CloudFront distribution. Enter the origin domain name, which can be an Amazon S3 bucket, ELB, an EC2 instance, or a custom origin server. Choose whether to enable HTTP or HTTPS support and specify the default root object if needed.
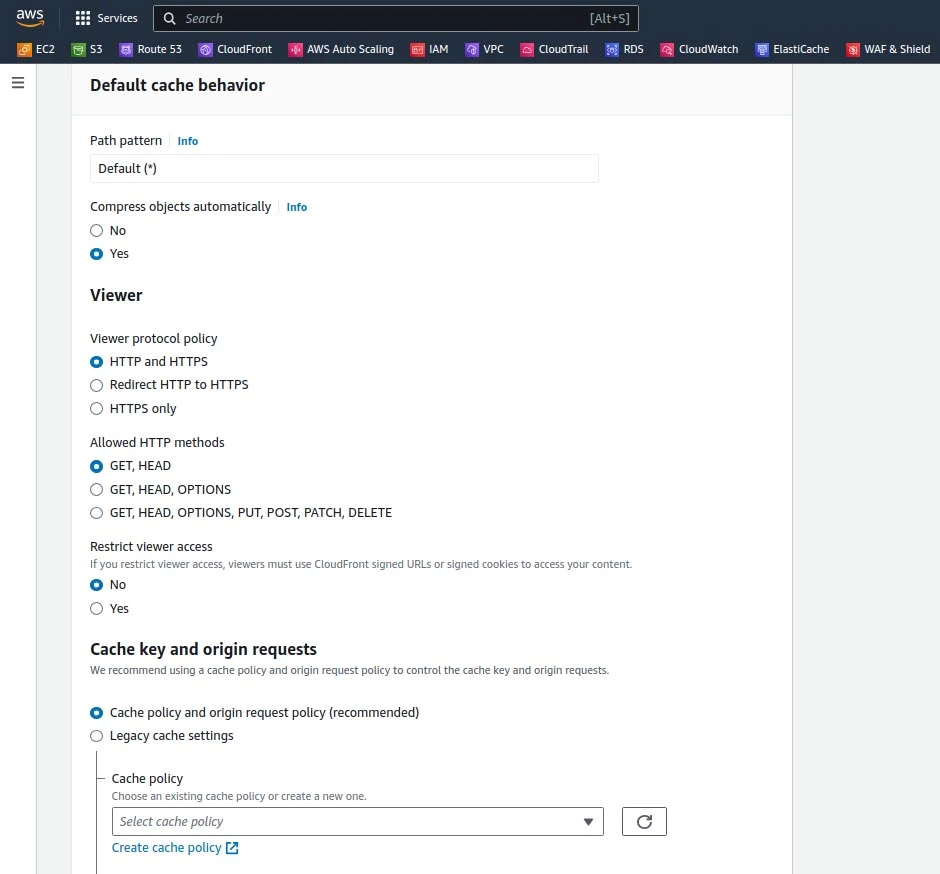
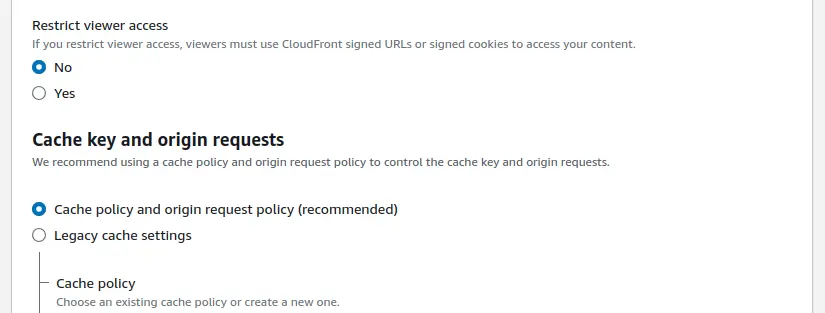
Step 5: Configure Cache Behavior Settings
In this step, you can define cache behaviors for different paths of your content. You can set the caching behavior, TTL (time to live), and other parameters based on your requirements. You can also specify whether to forward query strings or cookies to the origin server.
Step 6: Configure Distribution Settings
In the distribution settings screen, you can further configure advanced options such as logging, restrictions, and error pages. You can enable access logging to capture detailed logs of the requests, set up geo-restriction to restrict access based on geographic locations, and customize error responses.
Configuring CloudFront for Optimal Performance
To ensure that CloudFront is optimized for performance:
- Configure Caching Settings: Adjust caching behaviors based on your content’s characteristics. For static assets, you might want to enable longer cache durations, while dynamic content should have shorter durations.
- Enable Compression: Enable the Gzip or Brotli compression option to further reduce content sizes, enhancing delivery speed.
- Geo-Restriction (Optional): If you wish to restrict content access to specific geographic regions, configure geo-restriction settings.
Step 7: Review and Create the Distribution
Review the distribution settings to ensure all configurations are correct. Verify the origin domain name, cache behaviors, and other options. If everything looks good, click “Create Distribution” to create your CloudFront distribution.
Step 8: Integrate CloudFront with Your Content
Once your distribution is created and deployed, you can integrate it with your content by updating your DNS settings or using the CloudFront domain name directly. You can use the CloudFront domain name as the endpoint for your content, and CloudFront will handle the distribution to users globally.
Step 9: Verifying CloudFront Setup
After configuring CloudFront, it’s essential to verify its successful setup:
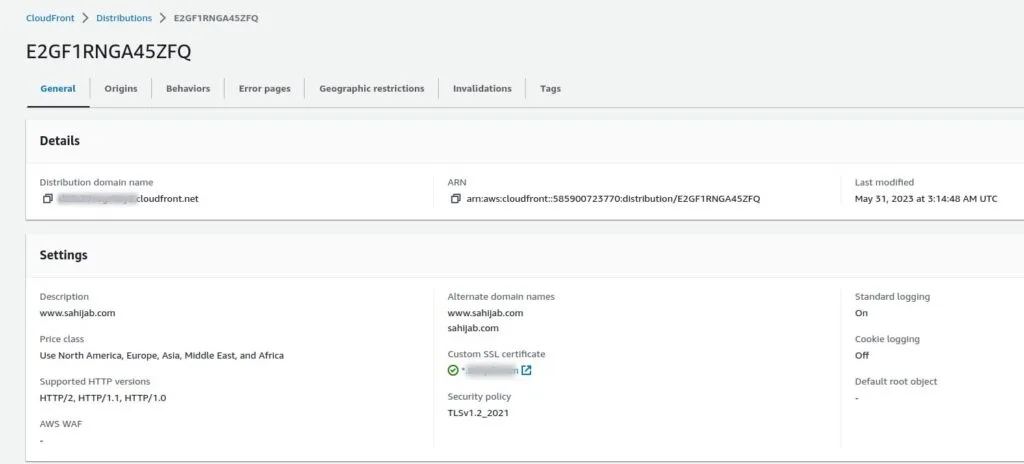
- Distribution Status: Monitor the distribution’s status within the AWS Management Console. It should display as “Deployed” once it’s fully functional.
- Testing Content Delivery: Test the content delivery by accessing your website or application through the CloudFront URL. Observe improved loading times and reduced latency.
Conclusion
Creating an AWS CloudFront distribution allows you to accelerate the delivery of your content to users worldwide with high performance and low latency. In this step-by-step guide, we have covered the process of creating a CloudFront distribution, configuring its settings, and integrating it with your content. By following these steps, you can leverage the power of AWS CloudFront to enhance the user experience and improve the performance of your web applications. Explore the various features and capabilities of CloudFront to optimize content delivery for your specific use cases.
Also Read Our Other Guides :
- How To Install Python 3.11 from Source on Ubuntu 22.04
- How To Install Varnish Cache for Nginx on Rocky Linux 9
- How To Install and Config Thumbor on Debian 10
- Install and Configure Docker Swarm Mode on Centos 7
- How To Install Docker CE on Centos 7
- How To Install and Use Docker Compose on Centos 7
Finally, now you have learned how to Creating an AWS CloudFront distribution.