


Introduction
In the ever-evolving world of Search Engine Optimization (SEO), ensuring fast and accurate search capabilities on your website is crucial. Apache Solr, a robust and open-source search platform, has proven to be an effective tool in enhancing user experience and boosting SEO efforts. This article will walk you through a step-by-step process of installing Apache Solr 9.1 on Debian 11, empowering you to optimize your website’s search functionality.
Table of Contents
Key Features Solr
Here are some key features and concepts related to Apache Solr:
- Full-Text Search: Solr supports full-text search, enabling you to search for keywords or phrases across large collections of documents or data. It provides advanced text analysis, tokenization, stemming, and ranking algorithms to improve search accuracy and relevance.
- Indexing and Document Management: Solr allows you to index structured and unstructured data, including documents, web pages, database records, and more. It provides flexible indexing options and powerful document management capabilities, including schema definition, field types, and dynamic fields.
- RESTful API: Solr provides a RESTful API, making it easy to interact with the search platform programmatically. You can send requests, perform queries, and manage indexes using HTTP methods and JSON/XML responses.
Apache Solr is widely adopted by organizations for its robust search capabilities, scalability, and flexibility. It is supported by a large and active community, which contributes to its ongoing development and provides resources for support and learning.
Prerequisites Install Solr 9.1 on Debian 11
Before we dive into the installation process, there is prerequisite you need to ensure are in place:
- Debian 11 : Make sure you have a clean installation of Debian 11. To set this up, follow our guide Initial Setup Debian 11 Server: Secure and Efficient. You can deploy this on a physical machine or a virtual environment like VMware or VirtualBox.
Installing Solr 9.1 on Debian 11
Follow the next steps to install Solr 9.0 on your latest Debian Servers
Step 1: System Update
Before diving into the installation process, it’s essential to ensure your Debian 11 system is up-to-date. Open a terminal and run the following commands:
samm@solr:~$ sudo apt-get update
samm@solr:~$ sudo apt-get upgrade
Step 2: Install Required Packages
Apache Solr requires Java to run. Install OpenJDK 11, a recommended version, using the following command:
samm@solr:~$ sudo apt install default-jdk gnupg2 apt-transport-https wget -y
Check the installed java version
samm@solr:~$ java -version
openjdk version "11.0.16" 2022-07-19
OpenJDK Runtime Environment (build 11.0.16+8-post-Debian-1deb11u1)
OpenJDK 64-Bit Server VM (build 11.0.16+8-post-Debian-1deb11u1, mixed mode, sharing)
Step 3: Install Solr 9.1 on Debian 11
After successfully installing the required packages, proceed to navigate to the Apache Solr official download page to obtain the URL for the latest version. Once you’re there, in your terminal, employ ‘wget’ to initiate the download of the package.
samm@solr:~$ wget https://dlcdn.apache.org/solr/solr/9.1.0/solr-9.1.0.tgz
Now extract the Apache Solr service installer shell script from the downloaded Solr archive file and run the installer using the following commands.
samm@solr:~$ tar xzf solr-9.1.0.tgz solr-9.1.0/bin/install_solr_service.sh --strip-components=2

samm@solr:~$ sudo bash ./install_solr_service.sh solr-9.1.0.tgz
id: ‘solr’: no such user
Creating new user: solr
Adding system user `solr' (UID 112) ...
Adding new group `solr' (GID 115) ...
Adding new user `solr' (UID 112) with group `solr' ...
Creating home directory `/var/solr' ...

Extracting solr-9.1.0.tgz to /opt
Installing symlink /opt/solr -> /opt/solr-9.1.0 ...
Installing /etc/init.d/solr script ...
Installing /etc/default/solr.in.sh ...

Service solr installed.
Customize Solr startup configuration in /etc/default/solr.in.sh
Step 4: Manage Solr Service
samm@solr:~$ sudo systemctl enable solr
samm@solr:~$ sudo systemctl start solr

samm@solr:~$ sudo systemctl status solr

● solr.service - LSB: Controls Apache Solr as a Service
     Loaded: loaded (/etc/init.d/solr; generated)
     Active: active (exited) since Sat 2022-12-24 16:41:06 WIB; 5s ago
       Docs: man:systemd-sysv-generator(8)
    Process: 5608 ExecStart=/etc/init.d/solr start (code=exited, status=0/SUCCESS)
        CPU: 6ms

Dec 24 16:41:01 solr systemd[1]: Starting LSB: Controls Apache Solr as a Service...
Dec 24 16:41:01 solr su[5610]: (to solr) root on none
Dec 24 16:41:01 solr su[5610]: pam_unix(su-l:session): session opened for user solr(uid=112) by (uid=0)
Dec 24 16:41:05 solr solr[5685]: Started Solr server on port 8983 (pid=5677). Happy searching!
Dec 24 16:41:06 solr systemd[1]: Started LSB: Controls Apache Solr as a Service.
Step 5: Create First Solr Core (Collection)
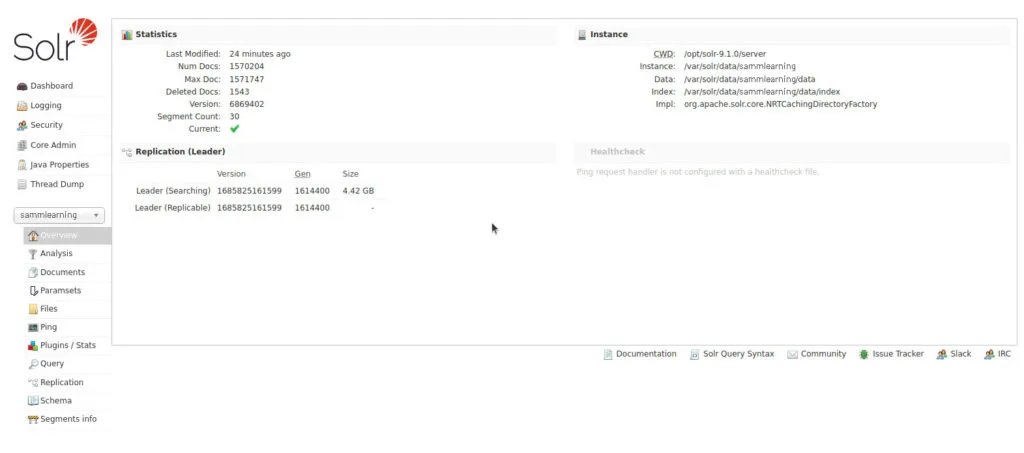
A core serves as a fundamental unit of Solr, encompassing both the configuration and data tailored for a specific index. Now, let’s proceed to create a core and name it ‘sammlinux’. Create the first collection in Apache Solr using the following command.
samm@solr:~$ sudo su - solr -c "/opt/solr/bin/solr create -c sammlinux"
Sample output:
Created new core 'sammlinux'
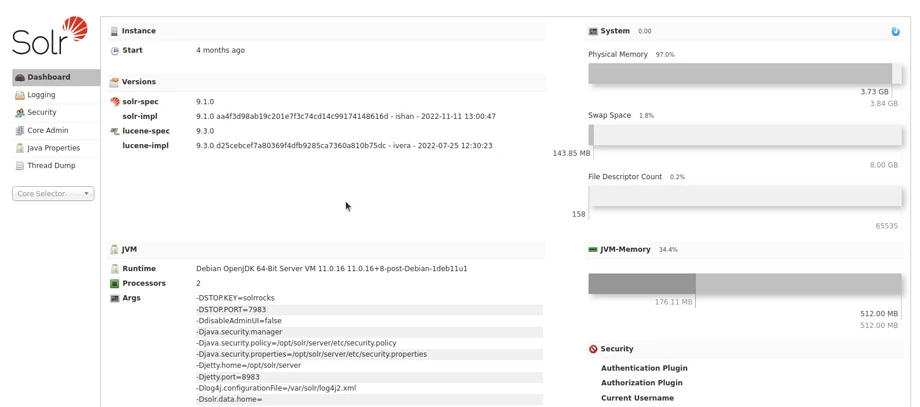
Step 6: Access Solr Admin Panel
By default, Solr runs on port 8983. Upon accessing the Solr port in your web browser, you’ll be directed to a Solr dashboard where you can explore its features and functionalities.
http://you-domain-solr:8983/
Here, you can review the statistics of the collection you created in the previous steps, named ‘sammlinux’. To do this, simply click on the ‘Core Selector’ located in the left sidebar, and then choose the collection you’ve created.
Step 7: Indexing Data
To make the most of Solr’s search capabilities, you need to index your website’s data. Use Solr’s Data Import Handler (DIH) or APIs to populate the index.
Step 8: Integrate Solr with Your Website
Transitioning to the integration phase, connect Solr seamlessly with your website’s search functionality by utilizing either Solr’s RESTful APIs or the client libraries accessible in a range of programming languages.
Step 9: Monitor and Optimize
As you proceed, make sure to consistently monitor your Solr instance to maintain peak performance. Make effective use of Solr’s inherent metrics and monitoring tools. Additionally, contemplate the integration of caching mechanisms and query optimization strategies to enhance search speed.
Conclusion
Incorporating Apache Solr 9.1 into your Debian 11 environment can significantly enhance your website’s search functionality. By following this comprehensive guide, you’ve successfully installed, configured, and integrated Solr, empowering you to take control of your website’s search capabilities. Stay proactive in monitoring and optimizing your Solr instance to reap the full benefits of this powerful search platform.
Congratulations! you have successfully installed Apache Solr on Debian 11. You can now create your own search application using Apache Solr. For more information, visit the Apache Solr documentation.
Also Read Our Other Guides :
- How To Install MySQL 8.0 on Debian 11
- How To Install and Config Thumbor on Debian 10
- How To Install Redis on Debian 11 Server
- How To Install and Setup Node.js on Debian 11
Finally, now you have learned how to install Apache Solr 9.1 on Debian 11.


