
Introduction
In the modern era of remote work and collaboration, tools like TeamViewer have become indispensable for connecting to and controlling computers remotely. Ubuntu 22.04, the latest iteration of the popular Linux distribution, offers seamless compatibility with TeamViewer, making it easy to set up and utilize remote desktop capabilities. In this comprehensive guide, we’ll walk you through the process of how to install and use TeamViewer on Ubuntu 22.04 to establish remote connections effectively.
Table of Contents
With TeamViewer, users can share their screens, transfer files, and communicate through chat or video calls while remotely controlling another device. It is widely used for various purposes, such as remote troubleshooting, online meetings and presentations, file sharing, and collaboration among team members.
TeamViewer uses a secure connection to ensure data privacy and employs encryption techniques to protect the transferred information. It supports cross-platform connectivity, enabling users to connect between different operating systems like Windows, macOS, Linux, iOS, and Android.
Overall, TeamViewer provides a convenient and efficient way for individuals and businesses to access and control computers remotely, making it useful for technical support, remote work, and collaboration.
TeamViewer Features
- User and device management
- Software integrations
- Session features
- Remote and Admin support
- Recording sessions
- Multi-platform access
- Detailed reports
- Management console
- Support ticket managemen
- Connection speed control
Install TeamViewer on Ubuntu 22.04
This article will cover 2 (two) methods to install TeamViewer:
- Install TeamViewer from the .deb Package
- Install TeamViewer Via Repository
To install of TeamViewer on the Ubuntu system, follow the step-by-step procedure given below.
A. Install TeamViewer from the .deb Package
You can install the latest version of TeamViewer from the official website. The website lets you download the .deb package.
After you go to the website, select Linux, and you can see the .deb packages on the bottom left side of the window.

Step 1: Download TeamViewer deb file
You can install it via the command line or Debian package installer like Gdebi. Firstly, we will use the wget command to install TeamViewer.
Right-click on the .deb package and select the option Copy Link. Next, use the link with the wget command in the terminal.
$ wget https://download.teamviewer.com/download/linux/teamviewer_amd64.deb
Step 2: Installing TeamViewer
Next, use the apt command to install TeamViewer. Make sure to run the following command from the directory where the .deb file was installed.
$ sudo apt install -y ./teamviewer_amd64.deb
After executing the command, you’ll see a prompt to enter your password. Enter your password, and then the above command will install TeamViewer’s latest version in your Ubuntu 22.04.
If you aren’t familiar with the terminal, you can download the package by clicking on the .deb package. Next, you can open the package with Gdebi, a Debian package installer. Alternatively, you can choose the Save File option and open the downloaded package with Gdebi.
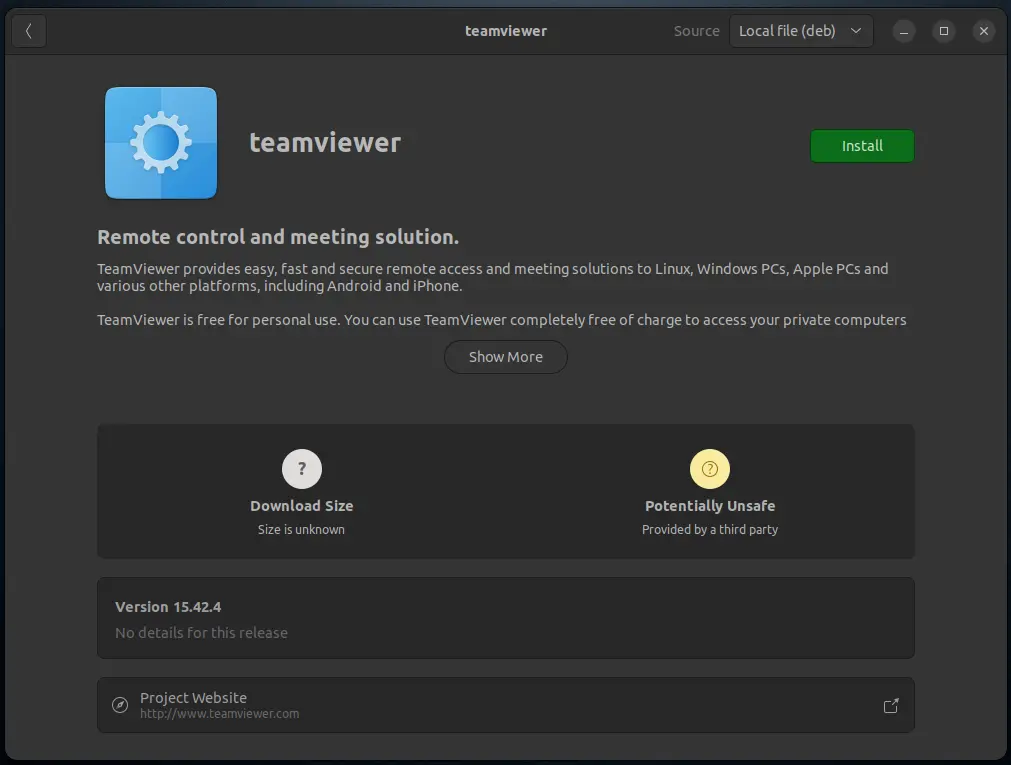
After that, click the Install button to install TeamViewer.
B. Install TeamViewer Via Repository
To install TeamViewer in Ubuntu via the TeamViewer repository, we need to update our system repositories first using the following command:
Step 1: Update and Upgrade packages
Before proceeding with the installation, ensure that your Ubuntu 22.04 system is up to date. Open a terminal and enter the following commands:
$ sudo apt-get update -y && sudo apt-get upgrade -y
Step 2: Install Required Packages
After updating the system repositories, execute the following command to install the required packages for TeamViewer:
$ sudo apt install wget apt-transport-https gnupg2 -y
Once the related processes are complete, we’ll need to import the GPG key of TeamViewer. We’ll do this using the wget command.
$ wget -O- https://download.teamviewer.com/download/linux/signature/TeamViewer2017.asc | gpg --dearmor | sudo tee /usr/share/keyrings/teamview.gpg
After that, next step: adding the TeamViewer repository to our Ubuntu 22.04.
$ echo "deb [arch=amd64 signed-by=/usr/share/keyrings/teamview.gpg] http://linux.teamviewer.com/deb stable main" | sudo tee /etc/apt/sources.list.d/teamviewer.list
Step 3: Installing TeamViewer
Finally, execute the command below to install TeamViewer on your Ubuntu 22.04 :
$ sudo apt -y install teamviewer
How to use TeamViewer on Ubuntu 22.04
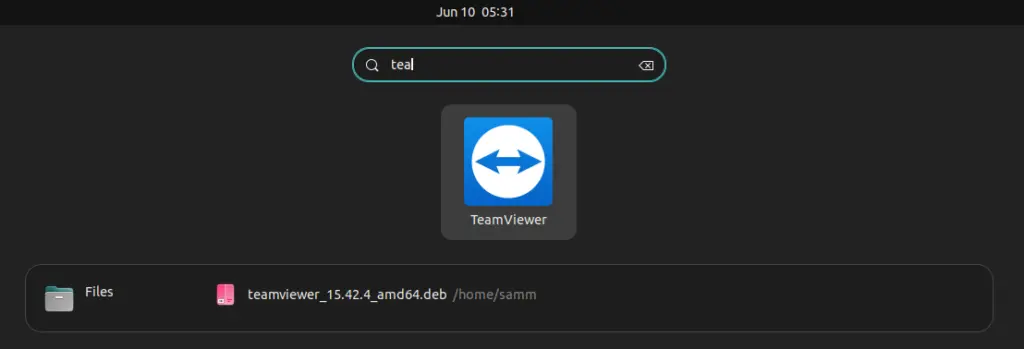
To launch TeamViewer, click on “Activities” on the left side of the desktop, search for “TeamViewer” in the search bar, and such an icon will appear. Click on it to open it.
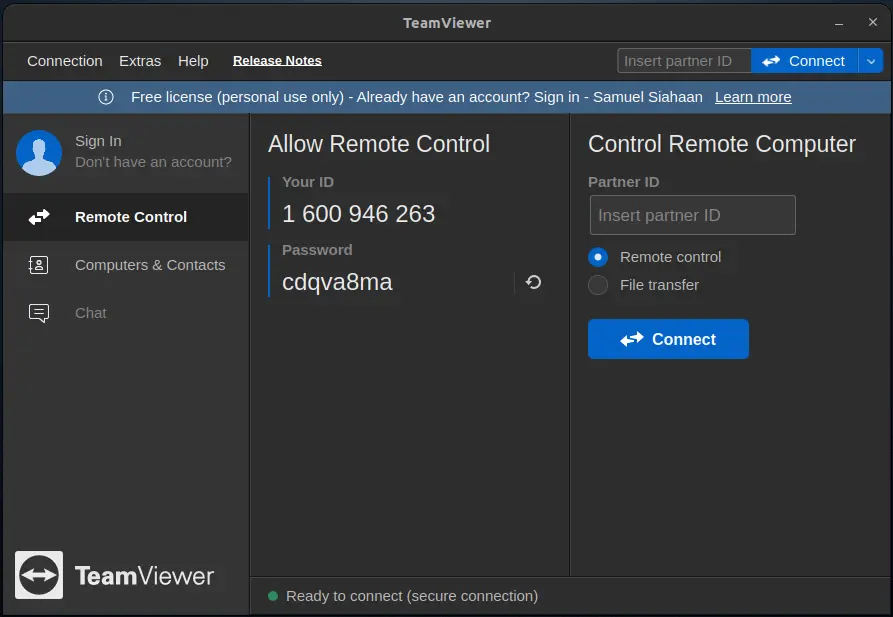
TeamViewer will then open in the following view, through which you can connect or be connected to a remote PC.
After successfully installing TeamViewer, you can start using it to establish remote connections:
- Launch TeamViewer: You can find TeamViewer in your application menu. Search for “TeamViewer” and click on the icon to launch the application.
- Accept the License Agreement: Upon launching TeamViewer for the first time, you’ll need to accept the license agreement.
- Set Up Unattended Access (Optional): TeamViewer allows you to set up unattended access to your computer, enabling you to connect to it even when you’re not physically present. This is useful for tasks like remote server management. To set up unattended access, follow the prompts provided by TeamViewer.
- Establish a Remote Connection: To initiate a remote connection, you’ll need the TeamViewer ID and password of the target computer. If you’re connecting to another computer, ask the remote user to provide you with these credentials.
- Connecting to a Remote Computer: In the TeamViewer interface, enter the remote computer’s TeamViewer ID in the “Partner ID” field. If required, enter the remote computer’s password. Then, click the “Connect” button.
- Authentication and Remote Control: The remote user will need to grant permission for the connection. Once permission is granted, you’ll gain access to the remote computer’s desktop. You can now control the remote computer as if you were sitting in front of it.
Security Considerations
While TeamViewer offers robust security features, it’s essential to follow best practices to ensure the safety of your remote connections:
- Use Strong Passwords: Choose strong, unique passwords for your TeamViewer account and any unattended access setups.
- Enable Two-Factor Authentication (2FA): TeamViewer supports two-factor authentication, which adds an extra layer of security to your account.
- Keep Software Updated: Regularly update TeamViewer and your Ubuntu system to ensure you’re benefiting from the latest security patches.
- Use Reliable Networks: Connect to TeamViewer from secure and trusted networks to prevent unauthorized access.
Conclusion
Installing and using TeamViewer on Ubuntu 22.04 is a straightforward process that empowers you to establish remote connections for both personal and professional purposes. With its user-friendly interface and cross-platform compatibility, TeamViewer enhances your ability to collaborate, troubleshoot, and manage systems from a distance. Remember to prioritize security by following best practices, and you’ll unlock the full potential of TeamViewer’s remote desktop capabilities on your Ubuntu 22.04 system.
Also Read Our Other Guides :
- How To Install Java Using OpenJDK 17 on Ubuntu 22.04
- How To Install Jenkins on Ubuntu 22.04
- How To Install Vagrant on Ubuntu 22.04
- How To Install VirtualBox 7.0 on Ubuntu 22.04
Finally, now you have learned how to Install and use TeamViewer on Ubuntu 22.04.