Rocky Linux 9 is a robust and secure Linux distribution widely recognized for its reliability and stability. If you’re planning to set up a server with Rocky Linux 9.2, this comprehensive guide will take you through the installation process step by step of how to install Rocky Linux 9.2 Server with screenshots. Don’t worry if you’re new to server configuration; we’ve included screenshots to make the journey smoother.
[Important Notice]
The support lifecycle for Rocky Linux typically spans ten years. Rocky Linux 9, released on July 14, 2022, will remain supported until May 31, 2032. Version 9.2 introduces several noteworthy updates and changes. In the following section, I will exclusively highlight the key features of the most recent Rocky Linux versions. Nevertheless, you can access the complete release notes here.
New Features and Changes
- An aarch64 kernel with a 64kb page size is now available via the package kernel-64k
- nfsrahead, a tool to configure the readahead for NFS mounts, was added
- Intel Arc GPU support was added
- The infamous Flatpak bug that breaks all fonts in applications using the default font (Cantarell) has been fixed
- Wireguard once again works with SELinux enabled
Table of Contents
- New Features and Changes
- Getting Started Install Rocky Linux 9.2 Server
- Conclusion
Getting Started Install Rocky Linux 9.2 Server
Before we dive in installing Rocky Linux 9.2, make sure you have the following ready:
- A computer or server where you want to install Rocky Linux 9.2. (Minimun HDD : 20GB, RAM : 4GB, System Type : 64-bit x86 System)
- A bootable USB drive or installation CD with Rocky Linux 9.2.
- An internet connection is recommended for updates during installation.
Step 1: Download The Latest Rocky Linux 9.2
For installing Rocky Linux 9 you can obtain a minimal ISO image of Rocky Linux 9.2 by downloading it from the Official Rocky Linux download page. The minimal ISO file measures approximately 1.6GB in size, so it’s crucial to ensure that you possess a fast and dependable internet connection and have ample disk space on your system.
Step 2: Booting from the Installation Media
First and foremost, insert your bootable USB drive or installation CD into your computer’s drive. Then, restart your system. Furthermore, be sure to set your system to boot from the installation media.
- As your computer boots up, you may see a message like “Press any key to boot from CD or DVD.” Go ahead and press any key.
- Moreover, if your system doesn’t automatically boot from the installation media, you’ll need to enter the BIOS settings. Typically, you can access the BIOS by pressing the “F2” or “Del” key during the boot process. Navigate to the “Boot” menu and select the installation media as your boot device.
- However, different computers may have slightly different BIOS interfaces, so consult your computer’s manual if you’re unsure about accessing the BIOS.
Step 3: Rocky Linux 9.2 Installation Screen
Once your system boots from the installation media, you’ll be greeted by the Rocky Linux 9 installation screen. Here, you’ll be presented with several options:
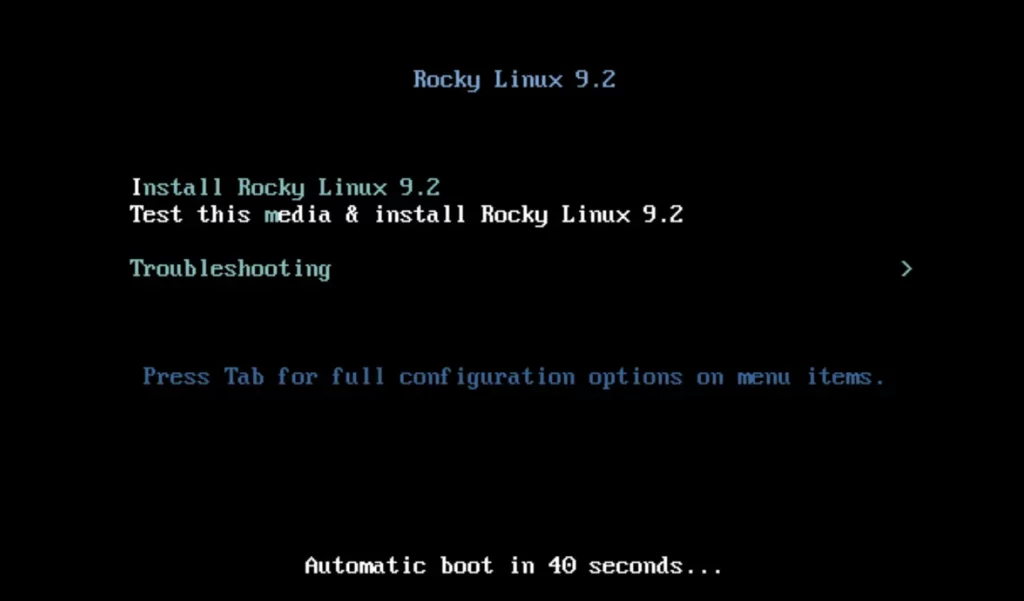
- Install Rocky Linux 9.2
- Test this media & install Rocky Linux 9.2
- Troubleshooting
Select “Install Rocky Linux 9.2” to start the installation process.
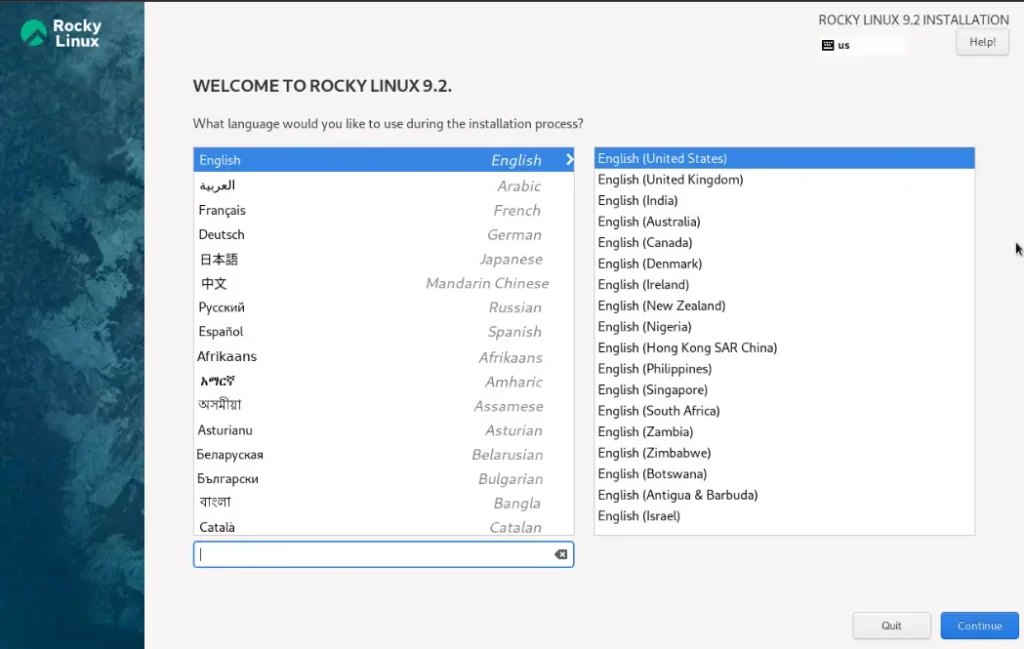
Once the installer is started, the Rocky Linux 9.2 Welcome page will be displayed, and the first course of action is to select the installation language. So, choose your preferred language and click ‘Continue’.
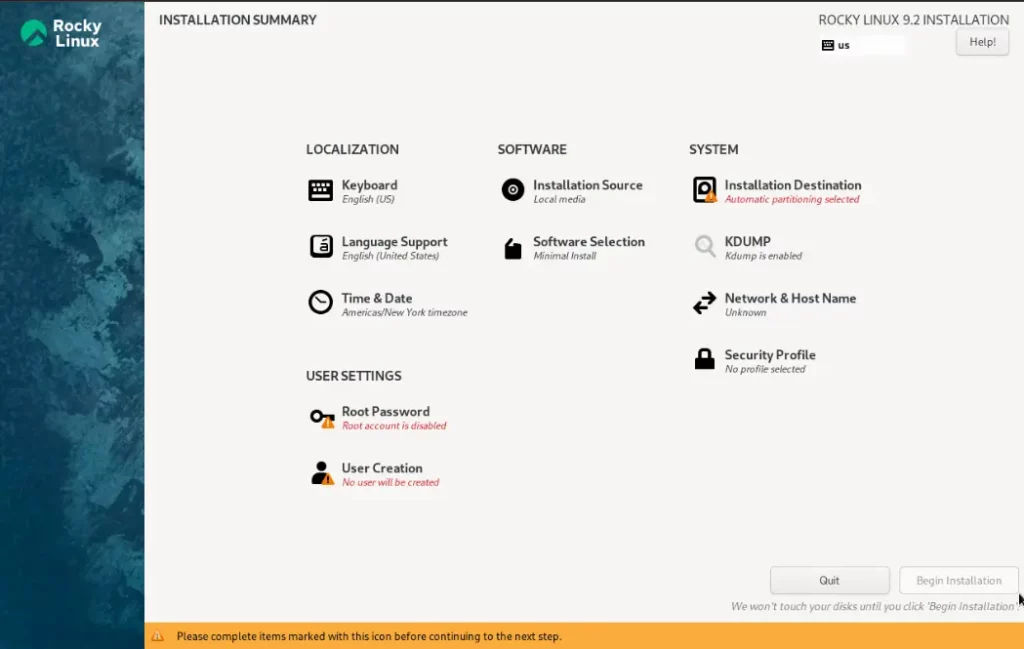
Step 4: Installation Summary
In this step, we will get the following initial installation summary. To begin the installation, first we must complete marked items like ‘Installation Destination’ and ‘User settings’.
Here you are able to customize the installation according to your needs.
- System (Installation Destination)
- Activate Root Password
- Create a local user
- Date & Time
- Software Selection
- Kdump
- Network & Host Name
- Security Policy
Language and Keyboard Settings
Next, you’ll be prompted to select your preferred language and keyboard layout. Choose the options that suit your preferences. On the other hand, if you’re not sure, you can go with the default settings for a typical installation.
Time and Date Settings
Select your timezone and ensure the system clock is set correctly. By default, the installer auto-detects your region and corresponding timezone if your server is connected to the internet.
Kdump
Now, let’s explore Kdump. By default, Kdump is enabled, and it is advisable to keep it enabled for diagnosing kernel-level crashes. To disable it, click on the option and uncheck the box. For further information on Kdump, you can click here.
Root Password
Set a strong password for the root user. This is a crucial step in ensuring the security of your system.
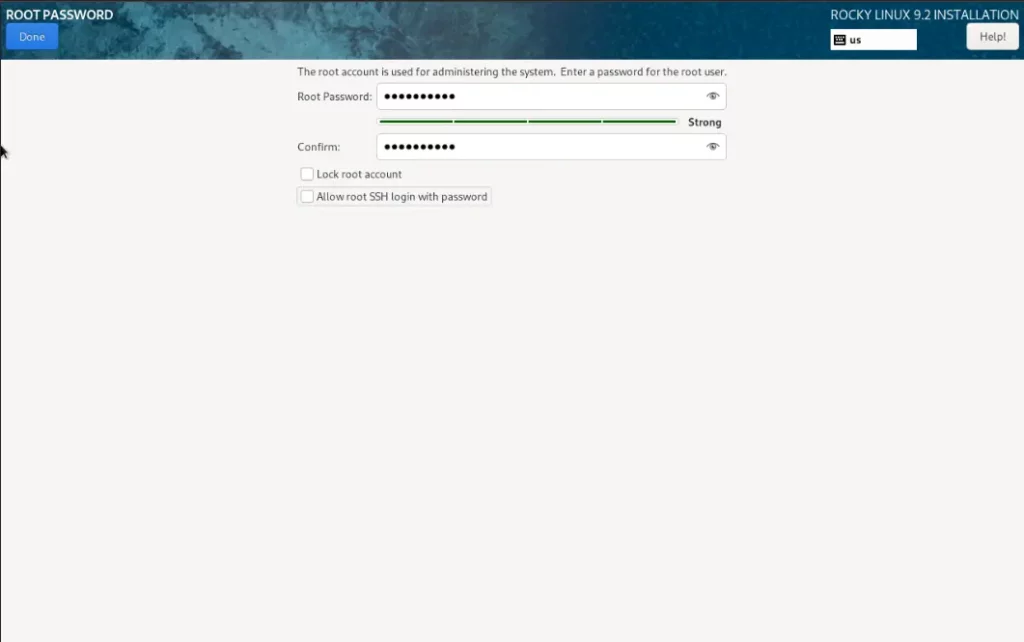
Once you’ve entered your root password, click “Done”.
User Creation
While the installation is ongoing, you can create a user account. This account will allow you to log in to your Rocky Linux system once the installation is complete. Creating a regular user account provides an additional layer of security and is recommended for daily use.
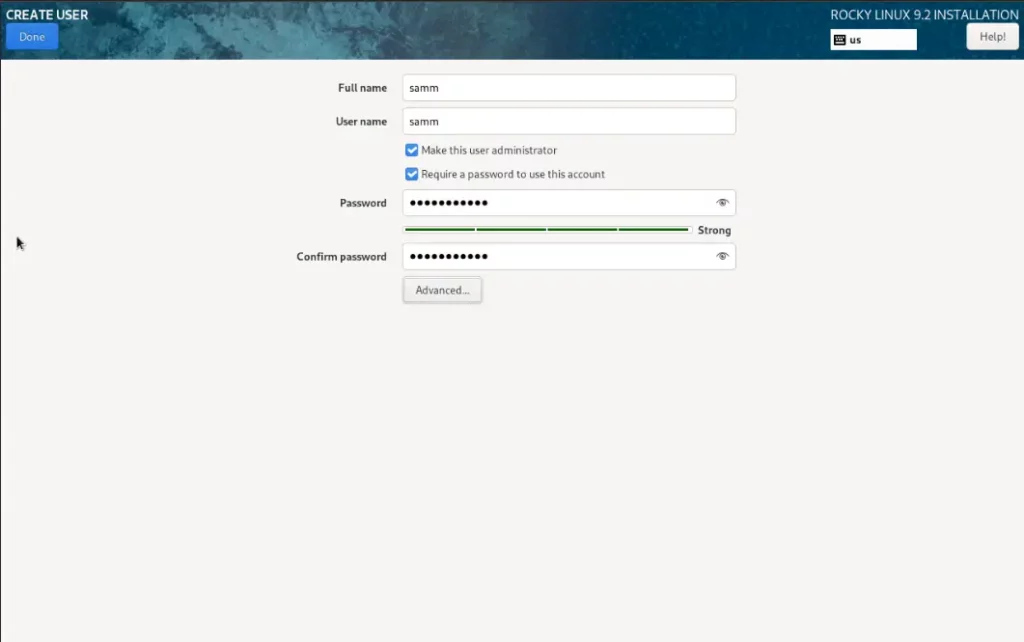
Once you’ve created your user and password, click “Done”.
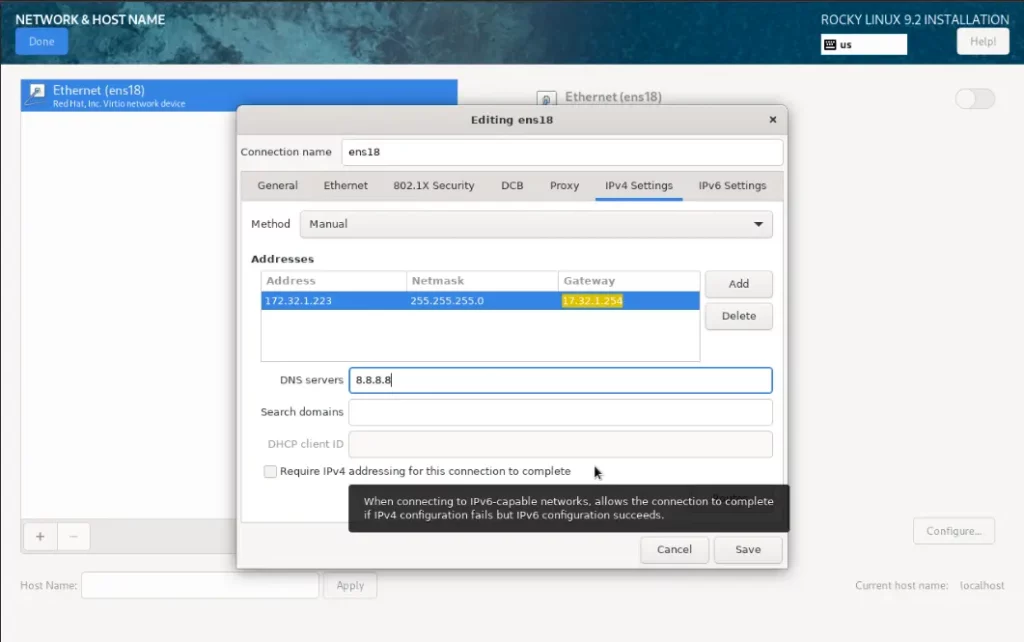
Network Configuration
Configure your network settings, such as setting a hostname and enabling or disabling network interfaces. Connect your system to the internet by configuring your network settings. If you’re unsure, the automatic DHCP setting usually works well for most users.
Disk Configuration/ Partitioning
Installing Rocky Linux 9 now comes a crucial step – disk partitioning. This is where you decide how Rocky Linux 9.2 will be installed on your system. You have a few options here:
- Automatically configure partitioning: This option lets Rocky Linux set up the partitions for you. It’s the easiest choice for most users. Just click “Done” after reviewing the proposed partitioning.
- Create custom partition layout: If you’re an advanced user or have specific partitioning requirements, choose this option. You can manually configure the partitions as needed.
- Subsequently, review and confirm your partitioning choices before proceeding.
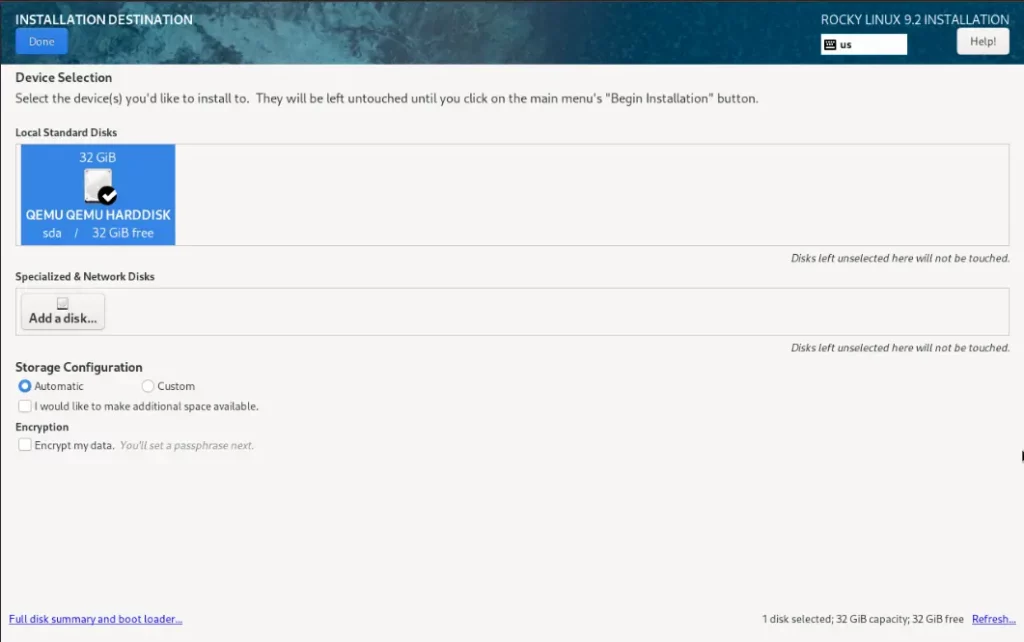
In the ‘Local Standard Disks’ section, you’ll find your hard disk drive listed. For the purposes of this guide, we are working with a 32GB hard drive. Ensure that you click on the hard drive icon to mark it with a black check mark.
As previously mentioned, the default partitioning scheme is configured as Automatic. This choice is particularly suitable for beginners in Linux or individuals who are unfamiliar with manual hard drive partitioning. This option automates and intelligently manages the partitioning process, relieving you of the effort of partitioning the drive.
Step 5: Start Install Rocky Linux 9.2
With your partitioning preferences in place, you’re ready to begin the installation. Click “Begin Installation” to kick things off. Meanwhile, you can customize other settings, such as the root password and user creation, while the installation process runs in the background.

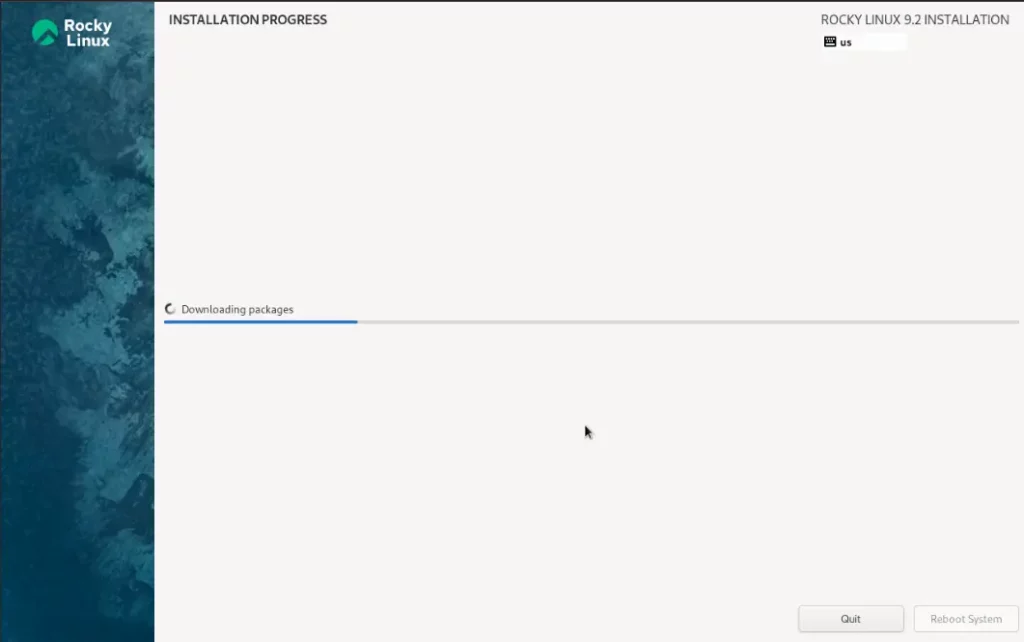
Step 6: Installation Progress
As the installation proceeds, you can view the progress on the screen. The installer shows a progress bar that reflects the ongoing actions. The installation typically consumes about 30 minutes, Likewise providing an excellent opportunity to pause and grab a cup of coffee.
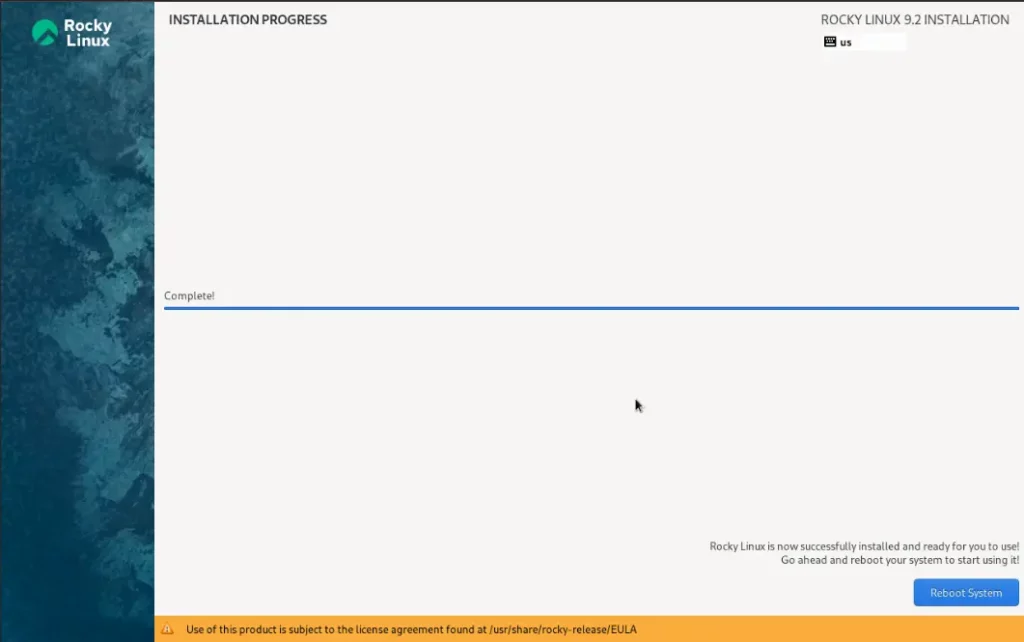
Step 7: Reboot and Configuration
Once the installation is complete, you’ll receive a message prompting you to reboot your system. Go ahead and reboot your computer. Upon reboot, you’ll need to complete the initial system configuration, such as setting up your time zone, language, and network settings.
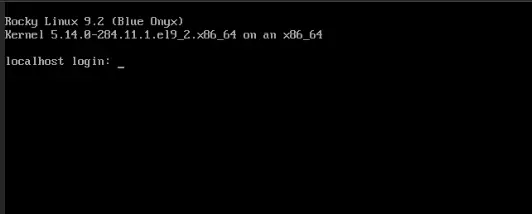
Step 8: Logging In Rocky Linux 9.2
After the system configuration, you’ll be directed to the login screen. Consequently, enter your username and password to access your newly installed Rocky Linux 9.2 server system.
Conclusion
Installing Rocky Linux 9.2 server is a straightforward process, and with this step-by-step guide, you’ll be up and running in no time. In addition, the inclusion of screenshots makes it even easier for users of all levels to follow along. Furthermore, you now have a fully functional Rocky Linux 9 system at your fingertips, ready for you to use and customize as you see fit. So, go ahead and start enjoying all the benefits of Rocky Linux 9.2 on your computer or server.
Also Read Our Other Guides :
- How To Install Debian 11 (Bullseye) Server With Pictures
- How To Install Ubuntu Server 22.04 LTS with Screenshots
- Initial Setup Debian 11 Server: Secure and Efficient
- Initial Setup CentOS 7 Server: Secure and Efficient
- Initial Setup Ubuntu Server 22.04: Secure and Efficient
- Initial Setup Rocky Linux 9 Server: Secure and Efficient
- How To Set Up a Firewall Using FirewallD on Rocky Linux 9
Finally, now you have learned how to install Rocky Linux 9.2 Server.