Introduction
Virtualization technology has revolutionized the way we work with multiple operating systems on a single physical machine. Oracle VirtualBox is a popular choice for creating and managing virtual environments. In this guide, we will walk you through the step-by-step process of how to install VirtualBox 7.0 on Ubuntu 22.04, enabling you to harness the power of virtualization for various purposes.
Table of Contents
The Importance of Virtualization with VirtualBox
Virtualization allows you to create isolated virtual machines (VMs) within your physical computer, each running its own operating system. This technology is invaluable for software development, testing, running multiple operating systems on a single machine, and experimenting with different configurations in a controlled environment.
VirtualBox is widely used by developers, testers, and IT professionals for various purposes, such as software development, testing, running legacy applications, sandboxing, and learning different operating systems. Since it’s open-source, it is freely available for personal and commercial use, making it a popular choice for virtualization needs.
This guide will walk you through the step-by-step process of how to install VirtualBox 7 on Ubuntu 22.04 LTS (Jammy Jellyfish) system.
Prerequisites
- Minimal Ubuntu 22.04 LTS system installed
- Sudo User with admin privileges
- 4GB RAM or more
- Multi Core Processor ( 4 Core CPUs or more)
Installing VirtualBox 7.0 on Ubuntu 22.04
Follow these steps to install VirtualBox 7.0 on your Ubuntu 22.04 system:
Step 1: System Update
Before you install VirtualBox, ensure that your system is up to date by running the following commands in your terminal:
sammy@virtualbox:~$ sudo apt update
sammy@virtualbox:~$ sudo apt upgrade
Additionally, make sure your system meets the hardware requirements for virtualization, including support for hardware-assisted virtualization (VT-x/AMD-V) in your computer’s BIOS settings.
Step 2: Add VirtualBox 7.0 Repository
VirtualBox 7 is not available in the default package repositories of Ubuntu 22.04. So, let’s first import virtualbox package repositories keys, run following commands,
sammy@virtualbox:~$ curl https://www.virtualbox.org/download/oracle_vbox_2016.asc | gpg --dearmor > oracle_vbox_2016.gpg

sammy@virtualbox:~$ curl https://www.virtualbox.org/download/oracle_vbox.asc | gpg --dearmor > oracle_vbox.gpg

sammy@virtualbox:~$ sudo install -o root -g root -m 644 oracle_vbox_2016.gpg /etc/apt/trusted.gpg.d/

sammy@virtualbox:~$ sudo install -o root -g root -m 644 oracle_vbox.gpg /etc/apt/trusted.gpg.d/
Once the system is updated and Repository key imported, you can add VirtualBox Repository to it by running following echo and tee command to add repository :
sammy@virtualbox:~$ echo "deb [arch=amd64] http://download.virtualbox.org/virtualbox/debian $(lsb_release -sc) contrib" | sudo tee /etc/apt/sources.list.d/virtualbox.list
Step 3: Install VirtualBox 7.0
Your machine is now ready to install VirtualBox. If you already have an earlier version of VirtualBox installed, the command below will update it automatically.
Finally, install VirtualBox on your Ubuntu 22.04 system by running the commands:
sammy@virtualbox:~$ sudo apt update

sammy@virtualbox:~$ sudo apt install linux-headers-$(uname -r) dkms

sammy@virtualbox:~$ sudo apt install virtualbox-7.0
To proceed with the installation, press ‘Y‘ when asked to confirm. Depending on network capacity and system performance, this may need a few minutes to finish.
Step 4: Launch the VirtualBox
After the successful installation of VirtualBox on Ubuntu 22.04, you can initiate it through the terminal.
sammy@virtualbox:~$ virtualbox
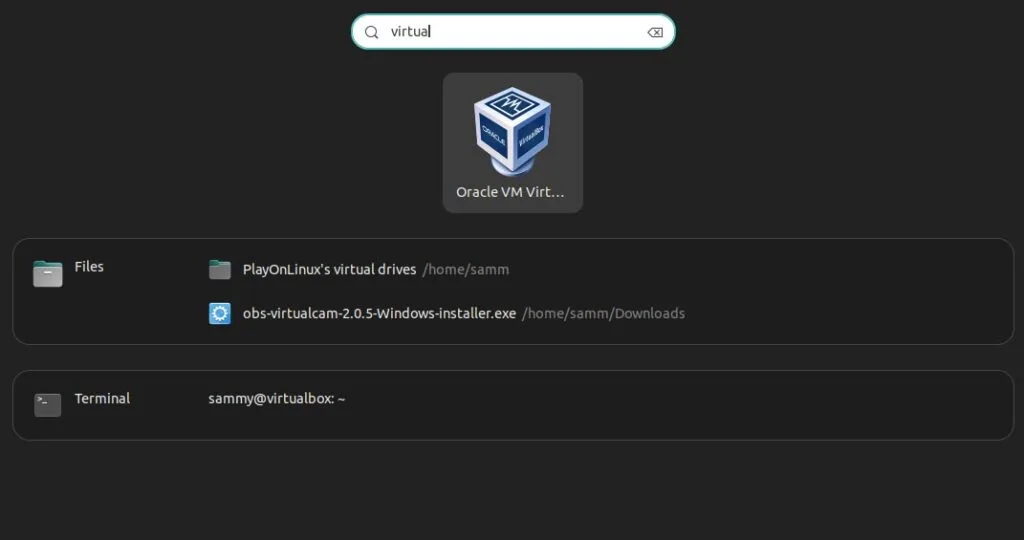
Or you can access from Desktop applications search.
The new user interface for VirtualBox interface looks like below:
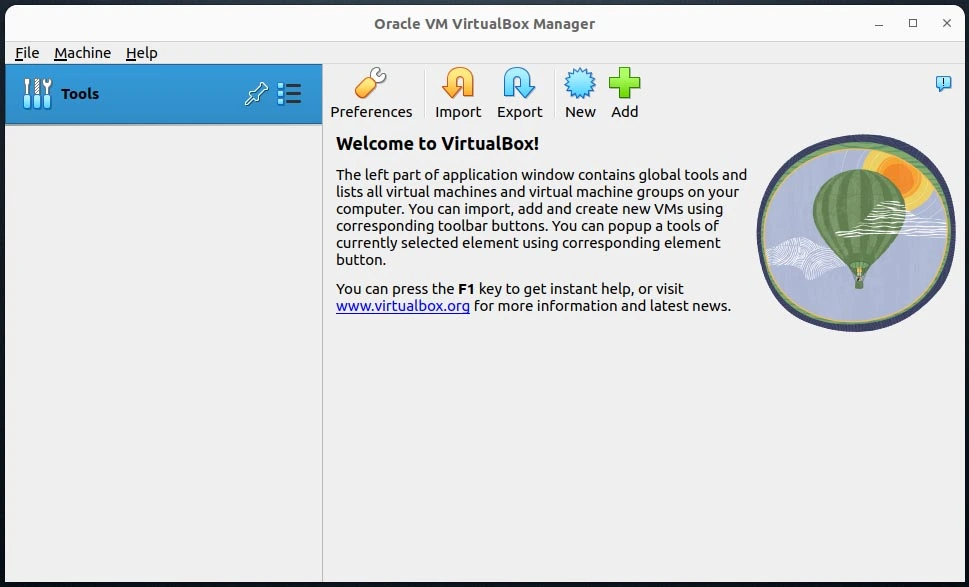
Above window confirms that VirtualBox has been started successfully. Before start creating virtual machines inside the virtualbox, let’s first install extension pack in the next step.
Step 5: Install VirtualBox 7 Extension Pack
VirtualBox Extension pack provides additional functionality to virtualbox like support for USB 2.0 & USB 3.0, PXE boot for Intel Cards, disk encryption and VirtualBox RDP.
To Install extension pack, let’s first download its file using beneath wget command.
sammy@virtualbox:~$ wget https://download.virtualbox.org/virtualbox/7.0.0/Oracle_VM_VirtualBox_Extension_Pack-7.0.0.vbox-extpack
To install extension pack, run following command:
sammy@virtualbox:~$ sudo VBoxManage extpack install Oracle_VM_VirtualBox_Extension_Pack-7.0.0.vbox-extpack
You will receive a prompt to accept the License agreement. Press ‘Y’ to accept it. The output will resemble the following:
.....
10 MISCELLANEOUS. This Agreement is the entire agreement between you
and Oracle relating to its subject matter. It supersedes all prior or
contemporaneous oral or written communications, proposals, representations
and warranties and prevails over any conflicting or additional terms
of any quote, order, acknowledgment, or other communication between
the parties relating to its subject matter during the term of this
Agreement. No modification of this Agreement will be binding, unless in
writing and signed by an authorized representative of each party. If any
provision of this Agreement is held to be unenforceable, this Agreement
will remain in effect with the provision omitted, unless omission would
frustrate the intent of the parties, in which case this Agreement will
immediately terminate. This Agreement is governed by the laws of the
State of California, USA, and you and Oracle agree to submit to the
exclusive jurisdiction of, and venue in, the courts of San Francisco
or Santa Clara counties in California in any dispute arising out of or
relating to this Agreement. Upon 45 days written notice, Oracle may
audit your use of the Product to confirm that you are in compliance
with the terms of this Agreement. You agree to cooperate with Oracle's
audit and provide reasonable assistance and access to information. Any
such audit shall not unreasonably interfere with your normal business
operations. You agree to pay within 30 days of written notification
any fees applicable to your unlicensed use of the Product. You agree
that Oracle shall not be responsible for any of your costs incurred in
cooperating with the audit. If a legal action or proceeding is commenced
by either party in connection with the enforcement of this Agreement,
the prevailing party shall be entitled to its costs and attorneys'
fees actually incurred in connection with such action or proceeding.

Do you agree to these license terms and conditions (y/n)? y

License accepted. For batch installation add
--accept-license=33d7284dc4a0ece381196fda3cfe2ed0e1e8e7ed7f27b9a9ebc4ee22e24bd23c
to the VBoxManage command line.

0%...10%...20%...30%...40%...50%...60%...70%...80%...90%...100%
Successfully installed "Oracle VM VirtualBox Extension Pack".
The confirmation above confirms the successful installation of the extension.
Now head back to VirtualBox GUI. From the File Menu choose Tools and then click on Extensions Pack Manager

The above window confirms the installation and activation of the extension pack. Now, we are ready to create virtual machines inside the VirtualBox.
Note: Please make sure VirtualBox version and extension pack version must match otherwise additional functionality will not work properly.
Conclusion
VirtualBox 7.0 is a powerful tool that opens the door to endless possibilities, from running multiple operating systems on a single machine to facilitating software development and testing. By following this step-by-step guide, you’ve successfully installed VirtualBox on your Ubuntu 22.04 system and learned how to create your first virtual machine. As you explore the capabilities of VirtualBox, you’ll find yourself empowered to achieve more with your computing experience, whether you’re a developer, IT professional, or enthusiastic learner.
Also Read Our Other Guides :
- How To Install Java Using OpenJDK 17 on Ubuntu 22.04
- How To Install Jenkins on Ubuntu Server 22.04
- How To Install and Use TeamViewer on Ubuntu 22.04
- How To Install Vagrant on Ubuntu 22.04
Finally, now you have learned how to Install and use Virtualbox on Ubuntu 22.04.