Introduction
Apache HTTP Server, commonly known as Apache, is a powerful and widely used web server software. It plays a crucial role in serving web content and hosting websites. This guide will provide you with a step-by-step walkthrough of the process how to install and configure Apache on Rocky Linux 9, allowing you to establish a stable foundation for your web hosting needs.
Table of Contents
Prerequisites for Install Apache
Before we dive into the installation process, make sure you have the following prerequisites in place:
- A Rocky Linux 9 system with root or sudo access, to set this up, follow our guide Initial Setup Rocky Linux 9 Server: Secure and Efficient You can deploy this on a physical machine or a virtual environment like VMware or VirtualBox.
- A stable internet connection to download packages
- Basic familiarity with command-line operations.
Why Choose Apache 2.4?
Before we dive into the install Apache on Rocky Linux 9 steps, let’s understand the benefits of Apache 2.4 and why it’s an excellent choice:
- Performance Improvements: Apache 2.4 introduces several performance enhancements, such as reduced memory usage and better handling of concurrent requests. This ensures smoother operations, even during high traffic periods.
- Enhanced Security: Security is a top priority. Apache 2.4 includes advanced security features like improved authentication and authorization modules, making it more resilient against cyber threats.
- Modular Architecture: Apache’s modular architecture allows you to add or remove modules as needed, optimizing the server for your specific use case.
Installing Apache on Rocky Linux 9
Follow these steps to install Apache 2.4 on your Rocky Linux 9 and harness its powerful features for your web hosting needs:
Step 1: Updating the System
To start the installation process on the right foot, update your system’s repositories and installed packages using the following command:
[samm@apache ~]$ sudo dnf update
[samm@apache ~]$ sudo dnf upgrade
[samm@apache ~]$ sudo dnf install httpd
Last metadata expiration check: 2:10:05 ago on Tue 22 Aug 2023 10:38:19 PM WIB.
Dependencies resolved.
===================================================================================================================================================================================================================
 Package                                                Architecture                                 Version                                                 Repository                                       Size
===================================================================================================================================================================================================================
Installing:
 httpd                                                  x86_64                                       2.4.53-11.el9_2.5                                       appstream                                        47 k
Installing dependencies:
 apr                                                    x86_64                                       1.7.0-11.el9                                            appstream                                       123 k
 apr-util                                               x86_64                                       1.6.1-20.el9_2.1                                        appstream                                        94 k
 apr-util-bdb                                           x86_64                                       1.6.1-20.el9_2.1                                        appstream                                        12 k
 httpd-core                                             x86_64                                       2.4.53-11.el9_2.5                                       appstream                                       1.4 M
 httpd-tools                                            x86_64                                       2.4.53-11.el9_2.5                                       appstream                                        81 k
 mailcap                                                noarch                                       2.1.49-5.el9                                            baseos                                           32 k
Installing weak dependencies:
 apr-util-openssl                                       x86_64                                       1.6.1-20.el9_2.1                                        appstream                                        14 k
 mod_http2                                              x86_64                                       1.15.19-4.el9_2.4                                       appstream                                       149 k
 mod_lua                                                x86_64                                       2.4.53-11.el9_2.5                                       appstream                                        61 k

Transaction Summary
===================================================================================================================================================================================================================
Install  10 Packages

Total download size: 2.0 M
Installed size: 6.0 M
This ensures your system is up-to-date before installing new software.
Step 2: Install Apache 2.4 on Rocky Linux 9
To install Apache on Rocky Linux 9, you can use the DNF package manager. Run the following command to install the Apache package:
[samm@apache ~]$ sudo dnf install httpd
The displayed output below confirms that the Apache HTTP Server version is 2.4.53, establishing it as the optimal edition of Apache HTTP Server (“httpd”).
Last metadata expiration check: 2:10:05 ago on Tue 22 Aug 2023 10:38:19 PM WIB.
Dependencies resolved.
===================================================================================================================================================================================================================
 Package                                                Architecture                                 Version                                                 Repository                                       Size
===================================================================================================================================================================================================================
Installing:
 httpd                                                  x86_64                                       2.4.53-11.el9_2.5                                       appstream                                        47 k
Installing dependencies:
 apr                                                    x86_64                                       1.7.0-11.el9                                            appstream                                       123 k
 apr-util                                               x86_64                                       1.6.1-20.el9_2.1                                        appstream                                        94 k
 apr-util-bdb                                           x86_64                                       1.6.1-20.el9_2.1                                        appstream                                        12 k
 httpd-core                                             x86_64                                       2.4.53-11.el9_2.5                                       appstream                                       1.4 M
 httpd-tools                                            x86_64                                       2.4.53-11.el9_2.5                                       appstream                                        81 k
 mailcap                                                noarch                                       2.1.49-5.el9                                            baseos                                           32 k
Installing weak dependencies:
 apr-util-openssl                                       x86_64                                       1.6.1-20.el9_2.1                                        appstream                                        14 k
 mod_http2                                              x86_64                                       1.15.19-4.el9_2.4                                       appstream                                       149 k
 mod_lua                                                x86_64                                       2.4.53-11.el9_2.5                                       appstream                                        61 k

Transaction Summary
===================================================================================================================================================================================================================
Install  10 Packages

Total download size: 2.0 M
Installed size: 6.0 M
Is this ok [y/N]: y
Press “y” to process install apache on your Rocky Linux 9. During installation, any required dependencies will also be installed automatically.
Step 3: Starting and Enabling Apache
Once the installation is complete, start the Apache service and enable it to start automatically at boot using these commands:
[samm@apache ~]$ sudo systemctl start httpd
[samm@apache ~]$ sudo systemctl enable httpd
Step 4: Verifying Apache Installation
To ensure that Apache has been successfully installed and is running, enter the following command:
[samm@apache ~]$ sudo systemctl status httpd
● httpd.service - The Apache HTTP Server
     Loaded: loaded (/usr/lib/systemd/system/httpd.service; enabled; preset: disabled)
    Drop-In: /etc/systemd/system/httpd.service.d
             └─php-fpm.conf
     Active: active (running) since Wed 2023-08-23 01:10:34 WIB; 2min 15s ago
       Docs: man:httpd.service(8)
   Main PID: 285920 (httpd)
     Status: "Total requests: 0; Idle/Busy workers 100/0;Requests/sec: 0; Bytes served/sec:   0 B/sec"
      Tasks: 213 (limit: 23169)
     Memory: 41.3M
        CPU: 188ms
     CGroup: /system.slice/httpd.service
             ├─285920 /usr/sbin/httpd -DFOREGROUND
             ├─285921 /usr/sbin/httpd -DFOREGROUND
             ├─285922 /usr/sbin/httpd -DFOREGROUND
             ├─285923 /usr/sbin/httpd -DFOREGROUND
             └─285924 /usr/sbin/httpd -DFOREGROUND

Aug 23 01:10:34 apache systemd[1]: Starting The Apache HTTP Server...
Aug 23 01:10:34 apache httpd[285920]: AH00558: httpd: Could not reliably determine the server's fully qualified domain name, using fe80::2880:7aff:fe29:7c11%ens18. Set the 'ServerName' directive globally to sup>
Aug 23 01:10:34 apache systemd[1]: Started The Apache HTTP Server.
Aug 23 01:10:34 apache httpd[285920]: Server configured, listening on: port 80
In the Terminal, you can also verify the status and version of the Apache package using the following command.
[samm@apache ~]$ sudo httpd -v
Server version: Apache/2.4.53 (Rocky Linux)
Server built:   Apr 28 2023 00:00:00
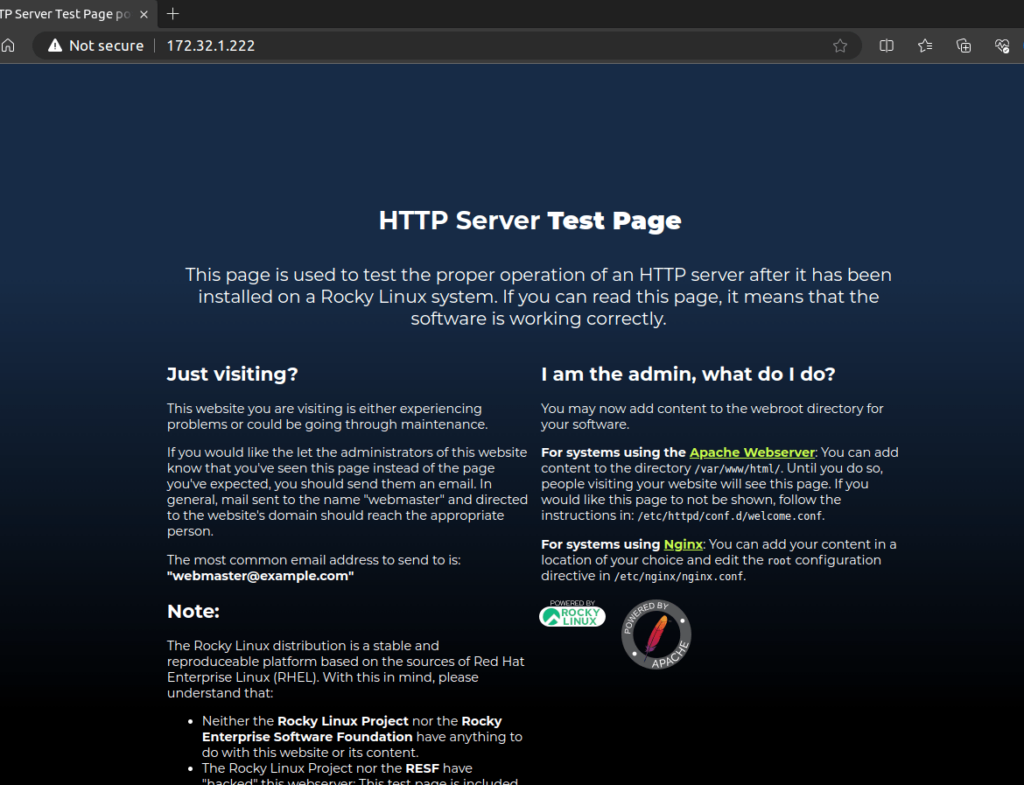
If Apache is active and running, you’ll receive a confirmation message. Additionally, you can open a web browser and access your server’s IP address or domain name. If Apache is functioning correctly, you’ll see the default Apache page.
Step 5: Configure Firewall
To allow external traffic to access your web server, you need to configure the firewall. Use firewalld to enable the necessary ports:
[samm@apache ~]$ sudo firewall-cmd --zone=public --add-service=http --permanent
[samm@apache ~]$ sudo firewall-cmd --zone=public --add-service=https --permanent
[samm@apache ~]$ sudo firewall-cmd --reload
Step 6: Test Apache Web Server
Open a web browser and enter your server’s IP address or domain name. If Apache 2.4 is functioning correctly, you should see the default Apache page.
Step 7: Configuring Apache
Apache’s default configuration is suitable for basic setups, but you might want to tailor it to your specific needs. The main configuration file, typically named httpd.conf, can be found in the /etc/httpd/conf/ directory.
Open the configuration file in your preferred text editor and make the necessary adjustments. You can configure Apache with various aspects such as virtual hosts, directory indexes, and access controls.
sudo vi /etc/httpd/conf.d/sammlinux.conf
Paste the following lines in the file.
<VirtualHost *:80>
    ServerAdmin   [email protected]
    ServerName    test.sammlinux.com
    ServerAlias   test.sammlinux.com
    DocumentRoot  /var/www/sammlinux
    ErrorLog      /var/log/httpd/sammlinux.com-error.log
    CustomLog     /var/log/httpd/sammlinux.com-access.log combined
</VirtualHost>
“Next, make a directory to house all files related to the new domain ‘sammlinux.com’. Upon the installation of the Apache (httpd) package, the default ‘DocumentRoot’ directory ‘/var/www/’ will be automatically generated. Apache utilizes this directory as the source for serving content, commonly referred to as the root directory.”
[samm@apache ~]$ sudo mkdir -p /var/www/sammlinux
Create a sample index.html file for testing the new domain.”
[samm@apache ~]$ sudo vi /var/www/sammlinux/index.html
Paste the following lines in the file.
<html>
<head>
<title>Welcome to sammlinux.com!</title>
</head>
<body>
<h1>Congratulation! The virtual host for <span style="color:blue; font-size: 24px;">sammlinux.net</span> is now up and running!</h1>
</body>
</html>
After making changes, save the configure of Apache and restart Apache to apply the modifications:
[samm@apache ~]$ sudo systemctl restart httpd
You can insert your IP Address and Domain Name in your localhost.
[samm@apache ~]$ sudo vi /etc/hosts
Paste the following lines in the file.
172.32.1.222 test.sammlinux.com
After completing the setup, launch a web browser, enter your domain name, and press ‘Enter’. The screenshot below illustrates an example of your newly configured virtual hosting page.

Conclusion
Installing Apache 2.4 on your Rocky Linux 9 opens the door to a world of powerful web hosting capabilities. Following this step-by-step guide ensures a seamless installation process, granting you access to enhanced performance, security, and scalability. With Apache 2.4 as your web server, you’re poised to provide a robust and secure environment for hosting websites, applications, and services. Embrace the power of Apache 2.4 and propel your online presence to new heights.
Also Read Our Other Guides :
- How To Install PHP8.2 on Rocky Linux 9
- How To Install Apache 2.4 on Ubuntu Server 22.04
- How To Install Apache Web Server on CentOS 7
- How To Install Varnish Cache for Nginx on Rocky Linux 9
- How To Install phpMyAdmin on Rocky Linux 9
Hopefully, now you have learned how to install and configure Apache 2.4 on your Rocky Linux 9.