
Introduction
NGINX has earned its reputation as a high-performance web server and reverse proxy that plays a crucial role in optimizing website speed and enhancing overall performance. By build NGINX from source on Centos 7, an open-source operating system, you can harness its full potential while tailoring it to your specific server requirements.
In this comprehensive guide, we’ll walk you through the process of how to build NGINX from source on Centos7 in order to unlock superior performance and optimize your online presence.
Table of Contents
- Introduction
- Why Build NGINX from Source?
- Prerequisites
- Build NGINX from Source Centos7
- Step 1: System Update and Install Some Tools
- Step 2: Install Required Packages
- Step 3: Download NGINX Source Code and Configure
- Step 4: Configure NGINX from Source
- Step 5: Build (Compile) and Install NGINX
- Step 6: Set Up Folder and User NGINX
- Step 7: Create an Nginx Systemd unit file
- Step 8: Create Custom “nginx.conf” File
- Step 9: Create Logrotate File
- Step 10: Adjusting Firewall Rules
- Step 11: Testing NGINX
- Conclusion
Why Build NGINX from Source?
While you can install NGINX using package managers like yum or dnf, building it from source offers certain advantages. Building from source allows you to customize the compilation to your server’s specific hardware, enabling optimized performance. Additionally, you have the flexibility to incorporate or exclude specific modules. This strategic approach reduces unnecessary bloat and further elevates the speed and SEO performance of your website.
Some key features and use cases of NGINX include:
- Web Server: NGINX can serve static files such as HTML, CSS, JavaScript, and media files directly to clients. It provides fast and efficient delivery of static content.
- Reverse Proxy: NGINX acts as an intermediary between clients and backend servers. It receives client requests and forwards them to the appropriate backend server based on various criteria such as load balancing algorithms, server health checks, and request routing rules.
- Efficient Load Balancing: NGINX excels in efficiently distributing incoming requests across multiple backend servers. This capability optimizes resource utilization, enhances overall web application performance, and ensures improved availability.
- SSL/TLS Termination: NGINX can handle SSL/TLS encryption and decryption, offloading this resource-intensive task from backend servers. It simplifies the management of SSL certificates and enables secure HTTPS connections.
- Caching: NGINX includes caching capabilities to store frequently accessed content in memory, reducing the load on backend servers and improving response times for subsequent requests.
- High Availability: NGINX can be configured in high-availability setups, where multiple instances work together to ensure continuous service availability even in the event of server failures or high traffic loads.
NGINX is highly configurable and supports a wide range of configurations and modules. It is widely used by large-scale websites, content delivery networks (CDNs), and web applications that require high performance,
Prerequisites
Requirements for Build NGINX from Source Centos7.
Mandatory requirements:
- GNU Compiler Collection (GCC)
- OpenSSL library version openssl-3.1.0
- Zlib library version between 1.1.3 – 1.2.11
- PCRE library version between 4.4 – 8.42
Optional requirements:
Build NGINX from Source Centos7
Compared to certain other UNIX/Linux software, Nginx stands out for its lightweight nature and minimal library dependencies. The default build configuration relies on just three essential libraries for installation: OpenSSL/LibreSSL/BoringSSL, Zlib, and PCRE.
Step 1: System Update and Install Some Tools
Start by updating your system’s repositories and installed software packages to ensure you have the latest updates:
[samm@nginx ~]$ sudo yum update -y
[samm@nginx ~]$ sudo yum install -y vim curl wget tree
Step 2: Install Required Packages
NGINX’s successful compilation relies on several libraries and tools. Install the required dependencies using the following command:
[samm@nginx ~]$ sudo yum groupinstall "Development Tools" -y
[samm@nginx ~]$ sudo yum install -y make perl perl-devel perl-ExtUtils-Embed libxslt libxslt-devel libxml2 libxml2-devel pcre-devel gd gd-devel GeoIP GeoIP-devel openssl-devel
Step 3: Download NGINX Source Code and Configure
Before you download the Nginx source code, visit the official NGINX website to identify and obtain the latest stable source code link. Once you’ve obtained the link, use the wget command to download the source code:
[samm@nginx ~]$ cd /var
[samm@nginx ~]$ sudo mkdir source
[samm@nginx ~]$ cd source/
- nginx-1.24.0
[samm@nginx source]$ sudo wget http://nginx.org/download/nginx-1.24.0.tar.gz && sudo tar zxvf nginx-1.24.0.tar.gz
- pcre-8.45
[samm@nginx source]$ sudo wget https://sourceforge.net/projects/pcre/files/pcre/8.45/pcre-8.45.tar.gz --no-check-certificate && sudo tar xzvf pcre-8.45.tar.gz
- zlib-1.2.11
[samm@nginx source]$ sudo wget https://zlib.net/fossils/zlib-1.2.11.tar.gz && sudo tar xzvf zlib-1.2.11.tar.gz
- openssl-3.1.0
[samm@nginx source]$ sudo wget https://www.openssl.org/source/openssl-3.1.0.tar.gz && sudo tar xzvf openssl-3.1.0.tar.gz
Step 4: Configure NGINX from Source
Go to the extracted directory by using this command
[samm@nginx source]$ cd nginx-1.24.0/
[samm@nginx nginx-1.24.0]$ sudo cp man/nginx.8 /usr/share/man/man8
[samm@nginx nginx-1.24.0]$ ls /usr/share/man/man8/ | grep nginx.8.gz
[samm@nginx nginx-1.24.0]$ man nginx
Initiate the configuration process using the ./configure script. This script allows for customization of the compilation process. The full documentation is in here: Building Nginx from Sources. For example, you can optimize NGINX for your server’s architecture and define the installation directory:
[samm@nginx nginx-1.24.0]$ sudo ./configure --prefix=/etc/nginx
            --sbin-path=/usr/sbin/nginx
            --modules-path=/usr/lib/nginx/modules
            --conf-path=/etc/nginx/nginx.conf
            --error-log-path=/var/log/nginx/error.log
            --pid-path=/var/run/nginx.pid
            --lock-path=/var/run/nginx.lock
            --user=nginx
            --group=nginx
            --build=Debian
            --builddir=nginx-1.24.0
            --with-select_module
            --with-poll_module
            --with-threads
            --with-file-aio
            --with-http_ssl_module
            --with-http_v2_module
            --with-http_realip_module
            --with-http_addition_module
            --with-http_xslt_module=dynamic
            --with-http_image_filter_module=dynamic
            --with-http_geoip_module=dynamic
            --with-http_sub_module
            --with-http_dav_module
            --with-http_flv_module
            --with-http_mp4_module
            --with-http_gunzip_module
            --with-http_gzip_static_module
            --with-http_auth_request_module
            --with-http_random_index_module
            --with-http_secure_link_module
            --with-http_degradation_module
            --with-http_slice_module
            --with-http_stub_status_module
            --with-http_perl_module=dynamic
            --with-perl_modules_path=/usr/share/perl/5.26.1
            --with-perl=/usr/bin/perl
            --http-log-path=/var/log/nginx/access.log
            --http-client-body-temp-path=/var/cache/nginx/client_temp
            --http-proxy-temp-path=/var/cache/nginx/proxy_temp
            --http-fastcgi-temp-path=/var/cache/nginx/fastcgi_temp
            --http-uwsgi-temp-path=/var/cache/nginx/uwsgi_temp
            --http-scgi-temp-path=/var/cache/nginx/scgi_temp
            --with-mail=dynamic
            --with-mail_ssl_module
            --with-stream=dynamic
            --with-stream_ssl_module
            --with-stream_realip_module
            --with-stream_geoip_module=dynamic
            --with-stream_ssl_preread_module
            --with-compat
            --with-pcre=../pcre-8.45
            --with-pcre-jit
            --with-zlib=../zlib-1.2.11
            --with-openssl=../openssl-3.1.0
            --with-openssl-opt=no-nextprotoneg
            --with-debug
Step 5: Build (Compile) and Install NGINX
After custom configuration complete we can now compile NGINX source code by using this command :
[samm@nginx nginx-1.24.0]$ sudo make
This process will require a bit of time. Once completed, proceed to install the compiled source code using the following command.
[samm@nginx nginx-1.24.0]$ sudo make install
To verify the installation, you can check the Nginx version
[samm@nginx ~]$ sudo nginx -V
nginx version: nginx/1.24.0 (CentOS)
built by gcc 4.8.5 20150623 (Red Hat 4.8.5-44) (GCC)
built with OpenSSL 3.1.0 14 Mar 2023
TLS SNI support enabled
configure arguments: --prefix=/etc/nginx --sbin-path=/usr/sbin/nginx --modules-path=/usr/lib64/nginx/modules --conf-path=/etc/nginx/nginx.conf --error-log-path=/var/log/nginx/error.log --pid-path=/var/run/nginx.pid --lock-path=/var/run/nginx.lock --user=nginx --group=nginx --build=CentOS --builddir=nginx-1.24.0 --with-select_module --with-poll_module --with-threads --with-file-aio --with-http_ssl_module --with-http_v2_module --with-http_realip_module --with-http_addition_module --with-http_xslt_module=dynamic --with-http_image_filter_module=dynamic --with-http_geoip_module=dynamic --with-http_sub_module --with-http_dav_module --with-http_flv_module --with-http_mp4_module --with-http_gunzip_module --with-http_gzip_static_module --with-http_auth_request_module --with-http_random_index_module --with-http_secure_link_module --with-http_degradation_module --with-http_slice_module --with-http_stub_status_module --with-http_perl_module=dynamic --with-perl_modules_path=/usr/share/perl/5.26.1 --with-perl=/usr/bin/perl --http-log-path=/var/log/nginx/access.log --http-client-body-temp-path=/var/cache/nginx/client_temp --http-proxy-temp-path=/var/cache/nginx/proxy_temp --http-fastcgi-temp-path=/var/cache/nginx/fastcgi_temp --http-uwsgi-temp-path=/var/cache/nginx/uwsgi_temp --http-scgi-temp-path=/var/cache/nginx/scgi_temp --with-mail=dynamic --with-mail_ssl_module --with-stream=dynamic --with-stream_ssl_module --with-stream_realip_module --with-stream_geoip_module=dynamic --with-stream_ssl_preread_module --with-compat --with-pcre=../pcre-8.44 --with-pcre-jit --with-zlib=../zlib-1.2.11 --with-openssl=../openssl-3.1.0 --with-openssl-opt=no-nextprotoneg --with-debug
Step 6: Set Up Folder and User NGINX
[samm@nginx ~]$ sudo mkdir -p /var/cache/nginx/{client_temp,fastcgi_temp,proxy_temp,scgi_temp,uwsgi_temp}

[samm@nginx ~]$ sudo chmod 700 /var/cache/nginx/*
[samm@nginx ~]$ sudo chown nginx:nginx /var/cache/nginx/*

[samm@nginx ~]$ sudo mkdir /etc/nginx/{conf.d,snippets,ssl}
[samm@nginx ~]$ sudo chmod 640 /var/log/nginx/*
[samm@nginx ~]$ sudo chown nginx:nginx /var/log/nginx/access.log
[samm@nginx ~]$ sudo chown nginx:nginx /var/log/nginx/error.log

[samm@nginx ~]$ mkdir ~/.vim/
[samm@nginx ~]$ sudo cp -r /var/source/nginx-1.24.0/contrib/vim/* ~/.vim/
[samm@nginx ~]$ sudo mkdir /root/.vim/
[samm@nginx ~]$ sudo cp -r /var/source/nginx-1.24.0/contrib/vim/* /root/.vim/
Symlink /usr/lib64/nginx/modules to /etc/nginx/modules directory. /etc/nginx/modules is a standard place for Nginx modules:
[samm@nginx ~]$ sudo ln -s /usr/lib64/nginx/modules /etc/nginx/modules
Create user nginx
[samm@nginx ~]$ sudo useradd --system --home /var/cache/nginx --shell /sbin/nologin --comment "nginx user" --user-group nginx

[samm@nginx ~]$ sudo tail -n 1 /etc/passwd /etc/group /etc/shadow
==> /etc/passwd <==
saslauth:x:992:76:Saslauthd user:/run/saslauthd:/sbin/nologin

==> /etc/group <==
screen:x:84:

==> /etc/shadow <==
saslauth:!!:19128::::::
Step 7: Create an Nginx Systemd unit file
To enable the service, we’re going to have to add a script with following lines:
[samm@nginx ~]$ sudo vi /usr/lib/systemd/system/nginx.service
[Unit]
Description= Nginx High Performance Webserver
Documentation=https://nginx.org/en/docs/
After=network-online.target remote-fs.target nss-lookup.target
Wants=network-online.target

[Service]
Type=forking
PIDFile=/var/run/nginx.pid
ExecStartPre=/usr/sbin/nginx -t -c /etc/nginx/nginx.conf
ExecStart=/usr/sbin/nginx -c /etc/nginx/nginx.conf
ExecReload=/bin/kill -s HUP $MAINPID
ExecStop=/bin/kill -s TERM $MAINPID

[Install]
WantedBy=multi-user.target
After that enable nginx on boot
[samm@nginx ~]$ sudo systemctl enable nginx.service
Created symlink /etc/systemd/system/multi-user.target.wants/nginx.service → /etc/systemd/system/nginx.service.

[samm@nginx ~]$ sudo systemctl start nginx.service
[samm@nginx ~]$ sudo systemctl is-enabled nginx.service
enabled

samm@nginx:~$ sudo systemctl status nginx.service
● nginx.service - Nginx - High Performance Webserver
   Loaded: loaded (/etc/systemd/system/nginx.service; enabled; vendor preset: enabled)
   Active: active (running) since Thu 2022-12-08 02:36:58 WIB; 21s ago
     Docs: https://nginx.org/en/docs/
  Process: 16571 ExecStartPre=/usr/sbin/nginx -t -c /etc/nginx/nginx.conf (code=exited, status=0/SUCCESS)
  Process: 16572 ExecStart=/usr/sbin/nginx -c /etc/nginx/nginx.conf (code=exited, status=0/SUCCESS)
 Main PID: 16573 (nginx)
    Tasks: 2 (limit: 4699)
   Memory: 1.9M
   CGroup: /system.slice/nginx.service
           ├─16573 nginx: master process /usr/sbin/nginx -c /etc/nginx/nginx.conf
           └─16574 nginx: worker process

Dec 08 02:36:58 nginx systemd[1]: Starting Nginx - High Performance Webserver...
Dec 08 02:36:58 nginx nginx[16571]: nginx: the configuration file /etc/nginx/nginx.conf syntax is ok
Dec 08 02:36:58 nginx nginx[16571]: nginx: configuration file /etc/nginx/nginx.conf test is successful
Dec 08 02:36:58 nginx systemd[1]: Started Nginx - High Performance Webserver.
Step 8: Create Custom “nginx.conf” File
[samm@nginx ~]$ sudo mv /etc/nginx/nginx.conf /etc/nginx/nginx.conf.ori
[samm@nginx ~]$ sudo vi /etc/nginx/nginx.conf
user            nginx;
worker_processes    2;

error_log       /var/log/nginx/error.log warn;
pid         /var/run/nginx.pid;


events {
  worker_connections    1024;
}


http {
    include     /etc/nginx/mime.types;
    default_type    application/octet-stream;

    ## Block spammers and other unwanted visitors  ##
    #  include block-ip.conf;

    server_tokens   off;

    proxy_http_version  1.1;
    proxy_set_header    Connection "";

    proxy_set_header    Host $host;
    proxy_set_header    Upgrade $http_upgrade;
    proxy_set_header    Connection "upgrade";
    proxy_set_header    X-Real-IP       $remote_addr;
    proxy_set_header    X-Forwarded-For $proxy_add_x_forwarded_for;

    add_header      "Strict-Transport-Security" "max-age=31536000";
    add_header      "X-XSS-Protection" "1; mode=block";
    add_header      "X-Content-Type-Options" "nosniff";
    add_header      "X-Permitted-Cross-Domain-Policies" "none";

    log_format  main    '$remote_addr - $remote_user [$time_local] "$request" '
                        '$status $body_bytes_sent "$http_referer" '
                        '"$http_user_agent" "$http_x_forwarded_for"';

    access_log          /dev/null;
    error_log           /dev/null;

    sendfile        on;
   #tcp_nopush      on;

    keepalive_timeout   65;

    client_body_buffer_size     50M;
    client_max_body_size        50M;

        gzip            on;
        gzip_http_version   1.1;
        gzip_comp_level     5;
        gzip_min_length     256;
        gzip_proxied        any;
        gzip_vary       on;
        gzip_types
                application/atom+xml
                application/javascript
                application/json
                application/rss+xml
                application/vnd.ms-fontobject
                application/x-font-ttf
                application/x-web-app-manifest+json
                application/xhtml+xml
                application/xml
                font/opentype
                image/svg+xml
                image/x-icon
                text/css
                text/plain
                text/x-component;
        gzip_disable        "MSIE [1-6].";

    include /etc/nginx/conf.d/*.conf;
}
Then restart Nginx web server after the configuration.
[samm@nginx ~]$ sudo nginx -t
nginx: the configuration file /etc/nginx/nginx.conf syntax is ok
nginx: configuration file /etc/nginx/nginx.conf test is successful

[samm@nginx ~]$ sudo systemctl restart nginx
Step 9: Create Logrotate File
Logrotate is useful for rotating the Nginx log so it will not write on a single file continuously. First, create a new file on the logrotate folder.
[samm@nginx ~]$ sudo vi /etc/logrotate.d/nginx
Copy & Paster this code
/var/log/nginx/*.log {
    daily
    missingok
    rotate 52
    compress
    delaycompress
    notifempty
    create 0644 nginx nginx
    sharedscripts
    postrotate
            if [ -f /var/run/nginx.pid ]; then
                    kill -USR1 `cat /var/run/nginx.pid`
            fi
    endscript
}
[samm@nginx ~]$sudo logrotate -f /etc/logrotate.d/nginx
Step 10: Adjusting Firewall Rules
If you’re using a firewall, allow HTTP (80) and HTTPS (443) traffic, use following commands:
[samm@nginx ~]$ sudo firewall-cmd --zone=public --permanent --add-service=http
[samm@nginx ~]$ sudo firewall-cmd --zone=public --permanent --add-service=https
[samm@nginx ~]$ sudo firewall-cmd --reload
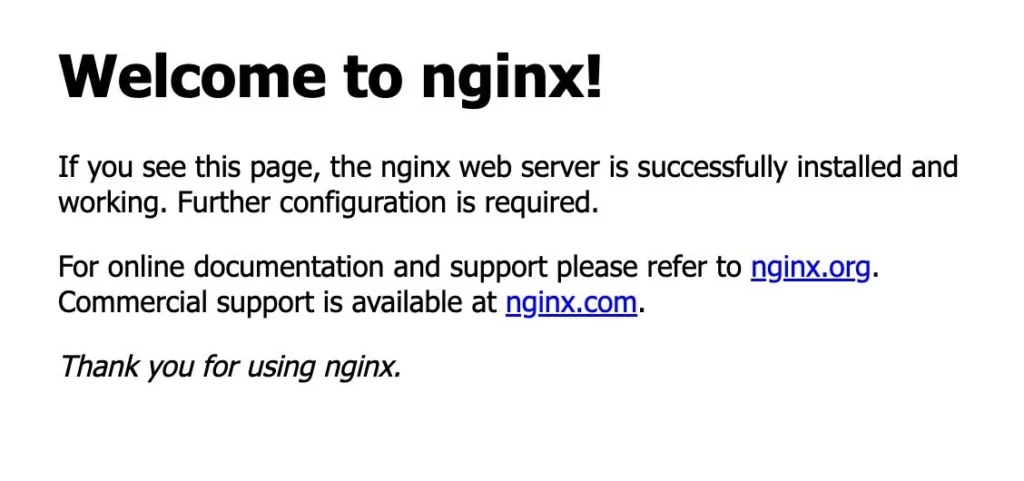
Step 11: Testing NGINX
Finally, verify that NGINX is running by accessing your server’s IP address or domain name in a web browser. You should see the default NGINX welcome page.
http://<your-nginx-ip-address>

Conclusion
The process of building NGINX from source on Centos 7 empowers you to harness the true potential of this high-performance web server, leading to optimized website. This guide has taken you through a step-by-step journey, ensuring you’re equipped to optimize your online presence through NGINX customization. Remember to stay updated with NGINX releases and configurations to continue enjoying the benefits of a finely tuned and high-performing web server.
Also Read Our Other Guides :
- How To Install Nginx on CentOS 7: A Comprehensive Guide
- How To Build NGINX from Source on Ubuntu Server 22.04
- How To Build NGINX from Source (Compile) on Rocky Linux 9
- How To Build NGINX from Source (Compile) on Debian 11
That’s it! Now you build NGINX from source (compile) and put in modules that you want to include in Nginx.
Finally, now you have learned how to Build NGINX from Source Centos7.